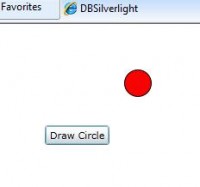
Data binding is a key technology in Silverlight that allows data to be presented to end users and then processed. Here is a simple example to show you how to bind data behind to Silverlight UI interface. We will draw a circle by clicking the button and the color and size of the circle will be controlled by back-end with data binding. Step 1: Open Visual Studio and select New Project… Search for Silverlight Application and we’ll be using C# for the back end.  Step 2: Now, you will see the Mainpage.xaml file. XAML stands for eXtensible Application Markup Language. XAML file is pure XML and it is a declarative markup. Visual Studio provides two views at the same time: Design and XAML. Drag a button from the toolbox in the left side to the canvas. And you will see a line of code has been added to the XAML file. You can either right click the button and choose properties to change this button’s properties. Or you can change the button properties directly from the code. After changing, the code will be look like this: [cc lang=‘c’ ] [/cc] Step 3: right click your Silverlight application in the Solution Explorer and Choose Class, name it circle.cs. And add the following code to circle.cs. Here, we create two properties of circle object, which are color and size. Both of them are set to String type. [cc lang=‘c’] namespace DBSilverlight { public class circle { public string color { get; set; } public string size { get; set; } } } [/cc] Step 4: Come back to MainPage.XAML. And drag a Ellipse in the canvas. Modify the code in the XAML to this: [cc lang=‘c’] [/cc] Here, we change Height and Width to {Binding size} and add a new property called Fill with {Binding color}. Here, when this Ellipse is generated from the front end, it will look for the binding value once we set up the data context. Step 5: Double click the button in the canvas and it will populate a method in the back (MainPage.xaml.cs)
Add in code showed as below: [cc lang=‘c’] private void DrawBtn_Click(object sender, RoutedEventArgs e) { circle one = new circle(); one.color = “red”; one.size = “32”; ellipse1.DataContext = one; } [/cc] When the control object ellipse1 is binded to dataContext one, it will create an instance of class circle. And that’s how the binding works. Step 6: compile the code and launch the project. Now by clicking the circle, you can see that circle is showed on canvas based on the color value and size value in the back. 
You could download the source code here.
Or you could view more tutorial here.