What is UnityVS?
Building a Unity Game but looking for an alternative IDE to develop in? Look no further as UnityVS might be a solution for you. Developing games on the Unity Game Engine has traditionally restricted developers to just Monodevelop IDE. Recently, the creator of UnityVS, SyntaxTree, was acquired by Microsoft and together that had improved on UnityVS to provide an alternative development environment to game developers. UnityVS enables Unity developers to take advantage of the productivity of Visual Studio to code and debug their Unity applications in a more sophisticated C# development environment. It can support Visual Studio 2010 and newer versions. To learn more about Unity Game Engine, do visit Unity website at https://unity3d.com/
What can UnityVS not do?
UnityVS is only able to restrict debugging to the Editor and not to devices UnityVS is only able to compile C# scripts. If your game have Javascript assets you will need to let Unity Game Engine compile it first by switching over to Unity.
A guide to UnityVS
Visit http://syntaxtree.com/ to download the UnityVS for your Visual Studio. There are also documentation on how to setup and configure UnityVS, but I will cover some of the basics here.
Setting up Unity VS
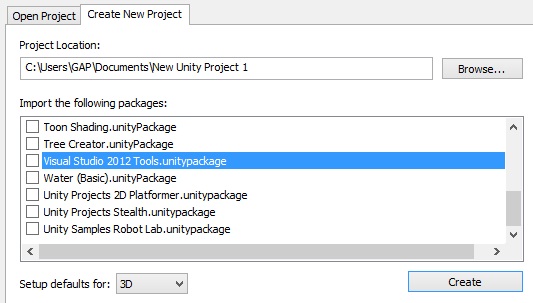
Head to http://unityvs.com/documentation/installation/ to get the plugin for your Visual Studio. For reference I will be using Visual Studio 2012 Ultimate with Unity 4.5.1. After installing the plugin, you should be able to import the plugin into your existing project in Unity or when creating a new project. 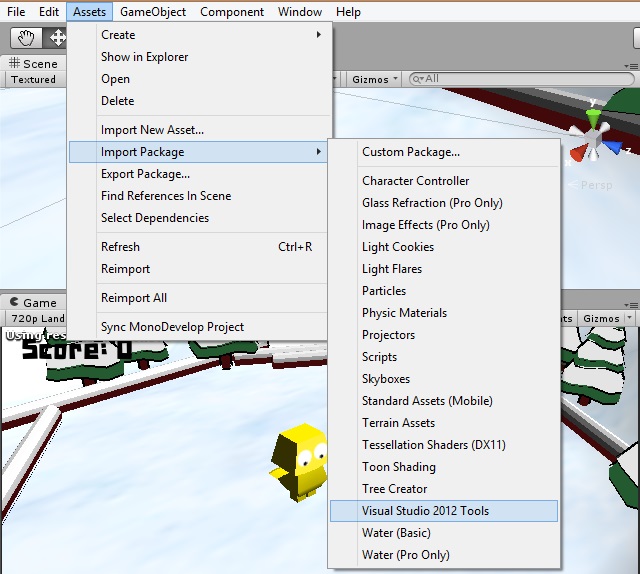
 Once you have UnityVS package in your project, you should see that you now have a new menu item called “Visual Studio Tools” at the top of the screen. Click on “Open in Visual Studio” to start editing your scripts in Visual Studio.
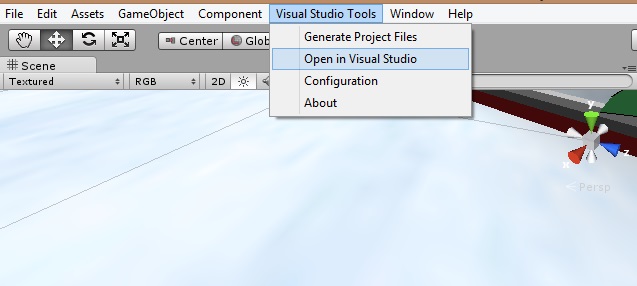
Using the Unity Project Explorer
You should see that in the solution explorer plane you can locate your scripts and start coding away. To have a better view of all your scripts, UnityVS also comes with the Unity Project Explorer. The project explorer is another tool to explore your C# scripts, thus avoiding the need to switch frequently between Unity editor and Visual Studio. To access explorer, hover over to the “View” tab, and you should see “Unity Project Explorer”. Within the Unity Project Explorer, you can also create new C# scripts as an alternative to creating it in the Unity window. 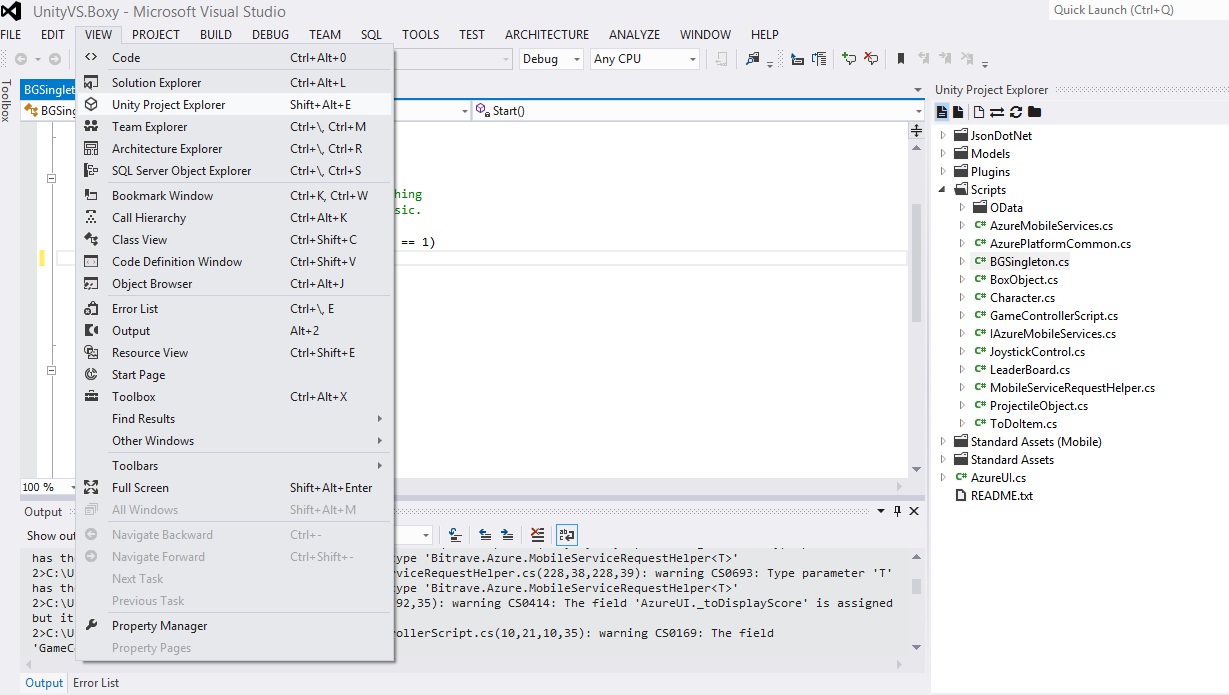
Debugging with Unity
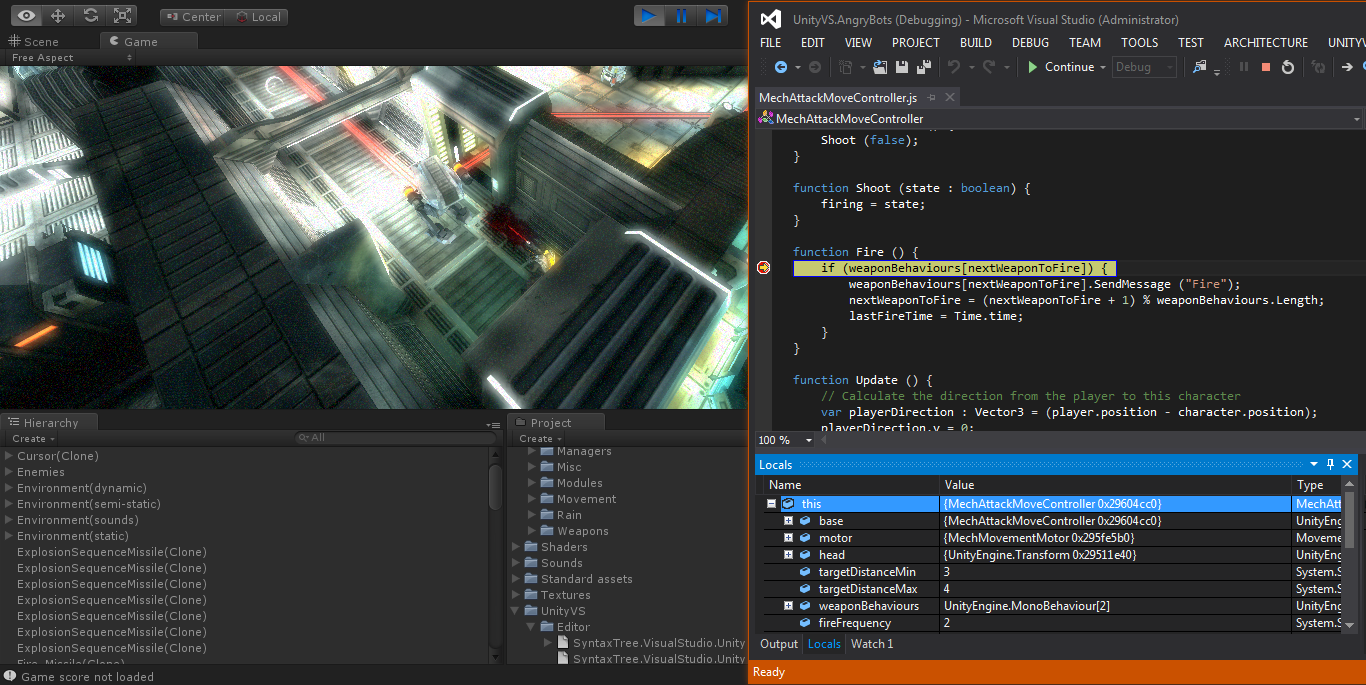
To debug in Visual Studio, all you have to do is just to press F5 and select the unity instance to run it with. You can also change the setting to “Attach to Unity and Play” to make your Unity Game start automatically. Pretty cool if you are running dual screens =) 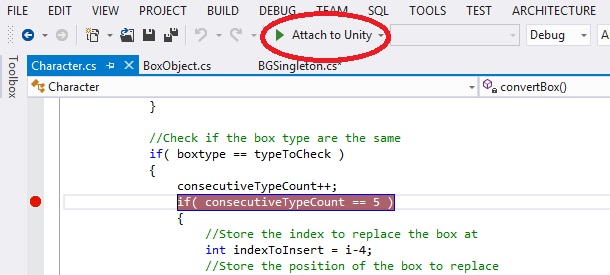 You can even insert breakpoints in your code and it will work just as your would develop in Visual Studio. The Unity console is connected directly to the console in Visual Studio so you do not have to switch screen to debug.
Easy Development with Scripting Wizards
Not just all, UnityVS also helps in making your development faster through the Scripting Wizards. There are two wizards that you can tap on, MonoBahaviour Wizard and Quick MonoBehaviour.
Quick MonoBehaviour
Press CTRL+SHIFT+Q to toggle the Quick MonoBehaviour. This is ideal for developers who already know the methods that they want to implement
MonoBehaviour Wizard
Press CTRL+SHIFT+M to toggle the MonoBehaviour Wizard. This is ideal when creating scripts for the first time, and can also be helpful when learning the Unity API. 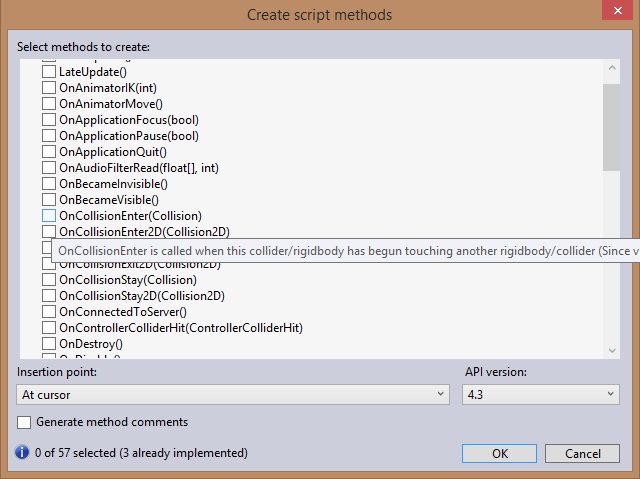 If anytime you want to have the flexibility to switch back to MonoDevelop, you can always do so by going to “Edit”, and then “Preferences”. You will be able to change the option under “External Tools”.
 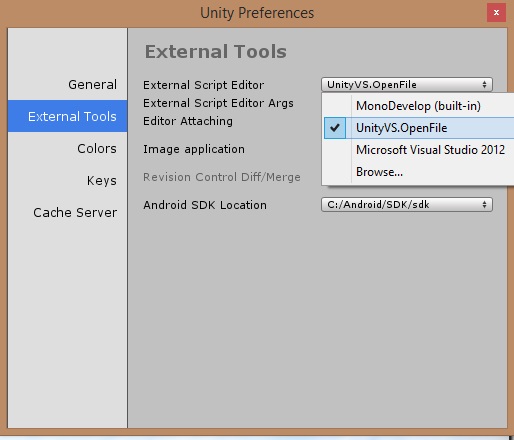 This sums up the essential that you need to get started in UnityVS. Go try it out yourself and let us know your comments!