This is an End-to-End example for building Windows Phone 7 from Start to finish. And I will cover several features inside this example. I put this technical blog into three pages , so it is easier for you to follow up. You could download the code here, with code snippet. The second part of the tutorial is at https://www.weshipcode.com/2011/03/windows-phone-7-2/. You could follow my twitter: @mingfeiy for my windows phone development news.
Part 1:
- How to use MVVM pattern in your phone application
- Introduce Data Binding
- How to utilize Visual Tree to change element in a list box
Part 2:
- How to pass data between pages – isolated storage
- How to use CameraTask in your application
Part 3:
- How to save data into cloud table storage
- How to access data from cloud table storage
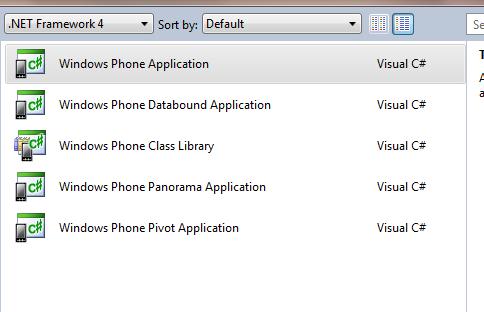
1. You could download the tool here: http://www.microsoft.com/express/Phone/ 2. Before start, I suggest you sketch out your application UI to avoid a lot of rework later on. Here is the design UI guideline; you may want to take a look here . 3. Open Visual Studio Phone Express version and start a new Windows Phone Development project. There are multiple templates available, such as Panorama or Pivot. We will choose the basic one:
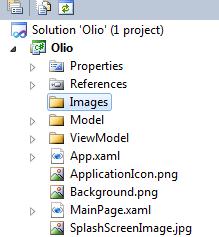
Name is Olio, so that you could use the code snippet I provided easily.
4. Right Click on your project name and create three new folders: Model, ViewModel and Images. Download add.png and minus.png. Right-click on Images folder and add these two items.
5. Click on Model folder and create a new C# class called OrderModel.cs. And add code snippet [mode] or type in code below:
[cc lang=‘c’ ] public String name { get; set; } public int quantity { get; set; } public OrderModel(String name, int quantity) { this.name = name; this.quantity = quantity; }[/cc]
Here, we create a data model. OrderModel is the data object with two attributes: name and quantity. We have getter, setter and constructor for the data entity.
6. Then we will prepare View Model. Right click on ViewModel folder and add a new class called OrderViewModel.cs. And you could use code snippet [ViewModel] or add in the code below:
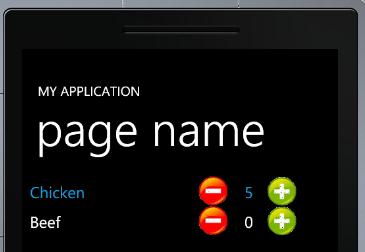
[cc lang=‘c’]public class OrderViewModel : ObservableCollection { public OrderViewModel() { Add(new OrderModel(“Chicken”, 0)); Add(new OrderModel(“Beef”, 0)); } } [/cc]
7. Here we need to resolve the namespace problem by adding:
[cc lang=‘c’]using System.Collections.ObjectModel; using Olio.Model;[/cc]
If you use a different project name, change [Olio] with your project name to include class in Model folder.
8. We just prepared Model and ViewModel. You can see that Model basically contains Data Model and ViewModel will be the glue between Model and View. It provides databound to view. Here I added Chicken and Beef as sample data in OrderModel. You could link to external files or external sources to load in your data.
9. Now we will change the view to realize DataBinding. MVVM pattern is widely used in WPF and Silverlight development. If you develop Silverlight application, it is the same concept. Plug in the following code intro MainPage.XAML ‘s ContentPanel Grid.
[cc lang=‘c’] [/cc]
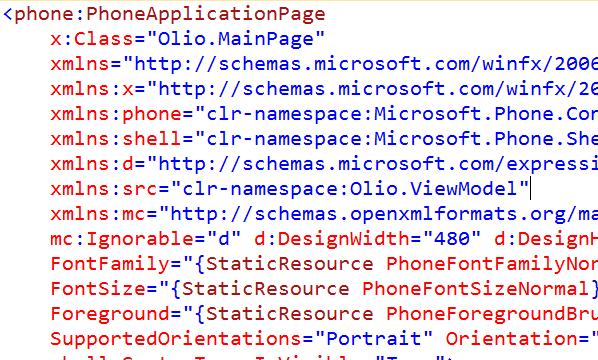
10. Add a namespace at the beginning also to include model
You will see the beginning code look like this.
xmlns:src=“clr-namespace:Olio.ViewModel”
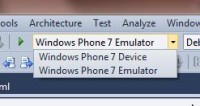
11. Press Ctrl+F5. And you will see data-binded from back end. Please check whether your deployment mode is on Emulator, you could directly deploy to Device too if you have your device unlocked.
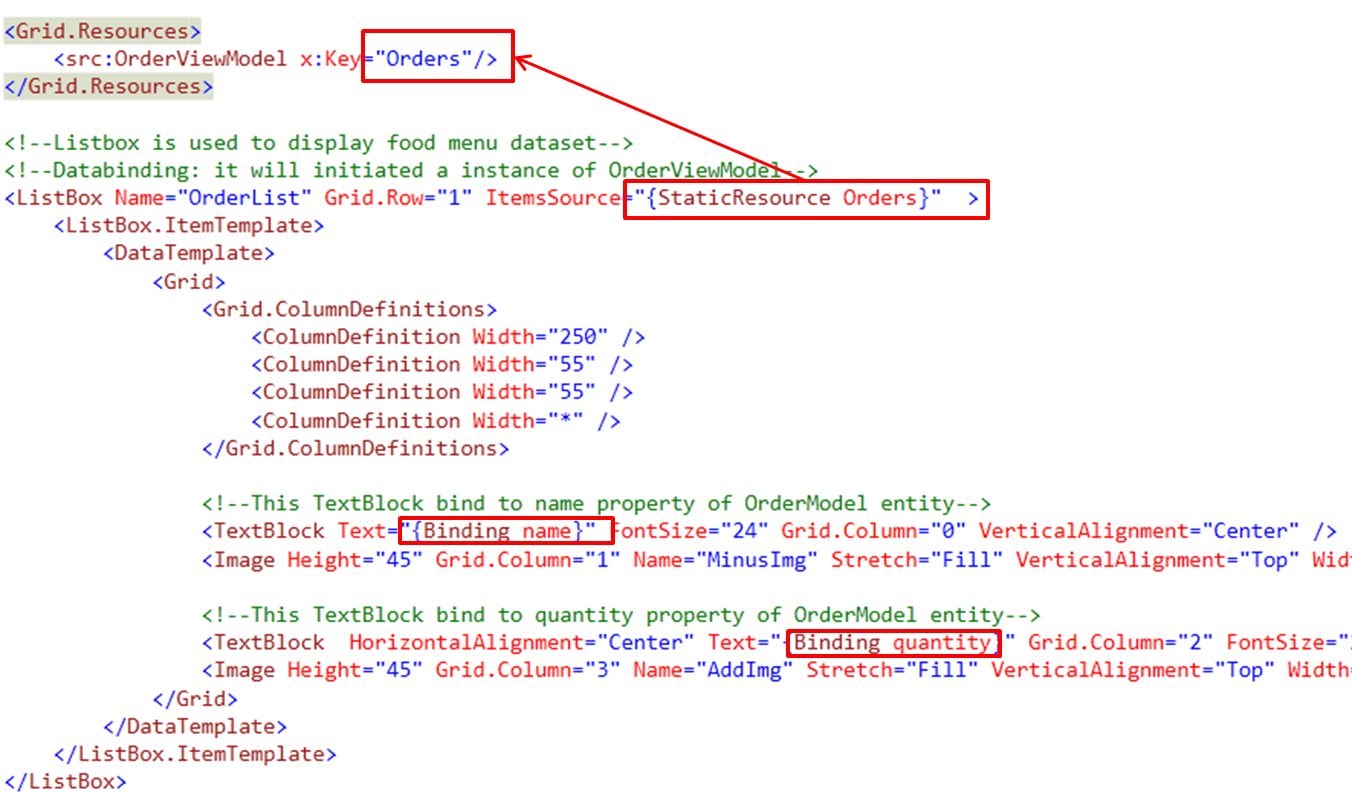
And let me explain the code and you can refer to the picture below.
Start from Listbox, it has an attribute called ItemsSource, which indicates where ListBox could get all the items from. Follow the arrow, you will see OrderViewModel from the resource. When Listbox get loaded, it will initialize an instance of OrderViewModel.cs. Open OrderViewModel.cs, you will see from the constructor, it creates a ObsevableCollection OrderModel and adds in two sample data : Chicken and beef.
However items got displayed in listbox? You can see another two highlights I showed in the picture. One TextBlock is binded to name property of OrderModel. The other is binded to quantity property of OrderModel.
So from this example, you could see View is only functioning as a presentation layer, taking care of UI display, themes/styles and user Interactions (Binding, events and behaviors).
12. Now we will introduce Visual Tree. How to change element inside Listbox based on another element’s behavior. This is a very common behavior. I use VisualTree here, which is a very simple implementation.
Firstly, we will add a behavior for the increase image. You can change code showed as below, adding MouseLeftButtonUp behavior for image. This behavior will be triggered once users release their finger from a touch behavior.
[cc lang=‘c’][/cc]
13. Add code-behind code showed here, you can either use Code Snippet [AddImg] or plug in the code below.
[cc lang=‘c’] private void AddImg_MouseLeftButtonUp(object sender, MouseButtonEventArgs e) { //Go through Visual Tree and find quantity element int a = System.Convert.ToInt32(((TextBlock)((Grid)((Image)(sender)).Parent).Children[2]).Text); a += 1;
//update quantity element ((TextBlock)((Grid)((Image)(sender)).Parent).Children[2]).Text = a.ToString(); //Go through Visual Tree and find name elements string name = ((TextBlock)((Grid)((Image)(sender)).Parent).Children[0]).Text; //Based on name element to create final order list AddOrderList(name); } private void AddOrderList(String name) { int flag = 0; foreach (OrderModel a in orderlist) { //Check whether item has been put into order list if (name.Equals(a.name)) { a.quantity += 1; flag = 1; break; } } //Add item into order list if hasnt been added before if (flag == 0) { orderlist.Add(new OrderModel(name, 1)); } } [/cc]
14. Change the constructor as:
[cc lang=‘c’] public ObservableCollection orderlist; /*Constructor*/ public MainPage() { InitializeComponent(); orderlist = new ObservableCollection(); } [/cc]
15. Add in two namespace.
[cc lang=‘c’] using System.Collections.ObjectModel; using Olio.Model; [/cc]
16. From AddImg_MouseLeftButtonUp method, we can have a closer look at how the value is grabbed using Visual Tree. Silverlight XAML organizes elements in Visual Tree format, which forms Parents-Children relationship. For instance, we have Content Panel Grid, contents several TextBlocks and Images. The Images and TextBlocks consider children of Content Panel Grid.
From the code above, you will see that Image is a child for Grid and TextBlock (for displaying quantity) is the third child of Grid. However, by using this method, you need to be very careful. It won’t show you the type of a particular element. So your application will crash if you cast the type wrongly. So put into Exception is better in case you changed the UI without changing the back end. However, this is a really simple way to change corresponding element in a ListBox format.
17. AddOrderList is a method to simply put whatever customer ordered into an order list. I didn’t implement decrease quantity function in this tutorial but you could try it out yourself. It should be quite straight forward given quantity-increase method.
18. Press Ctrl+F5 you will be able to see this in the emulator and by pressing Plus Button, the quantity changed.
