Sensors
Hey guys, its Shank again. It seems that quite a number of you are were quite enthusiastic about writing your very own AR app after my first post. For those who have not read part one yet, well here’s the link to that post: http://weshipcode.com/developers/wp7arparti/
In this post, we are going to continue from where we last left off. By now, you would have an application that can display the camera stream on your screen. That’s great, but for an AR Application we also need to know the device’s movements and orientation, in order to display the information correctly on the screen. In this post we are going to explore 3 sensors and see how to hook up the data from those sensors to our application.
Background
There are three sensor components we would be looking at in this section. Each of the sensors would play an integral part in our augmented reality app. The sensors are as follows:
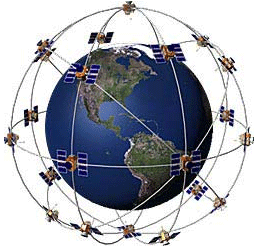
GPS Sensor
The GPS gives us information about the geo-coordinate of the phone. This would allow us to pull information about the locality such as the places of interest from back-end web services. For our app, i would be showing how to use the data endpoints provided from Project Nimbus in the 3rd part of this series.
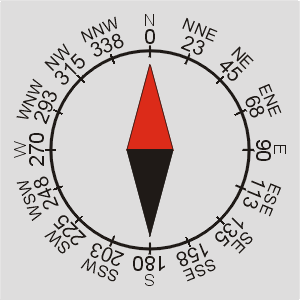
Compass Sensor
The Compass would give us the magnetic heading of the phone. This allows us to know where the phone is pointing at, with respect to the magnetic north or true north. With this information we would know what POIs we would need to display on the screen.
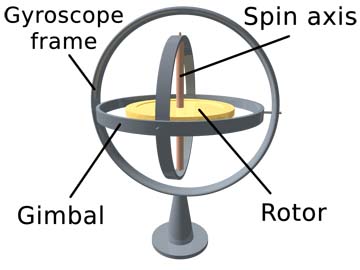
Motion API
Finally the Motion API, allows developers to determine the actual orientation and motion of a device. The data comes from the cumulation of raw data of various sensors such as Compass, Gyroscope and Accelerometer. The Motion API handles the low-level sensor calculation and allows applications to easily obtain the device’s attitude (yaw, pitch and roll), rotational acceleration as well as the linear acceleration, compensating for the gravitational and user movements. For applications that primarily focus on augmented reality, the Motion API is most suited, instead of re-inventing the wheel by using the compass or gyroscope or accelerometer individually.
Development
(b) GPS Location
The GPS location would give us the Longitude and Latitude of the device. With that information, we could get the information of Places of interests that are near the device. To retrieve the Long and Lat of the phone, we would need to use the “GeoCoordinateWatcher” class. To use that class, first a reference to “System.Device” has to be added to your project.
- Add reference to “System.Device” to project (right click on your project in solution explorer>add reference>select System.Device from the list)
- Add using statement for “System.Device.Location” to MainPage.xaml.cs
- Declare a “GeoCoordinateWatcher” instance. We are going to name our’s “watcher”
- In the page’s “OnNavigatedTo” event, initialize the GeoCoordinateWatcher and start it. This ensures that each time the page is visited to, we get the user’s current GPS location.
- We are going to use the constructor of GeoCoordinateWatcher that allows us to state the GeoPositionAccuracy. We are interested in the precise location, as such, we would be using “GeoPositionAccuracy.High”
- Add the event handlers for position changed event
- Set the ‘MovementThreshold’ to 20 meters (as we do not want to trigger the GPS Position change for every minute movements)
- Start the GeoCoordinateWatcher
- The code would look like this:
[cc lang=‘csharp’ line_numbers=‘false’]watcher = new GeoCoordinateWatcher(GeoPositionAccuracy.High);
watcher.PositionChanged += new EventHandler<GeoPositionChangedEventArgs>(watcher_PositionChanged);
watcher.MovementThreshold=20;
watcher.Start();[/cc]
- Create an event handler method for “watcher_PositionChanged”
- Check the GeoCoordinateWatcher’s status is ready (ie it has got hold of the GPS location)
- Call a method “callWebService” passing in the GPS location. Also remember to stop the GeoCoordinateWatcher once you have got the location.
- Create an empty method “callWebService” with a parameter “coordinate” of type “GeoCoordinate”
- The code should look like this:
[cc lang=‘csharp’ line_numbers=‘false’]void watcher_PositionChanged(object sender, GeoPositionChangedEventArgse)
{
if (watcher.Status == GeoPositionStatus.Ready)
{
Watcher.Stop();
callWebService(e.Position.Location);
}
}
private void callWebService(GeoCoordinate coordinate)
{}[/cc]
- We now have the GPS sensor setup for our application.
(c) Phone Attitude and Compass Bearing
MotionAPI
Motion api is the accumulation of raw sensor data from the various sensors, such as compass, accelerometer and gyro sensor, together with a bunch of math that tries to make sense of the information from the sensors and counteract for the noise in one sensor, using another.
Some devices, however, do not have the Gyro sensor. The motion api, however would use other instrumentations in the device to fall back and get a degraded set of values in-place of the gyro sensor. But devices that do not event have the Compass sensor would not be able to run the motion api at all. The developer is expected to handle such scenarios while developing his/her application.
Compass Bearing
Windows Phone Mango SDK exposes the Compass API via the Compass class. The Compass’s bearing property gives us the number of degree the phone has rotated based on magnetic or true north. Thus, Rotation Angle is the negative of the bearing.
Yaw Is -Bearing
Developers can get the Compass bearing from the Compass API. However the Yaw property in MotionAPI’s Attitude is also capable in providing us with the compass bearing. But the bearing is measured clockwise from true north, around the Z axis. As such, the heading would actually be 360degree minus YAW. Thus the YAW can be directly assigned to the angle of interest.
Code
Lets get the motion api up and running
- Add a reference to “Microsoft.Devices.Sensors” in your project
- Add the using statement “using Microsoft.Devices.Sensors” in your MainPage.xaml.cs
- Declare the global variable named “motion” of type “Motion”
- In the “OnNavigatedTo” event handler method:
- Check if Motion API is supported
- Instantiate the “motion” variable, if supported
- Add the event handlers for “CurrentValueChanged”
- Set the time between updates to 100ms
- Start the motion api
- If motion is not supported, move to your fallback function (in ourcase, we exit the app)
- Your code should look like this:
[cc lang=‘csharp’ line_numbers=‘false’]if (Motion.IsSupported)
{
motion = new Motion();
motion.CurrentValueChanged += new EventHandler<SensorReadingEventArgs>(motion_CurrentValueChanged);
motion.TimeBetweenUpdates = TimeSpan.FromMilliseconds(100);
motion.Start();
}
else
{
MessageBox.Show(“Motion API is not supported on this phone”);
return;
}[/cc]
- Create the event handling method “motion_CurrentValueChanged”
- Call the dispatcher to call another method in the UI thread, passing in the “SensorReading” of the MotionAPI
- Code:
[cc lang=‘csharp’ line_numbers=‘false’]Dispatcher.BeginInvoke(() => CurrentValueChanged(e.SensorReading));[/cc]
- Create the method “CurrentValueChanged” with the parameter “reading” of type “MotionReading”
- We now have our motion sensor setup for our augmented reality app. You can explore the properties exposed by the MotionReading parameter. The property we are interested in is the “Attitude”. It provides us with the following:
- The Yaw, Pitch and Roll of the device
- The Yaw also indirectly provides us with the compass bearing of the device
- The RotationMatrix, which we would be using later on to manipulate the 3D space in which we would be placing our places of interest as well as helping us converting the 3D space and world space into the screen coordinates
- You can display out the values of the GeoLocation as well as the Yaw Pitch and Roll to get the rough idea of the values.
- A pre-done sample with the values displayed is also attached in this tutorial. “Tutorial2_Values”.
- Download the source code for this Part here
In the next post…
Now that you have your camera stream up and running, your device motion api setup together with the events, the next thing we have to do is to get some data to work on. In the next post, we would be taking a side-step and see how we can get data from our favourite endpoint, Project Nimbus. So stay tuned…
Update: heres the link to the next part - http://weshipcode.com/developers/wp7arpartiii/