Someone was trying this out and could not get this to work so I mentioned I would write an article if I got it working and I did get it working so here is the article.
Let’s not have much of the usual gibberish that I write at the start of the post and get straight to the point.
What you would need:
- 30-Day Trial Azure Subscription [link] (If you do not have one)
- A little bit of knowledge of Linux shell commands
- PuTTY [link] on Windows | Terminal on OS X
- Remote Desktop Client (It’s on the Mac App Store for you OS X users. P.S. The OS X Version is also really pretty.) [link]
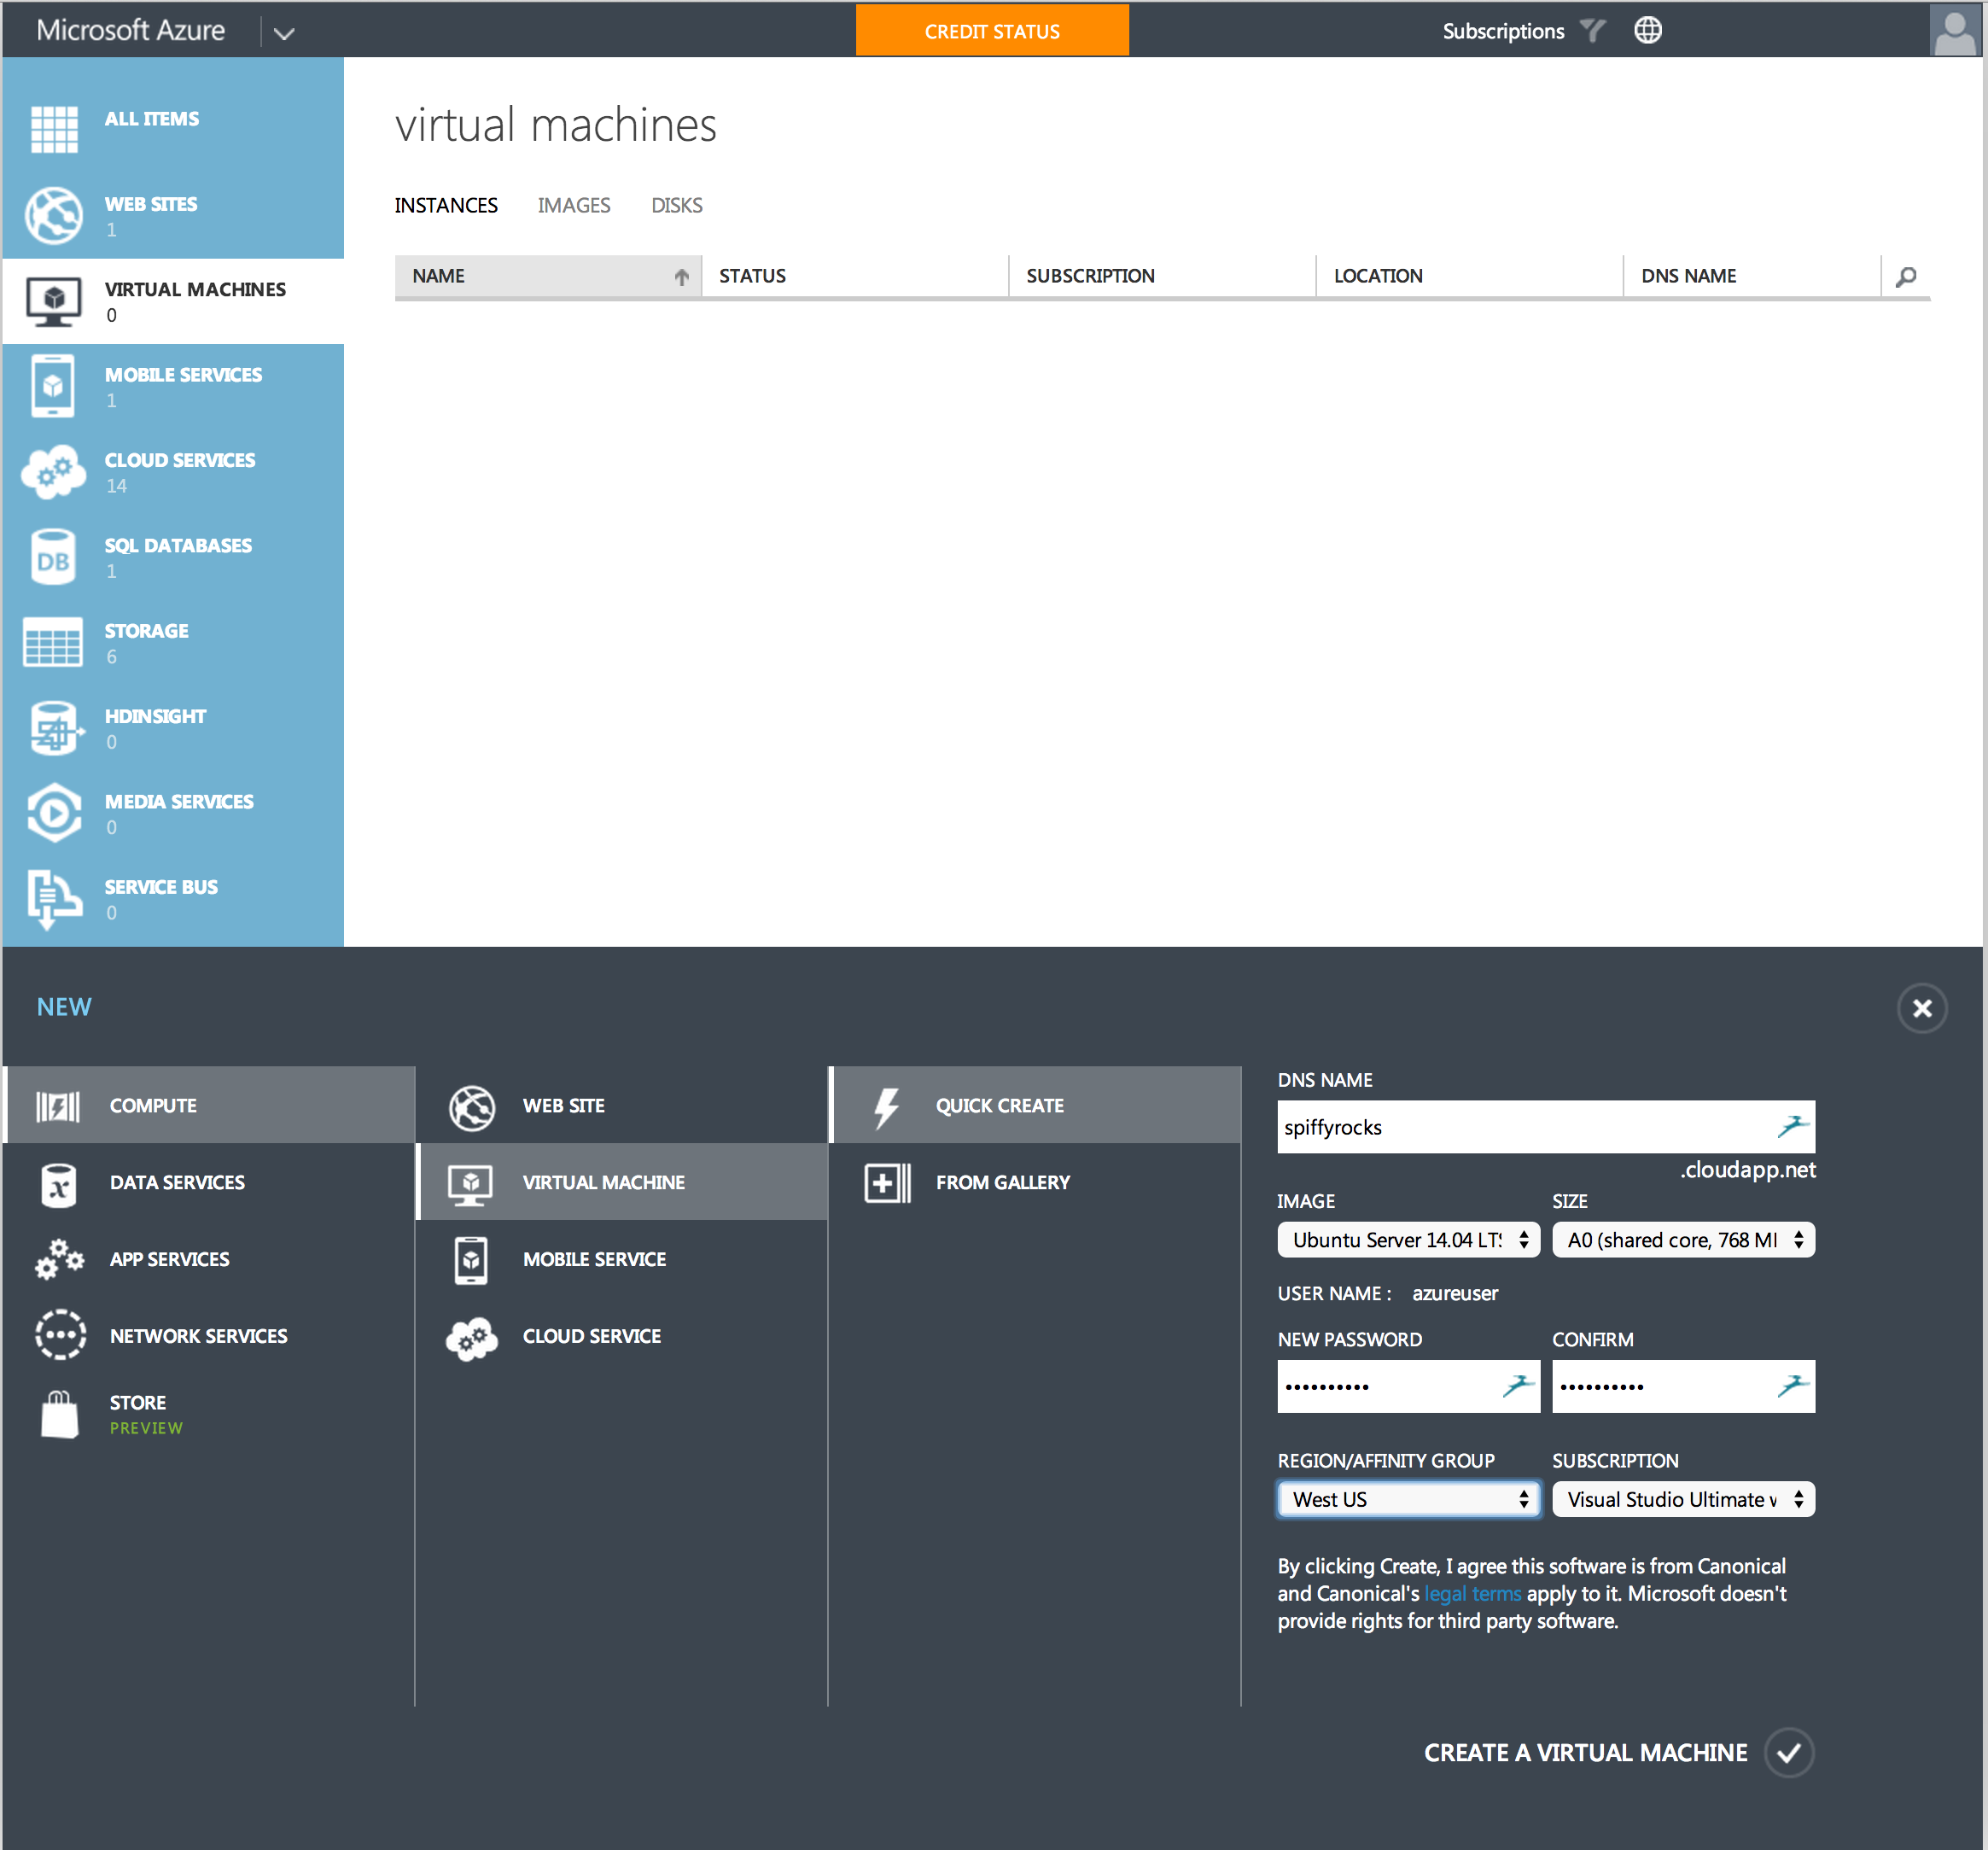
Create your Virtual Machine through Windows Azure and let’s make one running the latest Ubuntu which is 14.04 LTS as seen below. Give it a little bit to create, eat a cookie, drink a cuppa joe or anything that can be done in 5 minutes.
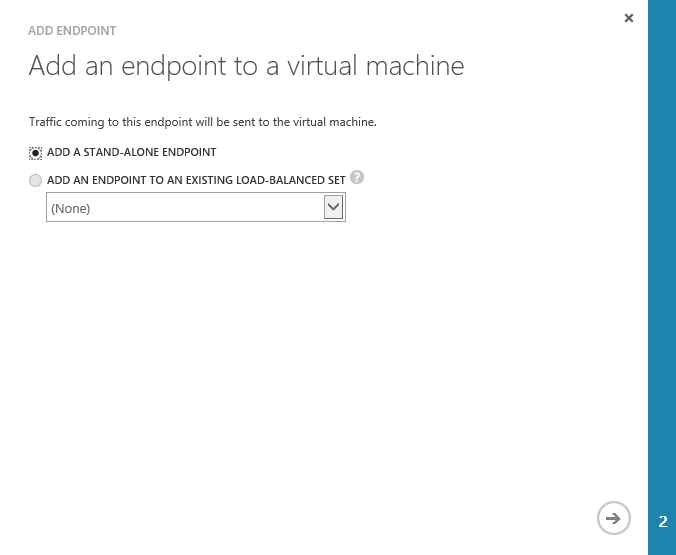
Once that’s done, go to the Endpoints section of the Virtual Machine and click Add to add an Endpoint.
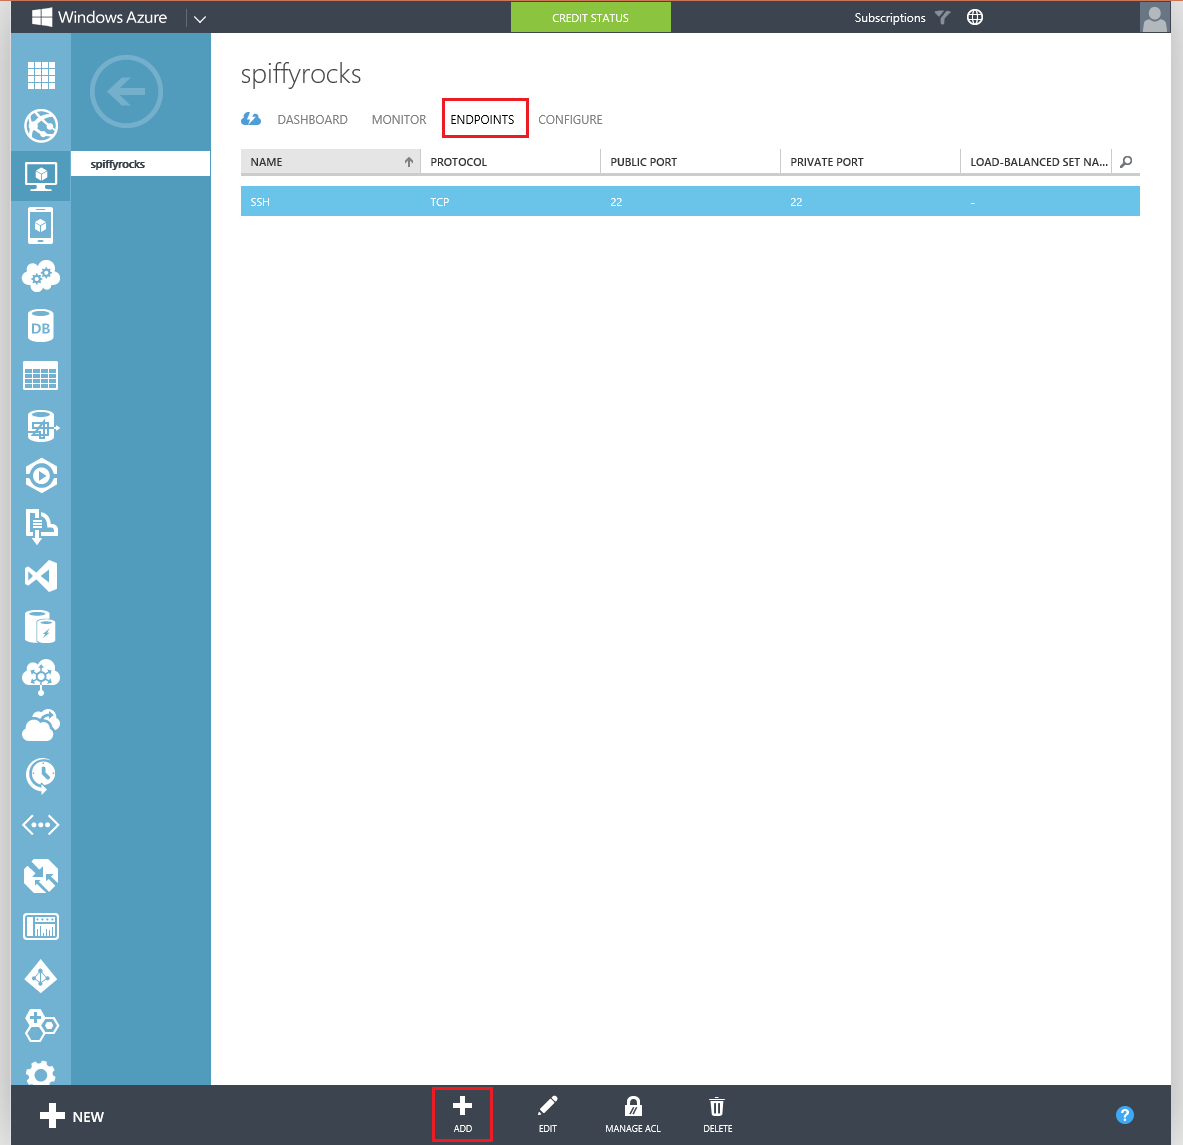
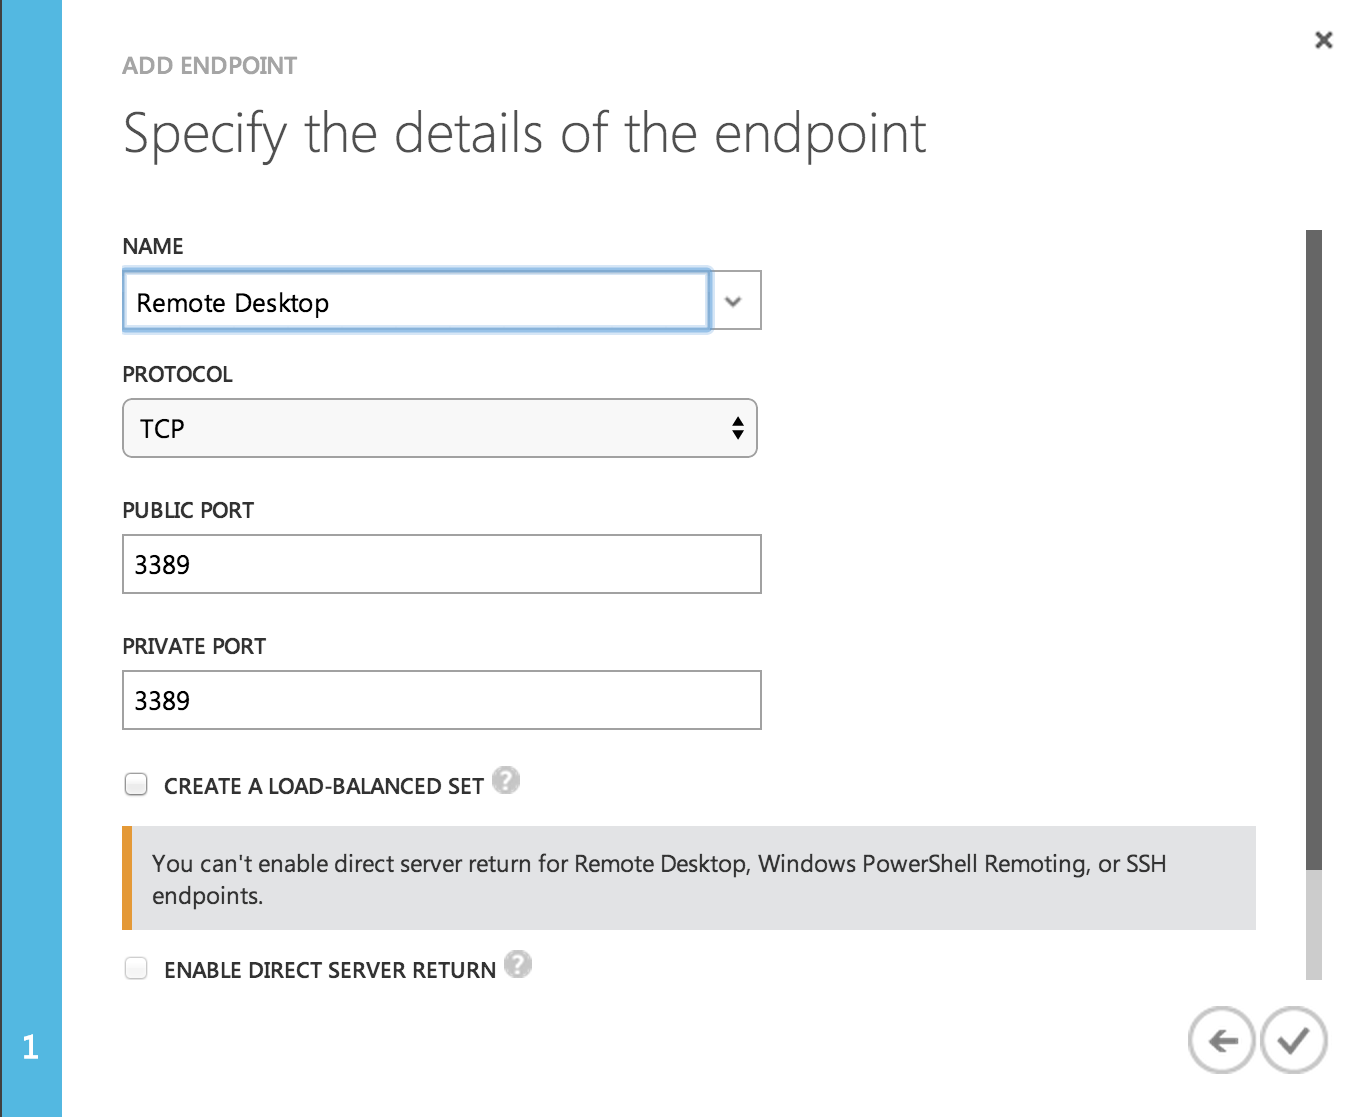
Once you see this click next and select Remote Desktop as the name of the Endpoint, all the relevant details will be filled out for you (yipee) and just hit the tick at the bottom right.
Wait a little again and your Endpoint will be successfully added. Moving on to commandline stuff!
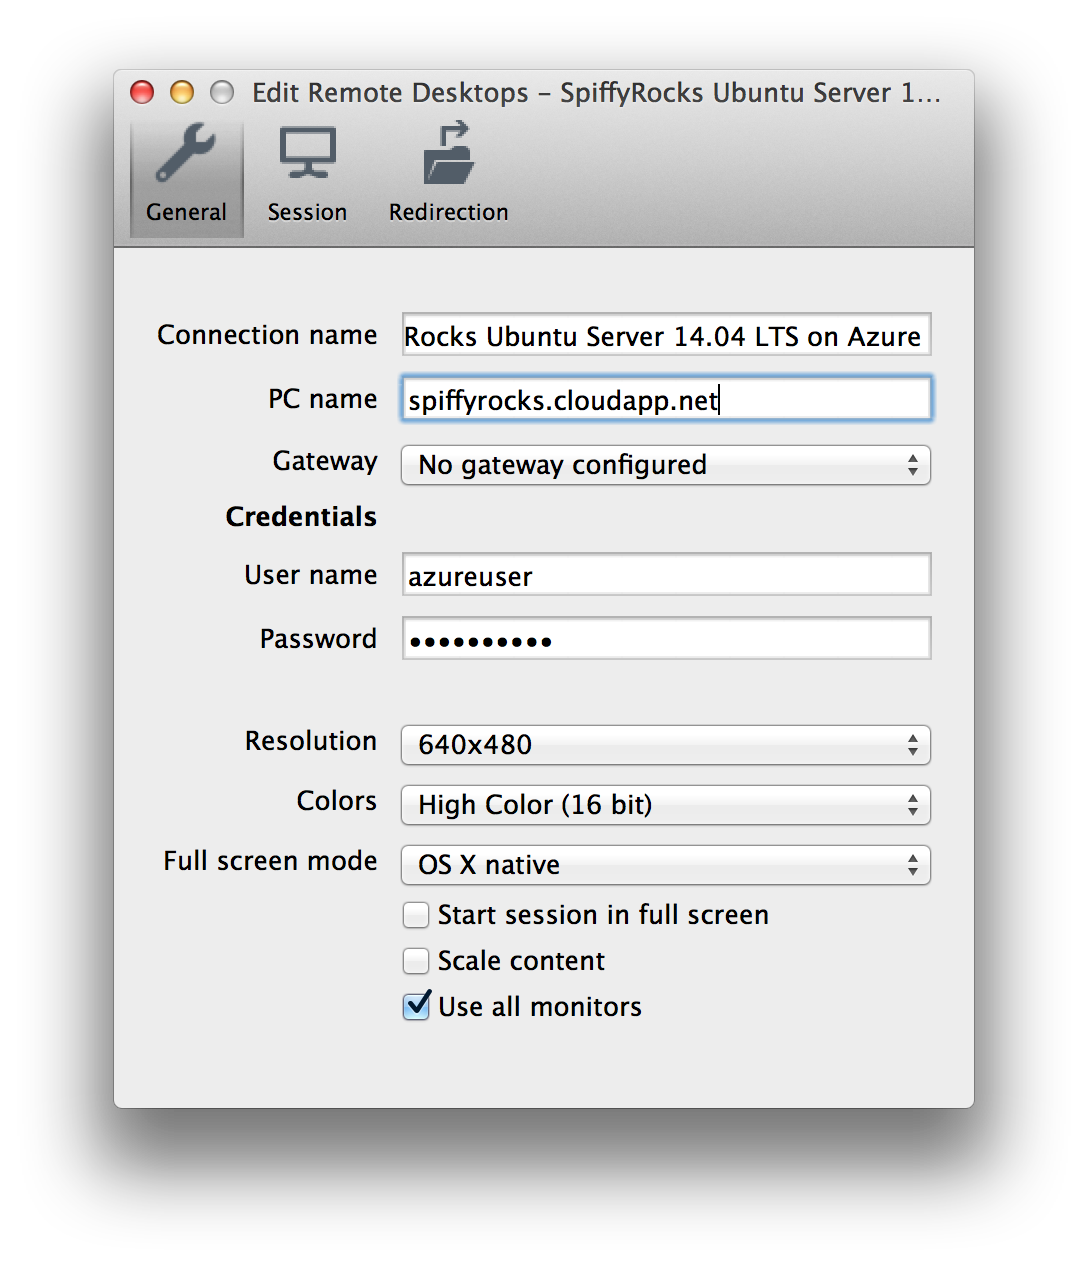
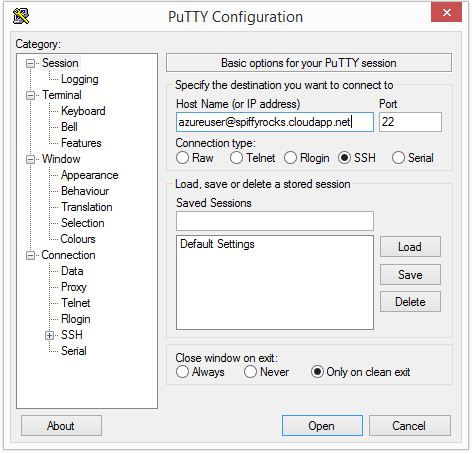
Fire Up PuTTY and fill in your login details as such or if you are on OS X follow the image below PuTTY one.
Now, let’s proceed onto this by just typing commands into the box above. Each line means a new command. sudo -i apt-get update && apt-get upgrade apt-get install xrdp xfce4 exit echo “xfce4-session” > ~/.xsession sudo service xrdp restart Command Line Explanations:
- Getting elevated administrator (root) permissions.
- Updating the repositories and thereafter uprgrading any packages
- Install Packages xrdp and xfce4
- Exit from elevated administrator (root) permissions.
- Write a file called .xsession in ~/ with the contents “xfce4-session”
- Restarting the xrdp service.
*Note: It is not recomended to install a desktop environment in a Server environment. Reason [link] The installation above will be done in a jiffy. By default Ubuntu Server does not come with a desktop environment and what you are essentially doing is installing one.
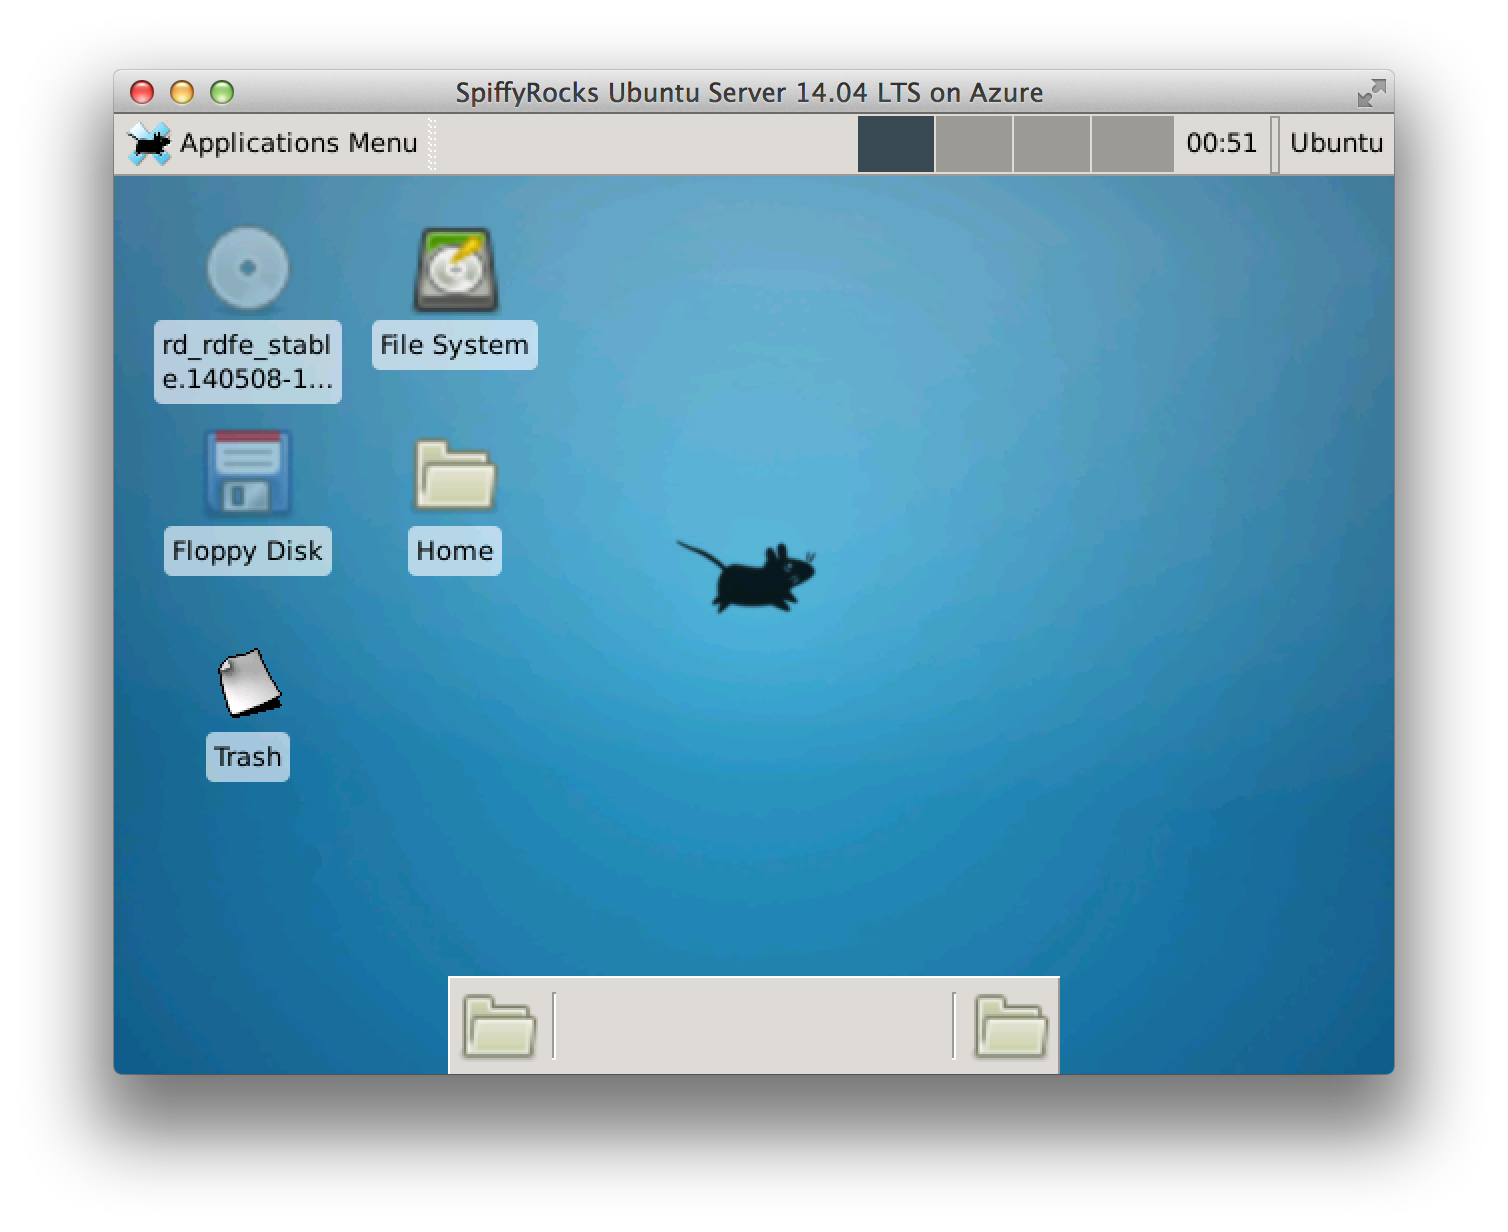
Once that’s done’s fire up Remote Desktop. Fill in your server details and Voilà! We have a nice Graphical User Interface through RDP.