Last month, during our monthly .NET Developer Singapore Community meetup, our friend Riza from Microsoft shared with us a very cool API, Win2D. Win2D is an open-source API announced by Microsoft last year which helps developers bring hardware accelerated Direct2D graphics to Windows 8.1 (and 10) Universal Apps. This API certainly excites developers, especially game developers who are not very familiar with Direct2D but would like to do 2D immediate mode rendering in C#. After the meetup, I have tried playing with some of the basic features in Win2D. I did a simple app which will keep adding colourful circles moving around on the Surface screen. After a few weeks, I read an article online about image effects on Win2D. Hence, I decided to try it as well. My Taiwan Trip and Image Processing I just came back from my first trip to Taipei. So I would like to use some of my photos taken in the journey to show how Win2D can be used to do interesting image effects. Now, let’s start with a photo that I took outside the National Chiang Kai-shek Memorial Hall. [caption id=“attachment_20740” align=“aligncenter” width=“640”]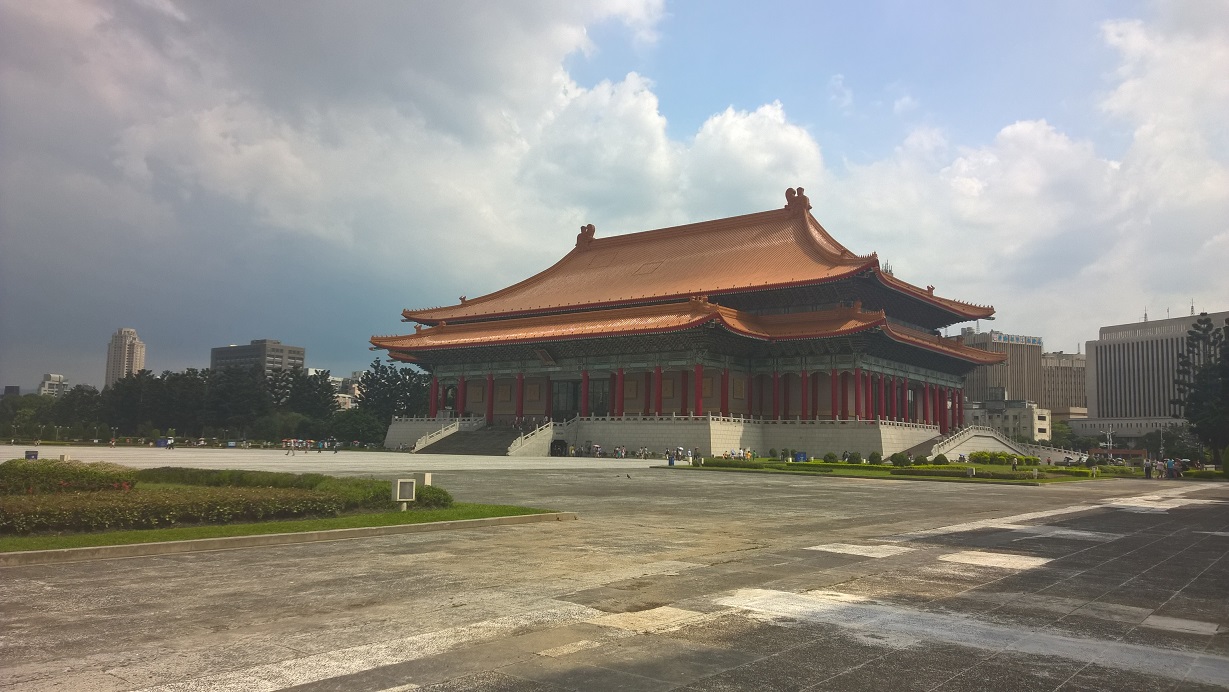 Taiwan National Concert Hall[/caption] There are plenty of effects available in the Microsoft.Graphics.Canvas.Effects namespace. I will just do a few of them as a demonstration of image effects in Win2D. Gaussian Blur Effect I will start with one of the simplest effect, the Gaussian Blur. For those who are new to Gaussian Blur, it is a result of blurring an image using the Gaussian function. The new value of each pixel in the image is a weighted average of neighbour pixels of the pixel. Hence, Gaussian Blur is able to produce a blur that preserve edges and uniform blurring filters. In Win2D, Gaussian Blur effect has a property called BlurAmount. It is actually the Standard Deviation of the Gaussian function, as shown in the Settings.xml.
So, if we set BlurAmount to be 3 to the photo above, we will get the result as follows. [caption id=“attachment_20741” align=“aligncenter” width=“640”]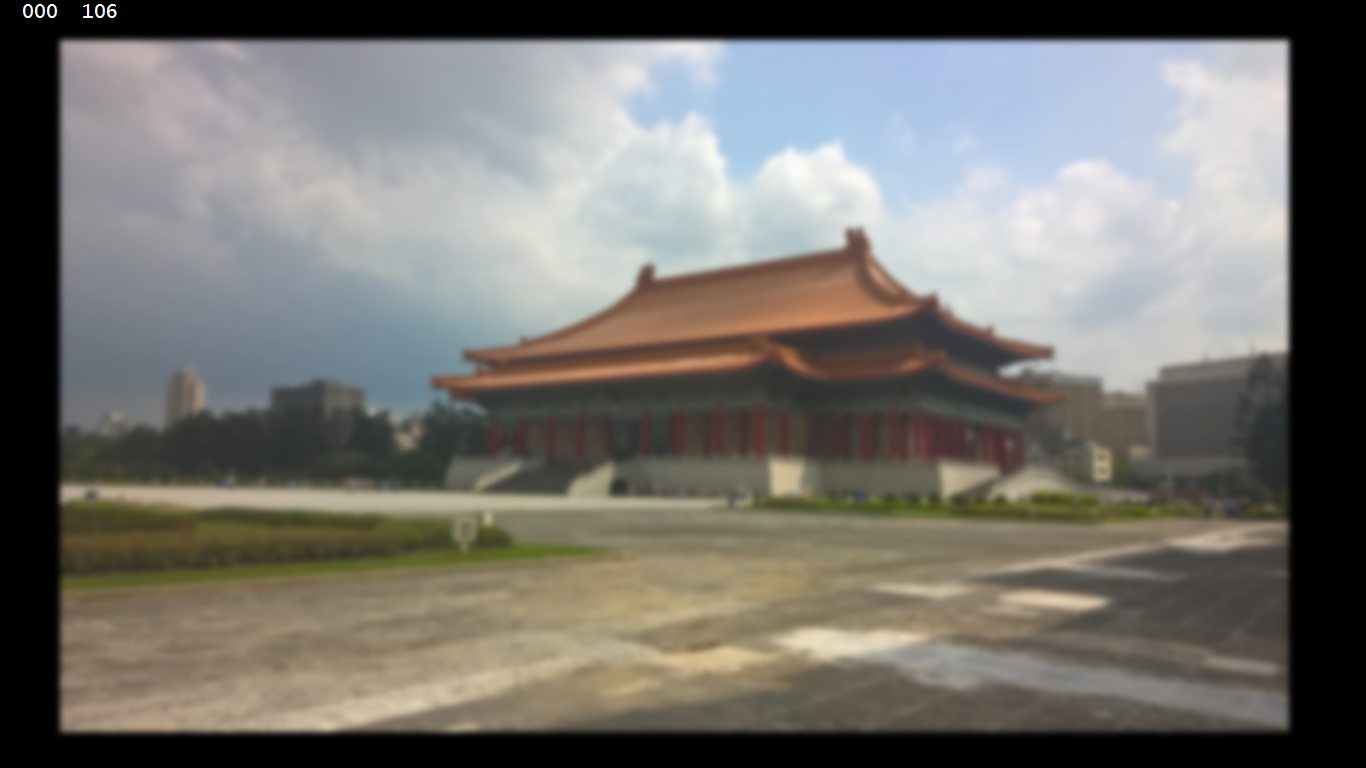 Result of applying the Gaussian Blur Effect.[/caption] Hue Rotation Effect and Saturation Effect Hue represents dominant color as perceived by an observer. Normally human views a color object in terms of its hue, saturation (aka colourfulness), and brightness. So these three properties form a model which describes how a colour is perceived by the human eyes. [caption id=“attachment_20742” align=“aligncenter” width=“400”]
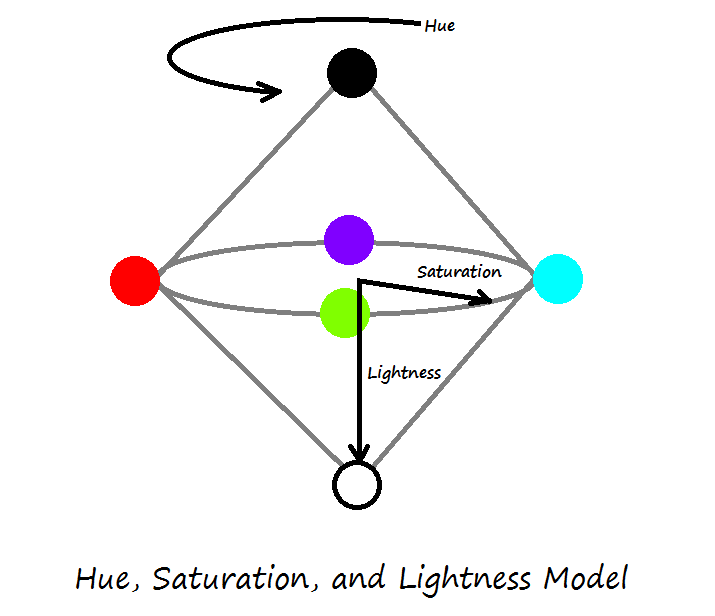 Hue-Saturation-Lightness Model[/caption] In Win2D, we can set the angle (in radians) to rotate the hue in HueRotationEffect. For example, if I set the angle to be 90 degrees, then I can get the result as shown in the following screenshot.
var hue = new HueRotationEffect { Angle = (float)Math.PI / 2, Source = myBitmap };
[caption id=“attachment_20743” align=“aligncenter” width=“640”]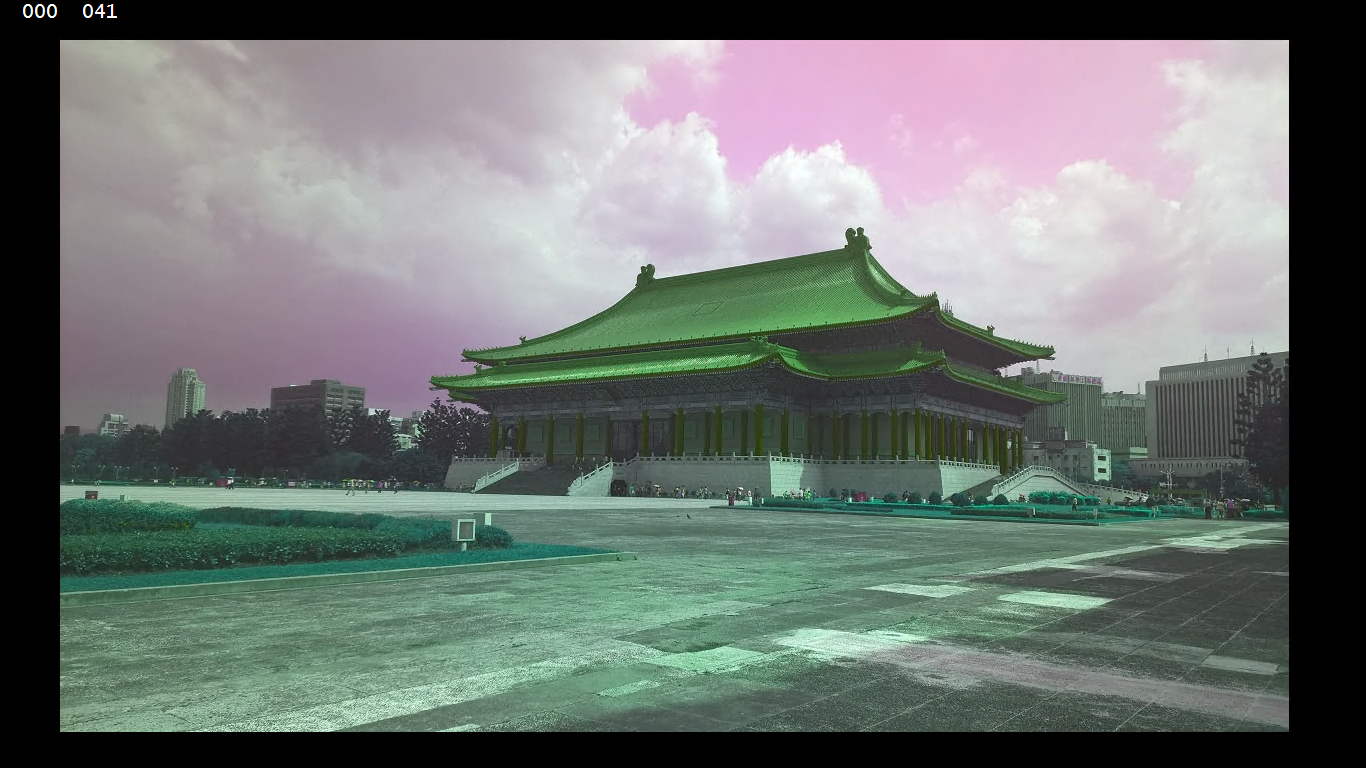 Applied Hue Rotation Effect with angle = 90 degrees.[/caption] In addition, to change the colourfulness of the photo, we can make use of SaturationEffect. There is one property called Saturation which accepts float value from 0 to 1. If the value is 0, then the result will be a monochrome, an image in shades of gray. Effects for Two Images So far, we have applied effects to one image only. So, could we apply an effect to two images? Well, the answer is yes. One of the effects that I tried is BlendEffect which will combine two images with Dissolve mode.
var blend = new BlendEffect { Background = myBitmap, Foreground = myBitmap2, Mode = BlendEffectMode.Dissolve };
The background image that I use is the same photo I took for National Chiang Kai-shek Memorial Hall. For foreground image, I use an image of my anime character. [caption id=“attachment_20744” align=“aligncenter” width=“640”]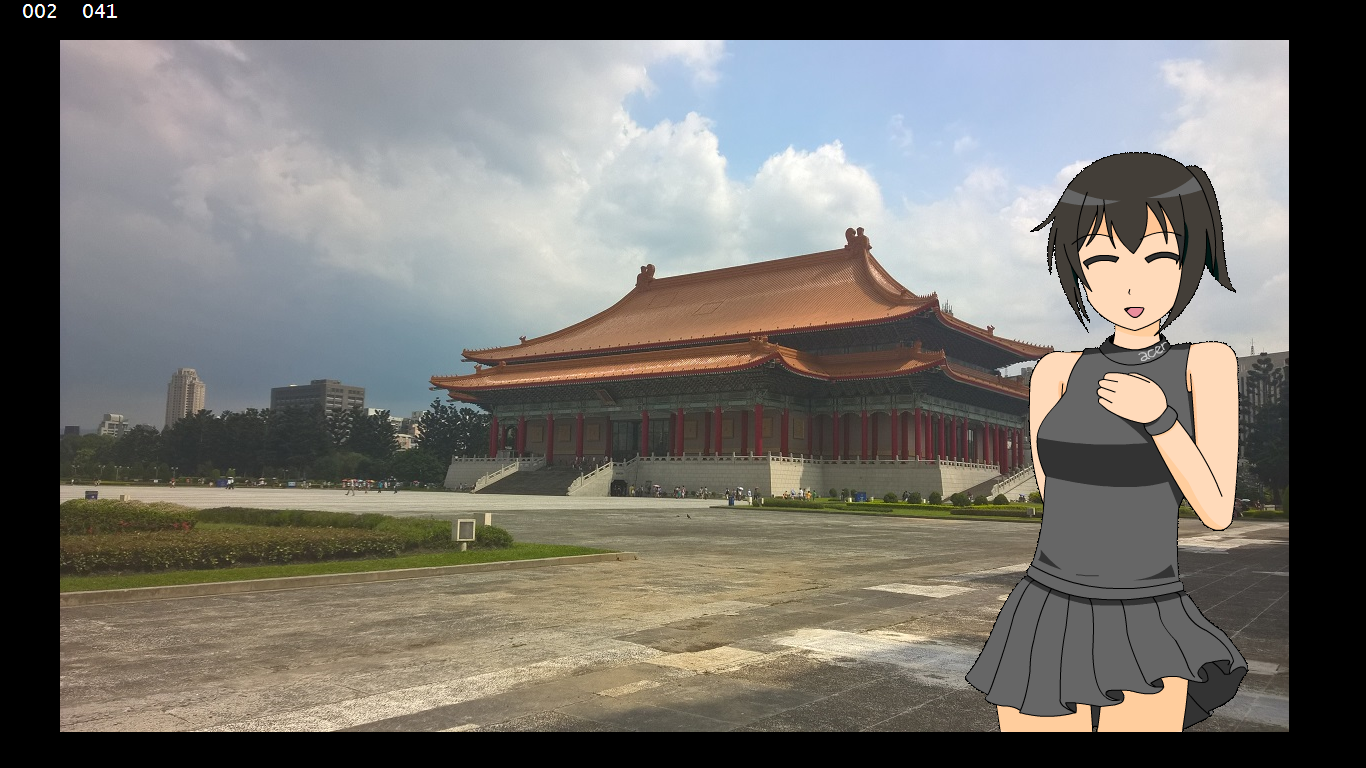 Combined two images together.[/caption] Here, I played a trick. Originally, the anime character has a white background. Due to the fact that I was building all these on Windows 8.1 Universal App instead of Windows 10, so I couldn’t play with ChromaKeyEffect which is only supported in Windows 10 Universal Windows Platform. Thus, I was not able to remove the white background of my anime character with transparency. Hence, what I used here is actually an image which has been processed in other program to remove the background. After viewing all these examples, you may wonder why we chose to do all these effects programmatically even though they can be easily done in Photoshop? To me, one of the reasons is that I can easily use Win2D to create animations with those effects. So, unlike Photoshop, output image with Win2D is not always a static image. It can be an animation. For example, by using backend code to input different values into ArithmeticCompositeEffect, I am able to make the anime character appear differently. Finally, we can also add text to the canvas too with the help of CanvasTextFormat. [caption id=“attachment_20745” align=“aligncenter” width=“640”]
 Hello, Taiwan! This is the Mayor’s Residential Art Salon in Taipei city.[/caption] Where Does the Bitmap Come from? Some of you may wonder where and how do I define the bitmap variable in my code? I’ve uploaded photos of my Taiwan trip to OneDrive. So, I can directly load the image to my canvas (_canvas) from there using the code below.
CanvasBitmap image = await CanvasBitmap.LoadAsync(_canvas.Device, new Uri(“https://imdgkq.by3301.livefilestore.com/.../WP_20150711_13_02_52_Pro.jpg?psid=1”));
This code cannot be put in the Draw event of the _canvas. Otherwise, an exception will be thrown. Hence, I put them in the CreateResources event of the _canvas, as shown in the code below.
CanvasBitmap image;
…
private async void _canvas_CreateResources(CanvasControl sender,
Microsoft.Graphics.Canvas.UI.CanvasCreateResourcesEventArgs args)
{
image = await CanvasBitmap.LoadAsync(_canvas.Device,
new Uri(“https://imdgkq.by3301.livefilestore.com/.../WP_20150711_13_02_52_Pro.jpg?psid=1”));
}
Then in the Draw event of the _canvas, I will need to check if the image is null or not before rendering them on the canvas.
private async void OnDraw(CanvasControl sender, CanvasDrawEventArgs args) { var myBitmap = new CanvasRenderTarget(sender, 1400, 800);
using (var ds = myBitmap.CreateDrawingSession())
{
    if (image != null)
    {
        ds.Clear(Color.FromArgb(0, 0, 0, 0));

        ds.DrawImage(image, 948, 145);
    }
}
}
To understand why I need to structure my code in this way, I’d like to recommend you to read an article about async loading and CreateResource event. Join Meetup! If you are interested to learn about .NET technologies or you want to meet .NET developers, feel free to join any of our .NET Developer Community Singapore event. Alternatively, please sign up as a member on the community Facebook Group! Hope to see you in the future events! [caption id=“attachment_20738” align=“aligncenter” width=“600”]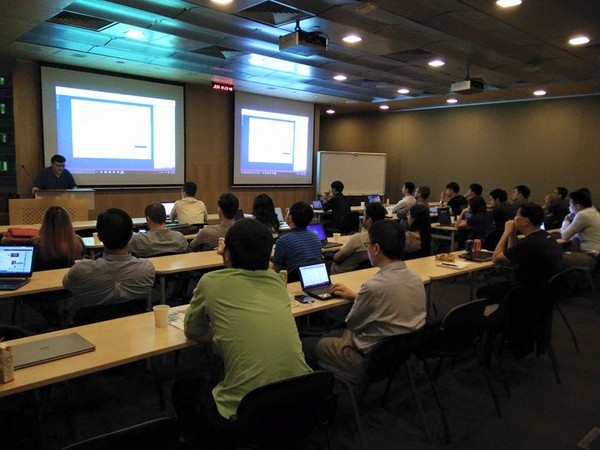 .NET developers are encouraged to share their ideas and coding experience during the community meetup.[/caption] Further Reading If you would like to understand more about Win2D Image Effects, I’d like to share with you two articles that I found to be very useful.