Many people are familiar with our official Windows USB/DVD Download Tool (https://www.microsoft.com/en-us/download/windows-usb-dvd-download-tool). A super convenient tool to flash ISO file into USB thumb drive. However, many of you will realize that, your Microsoft Surface doesn’t boot from the USB when you flash the ISO using the tool. That is because Microsoft Surface will only boot into a thumb drive with FAT32 file system!
So here. I will give you a step by step guide to create a Windows 10 bootable thumb drive for your Microsoft Surface.
What you need
• An 8GB or 16GB or 32GB thumb drive
• A PC with internet access and a USB port
What to do
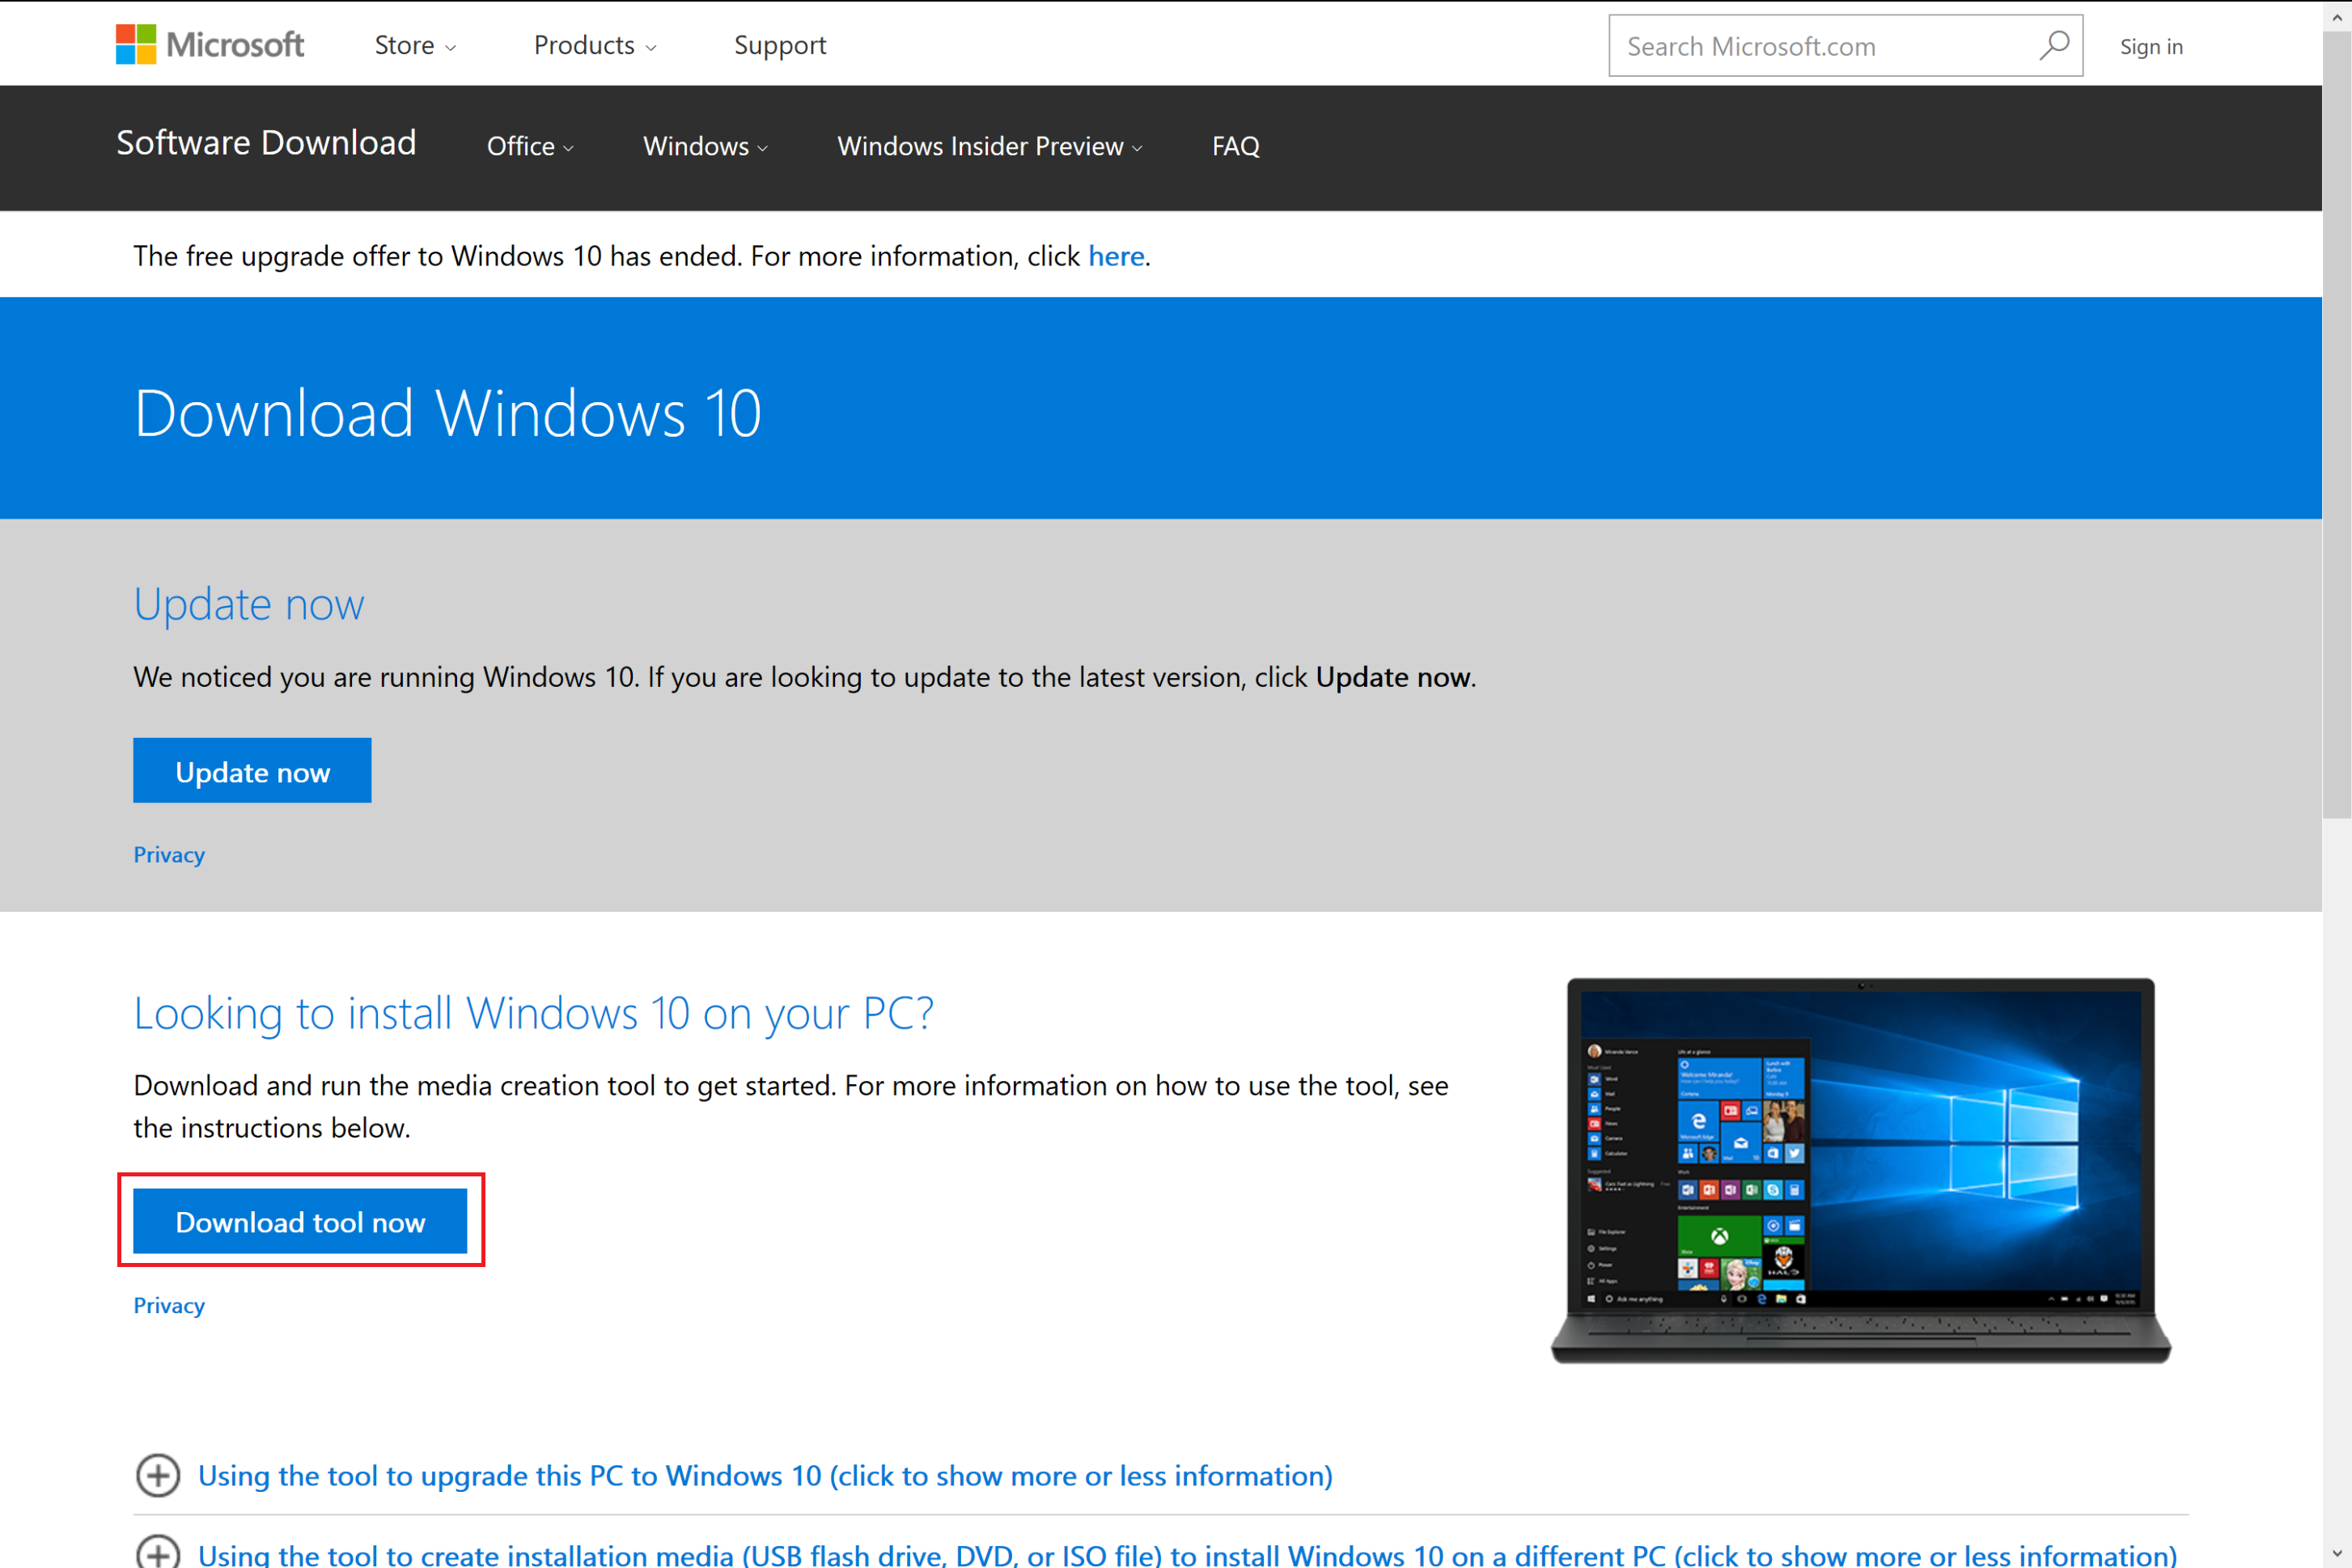
1. Go to https://www.microsoft.com/en-us/software-download/windows10 and click on “Download tool now”
2. Go to your download folder and double click on “MediaCreationTool.exe”

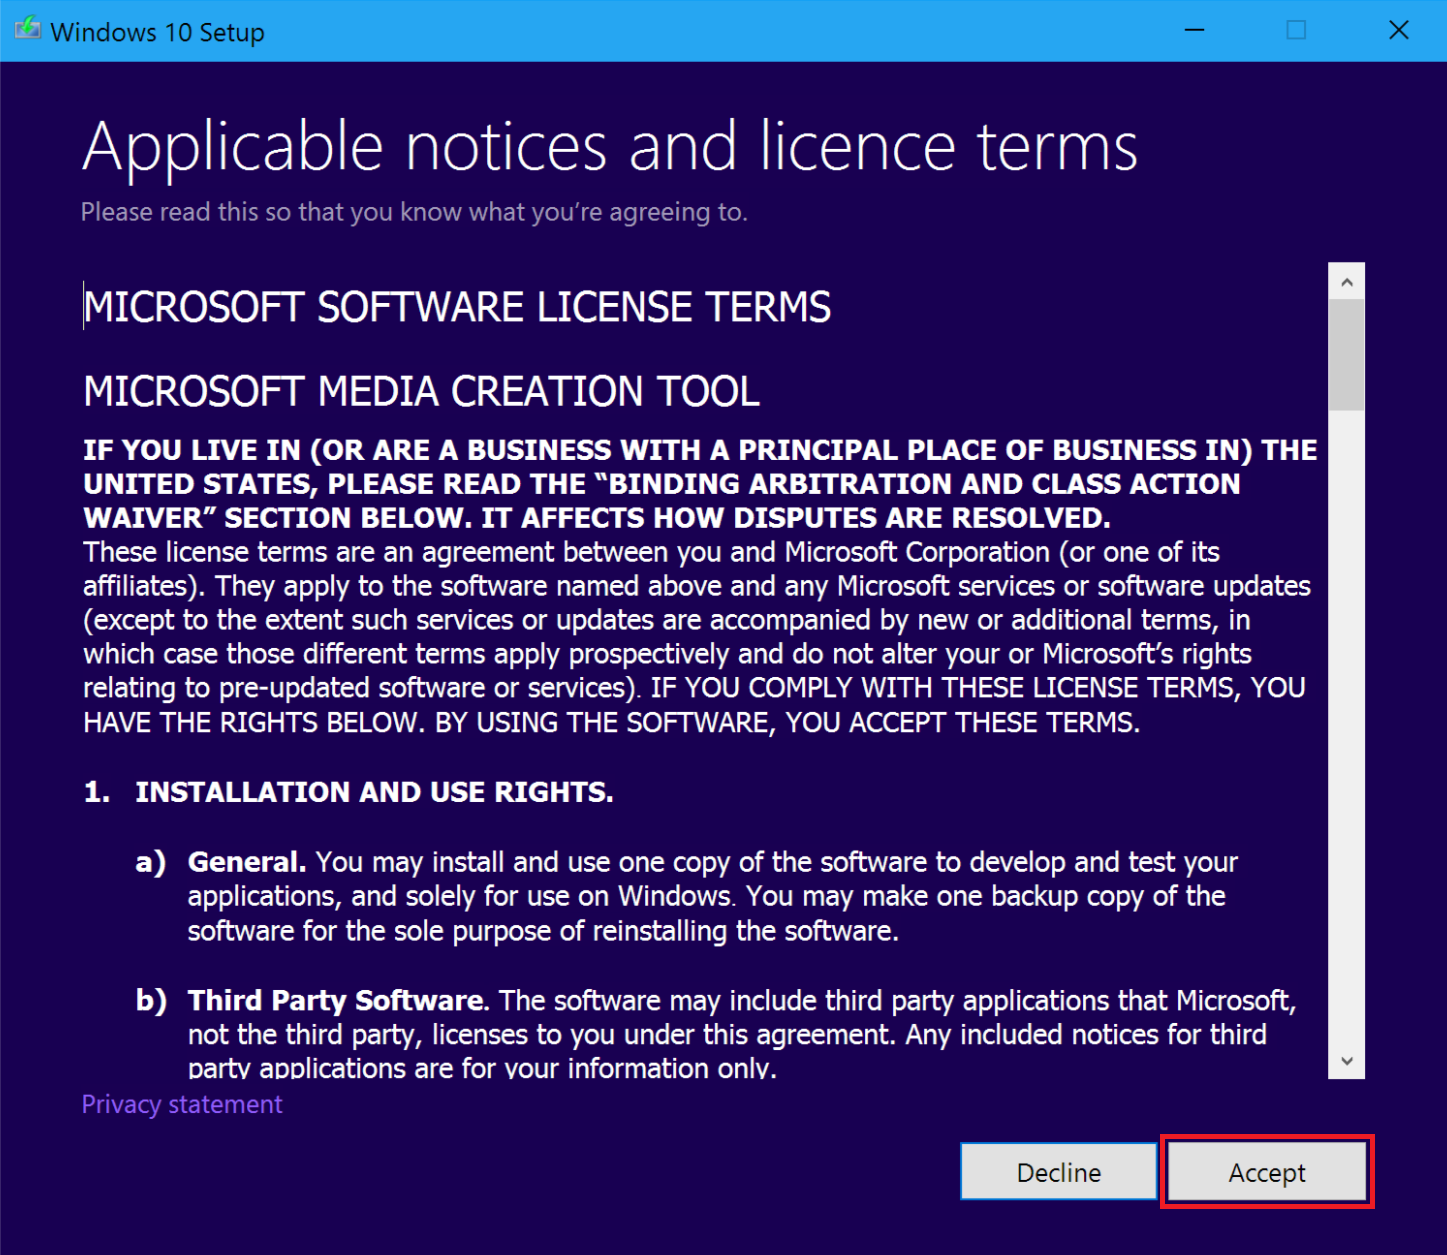
3. Click on “Accept” to agree the terms and condition (<- Please read)
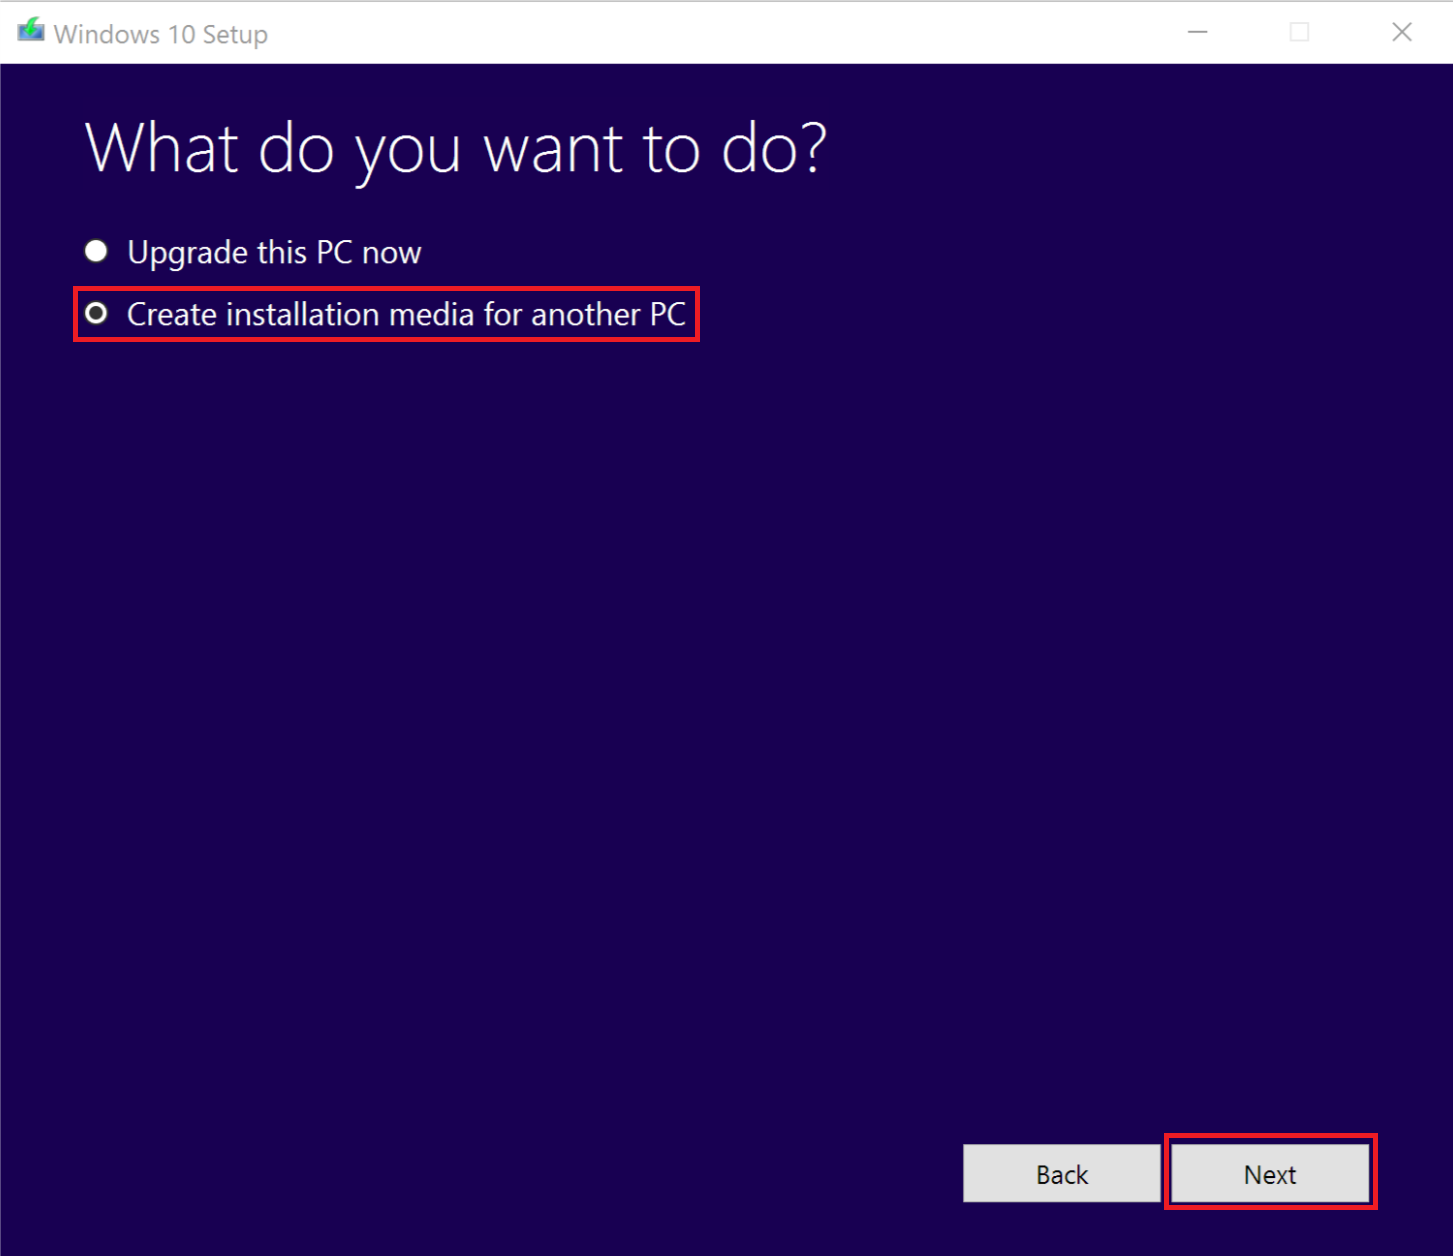
4. Select “Create installation media for another PC” then “Next”
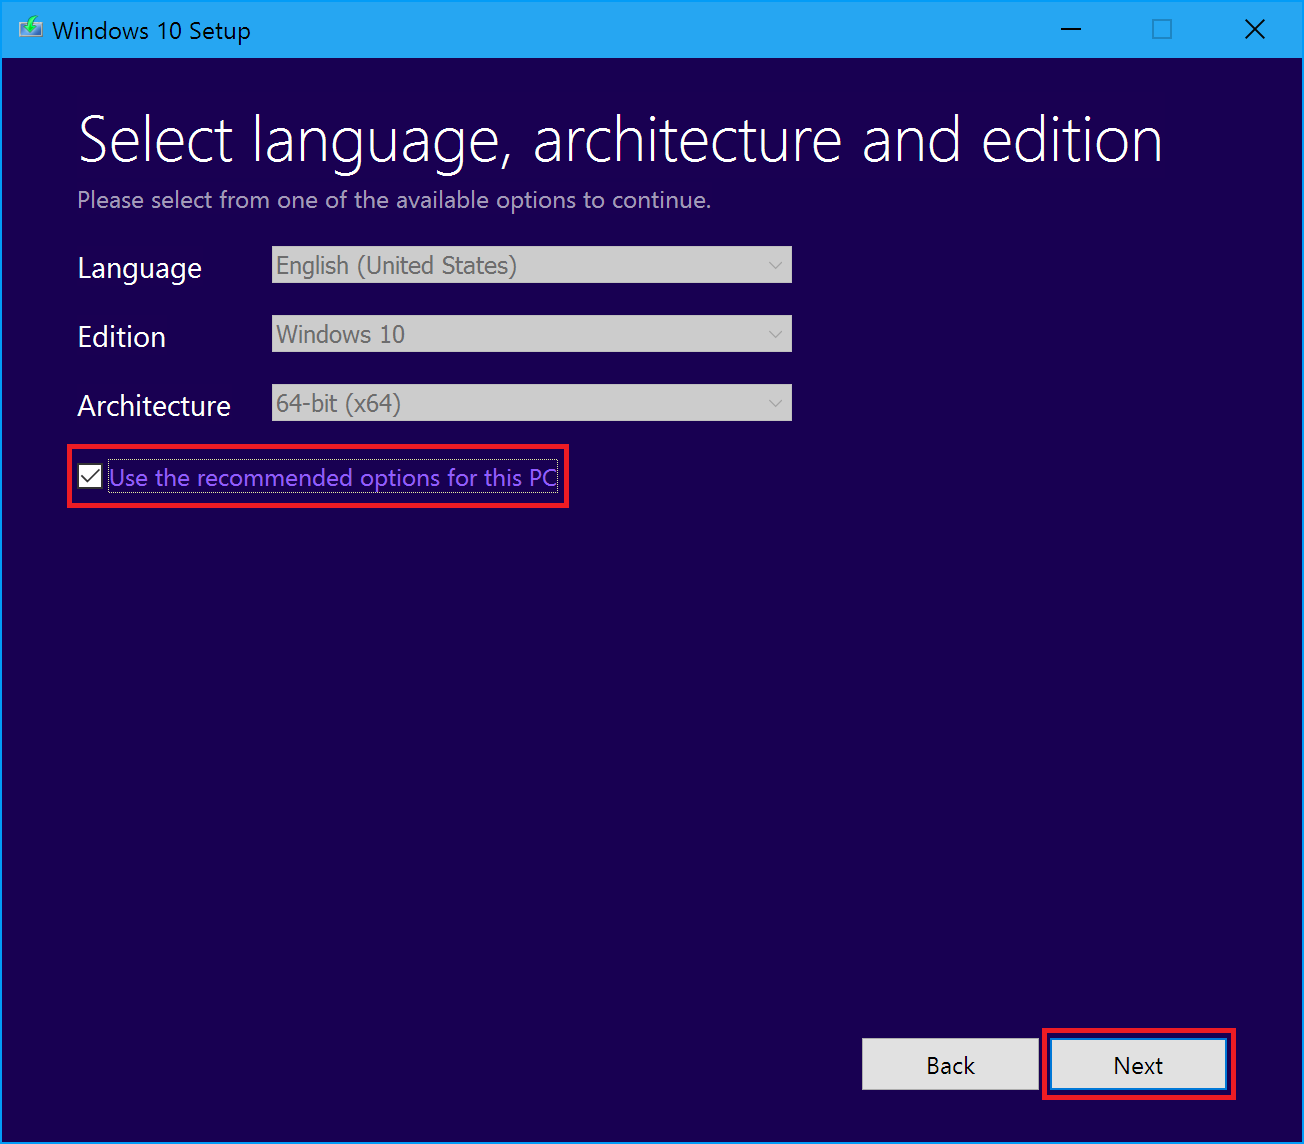
5. You can either “use recommended options for this PC” or uncheck the check box and select from the drop down list for the ISO file you need.
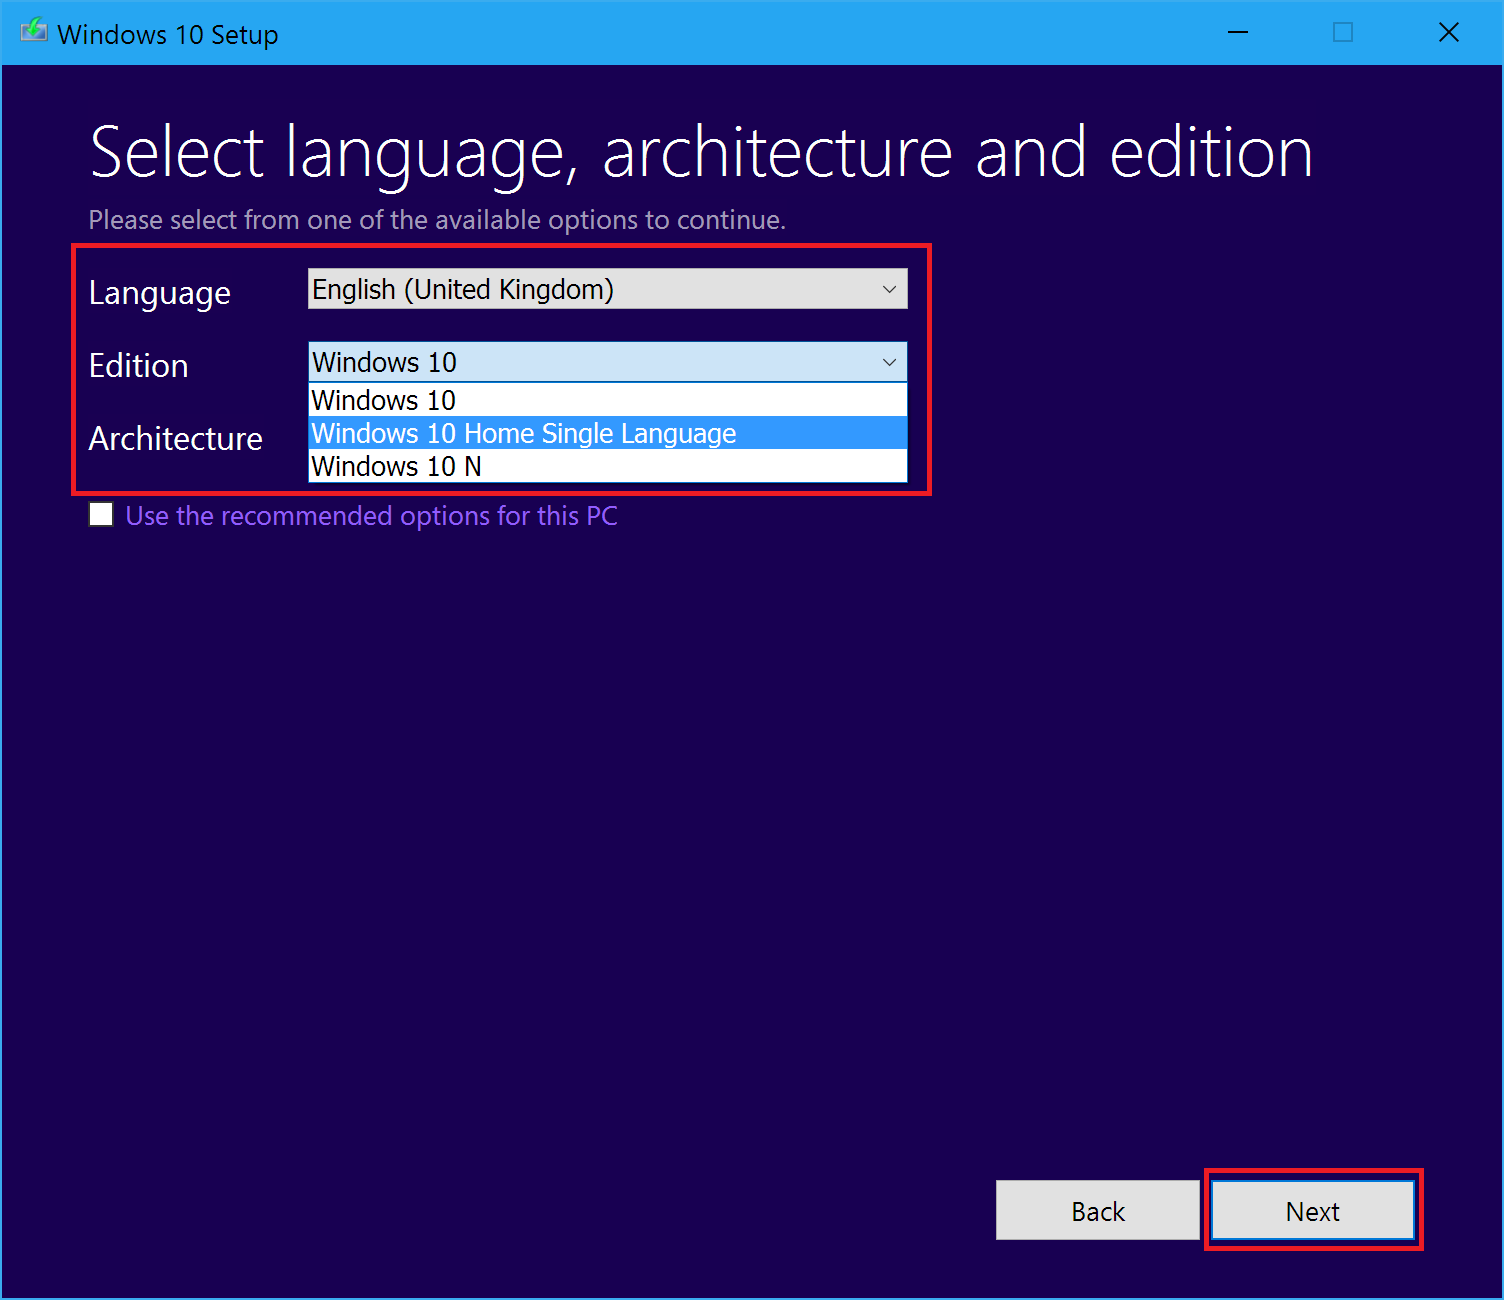
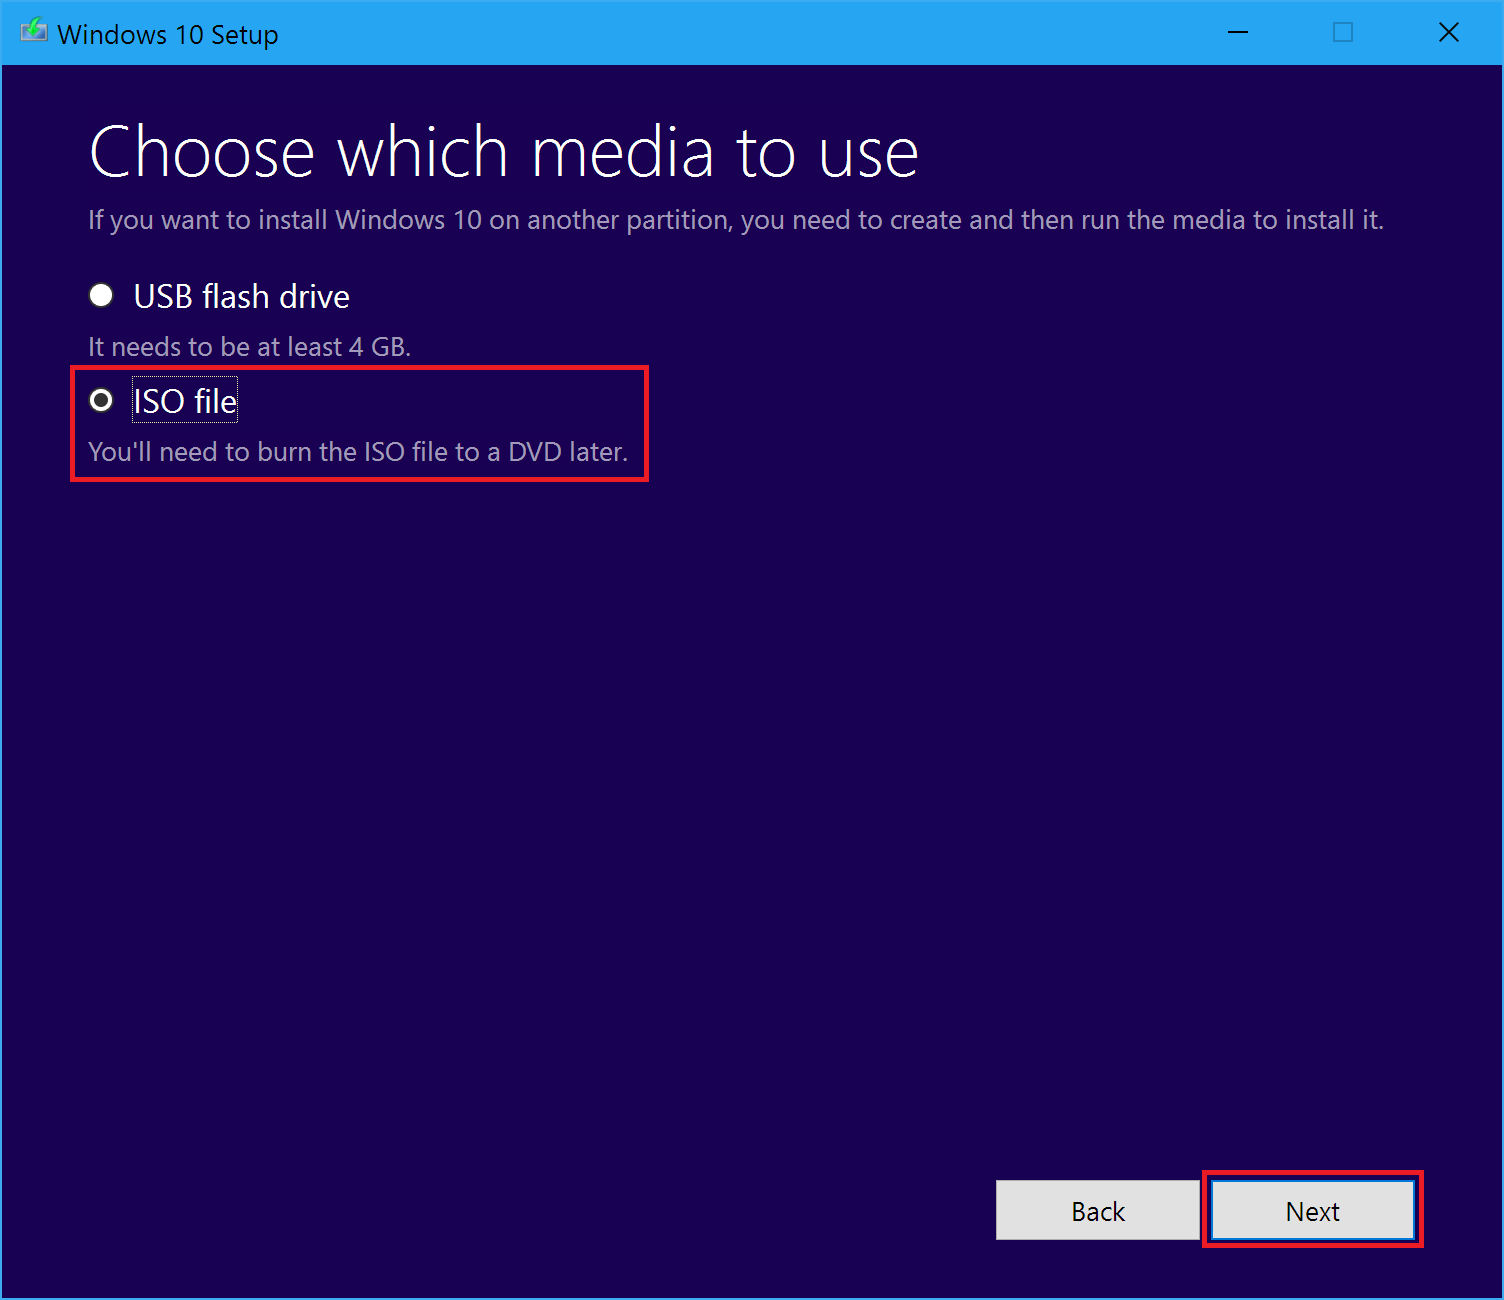
6. Select “ISO file” and click “Next”
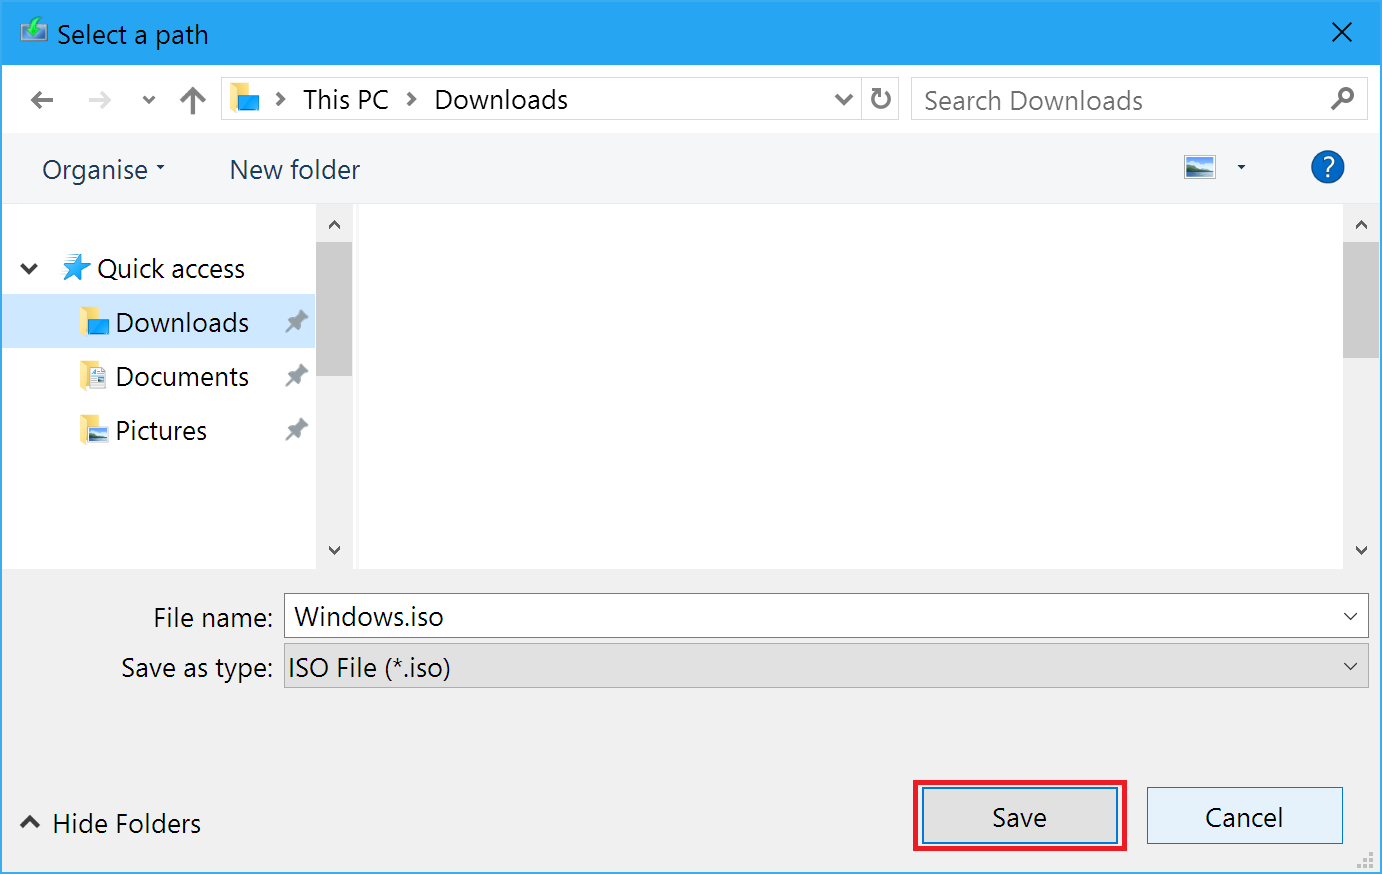
7. Choose a location to save the file and click “Save”
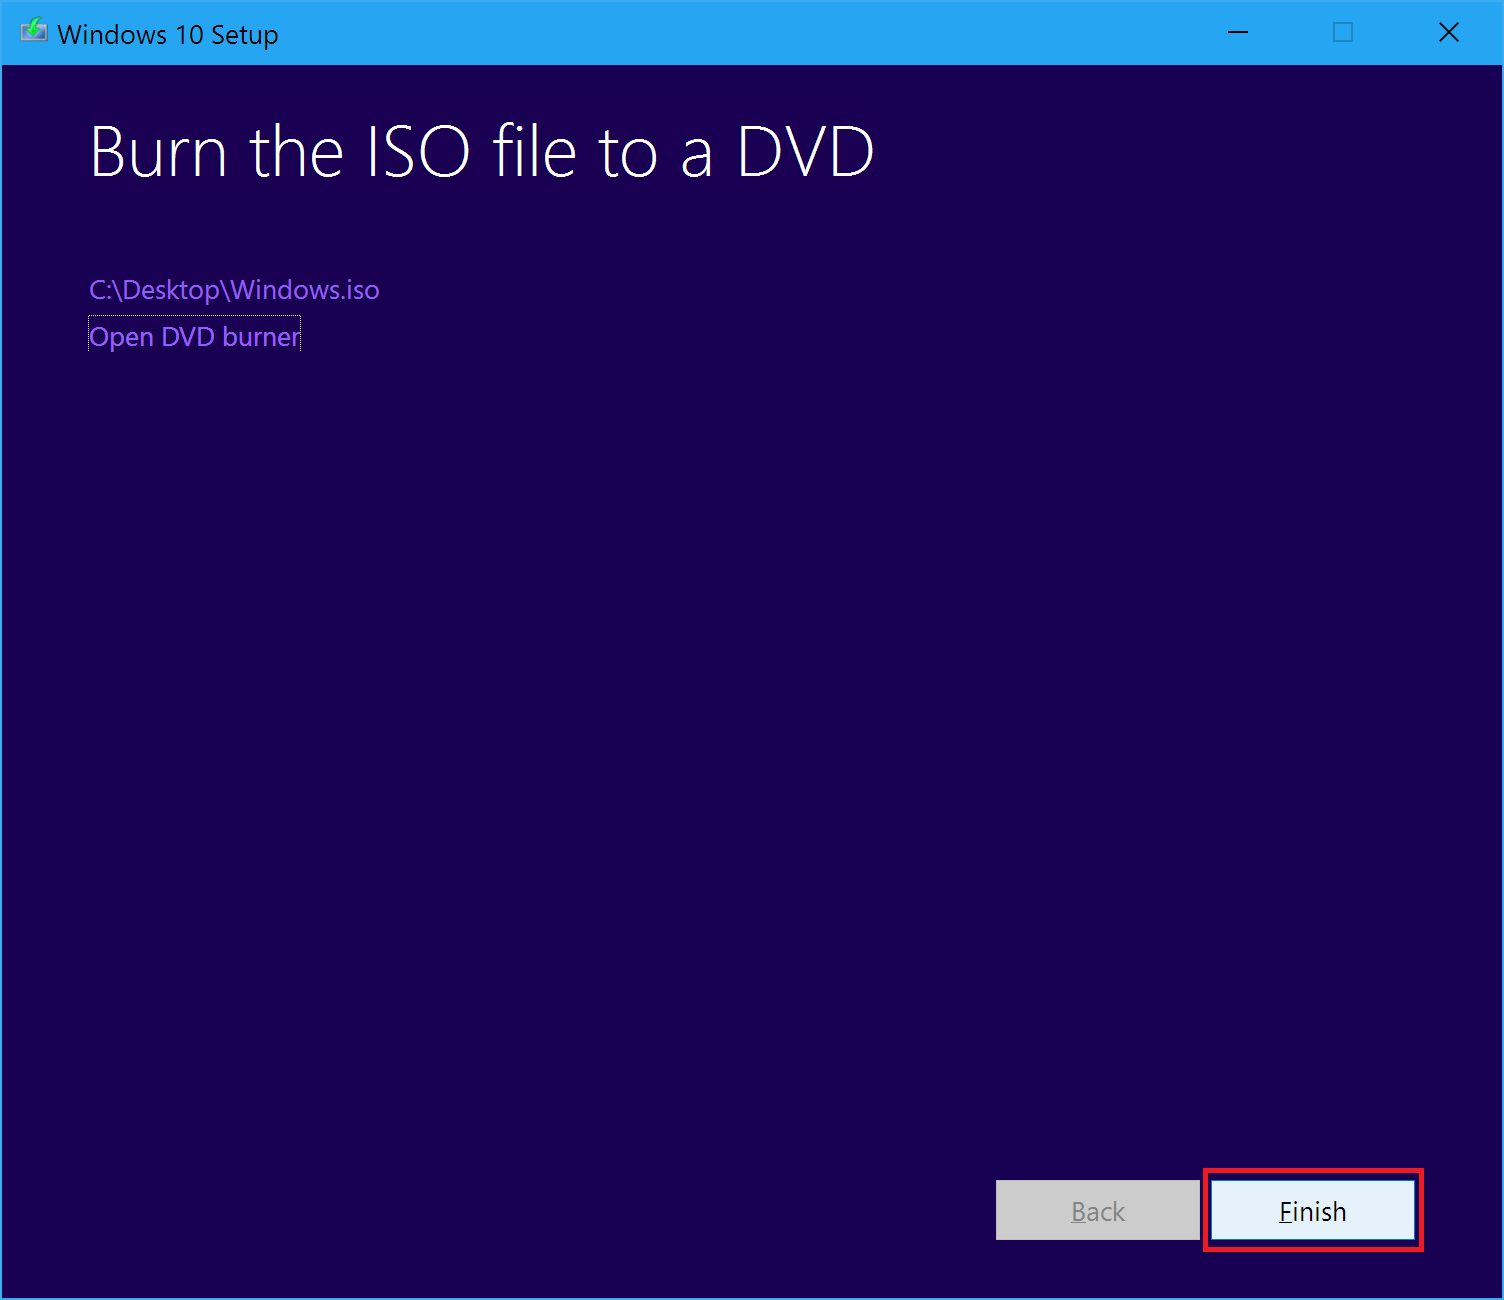
8. The download will begin. Just wait for the download to complete.
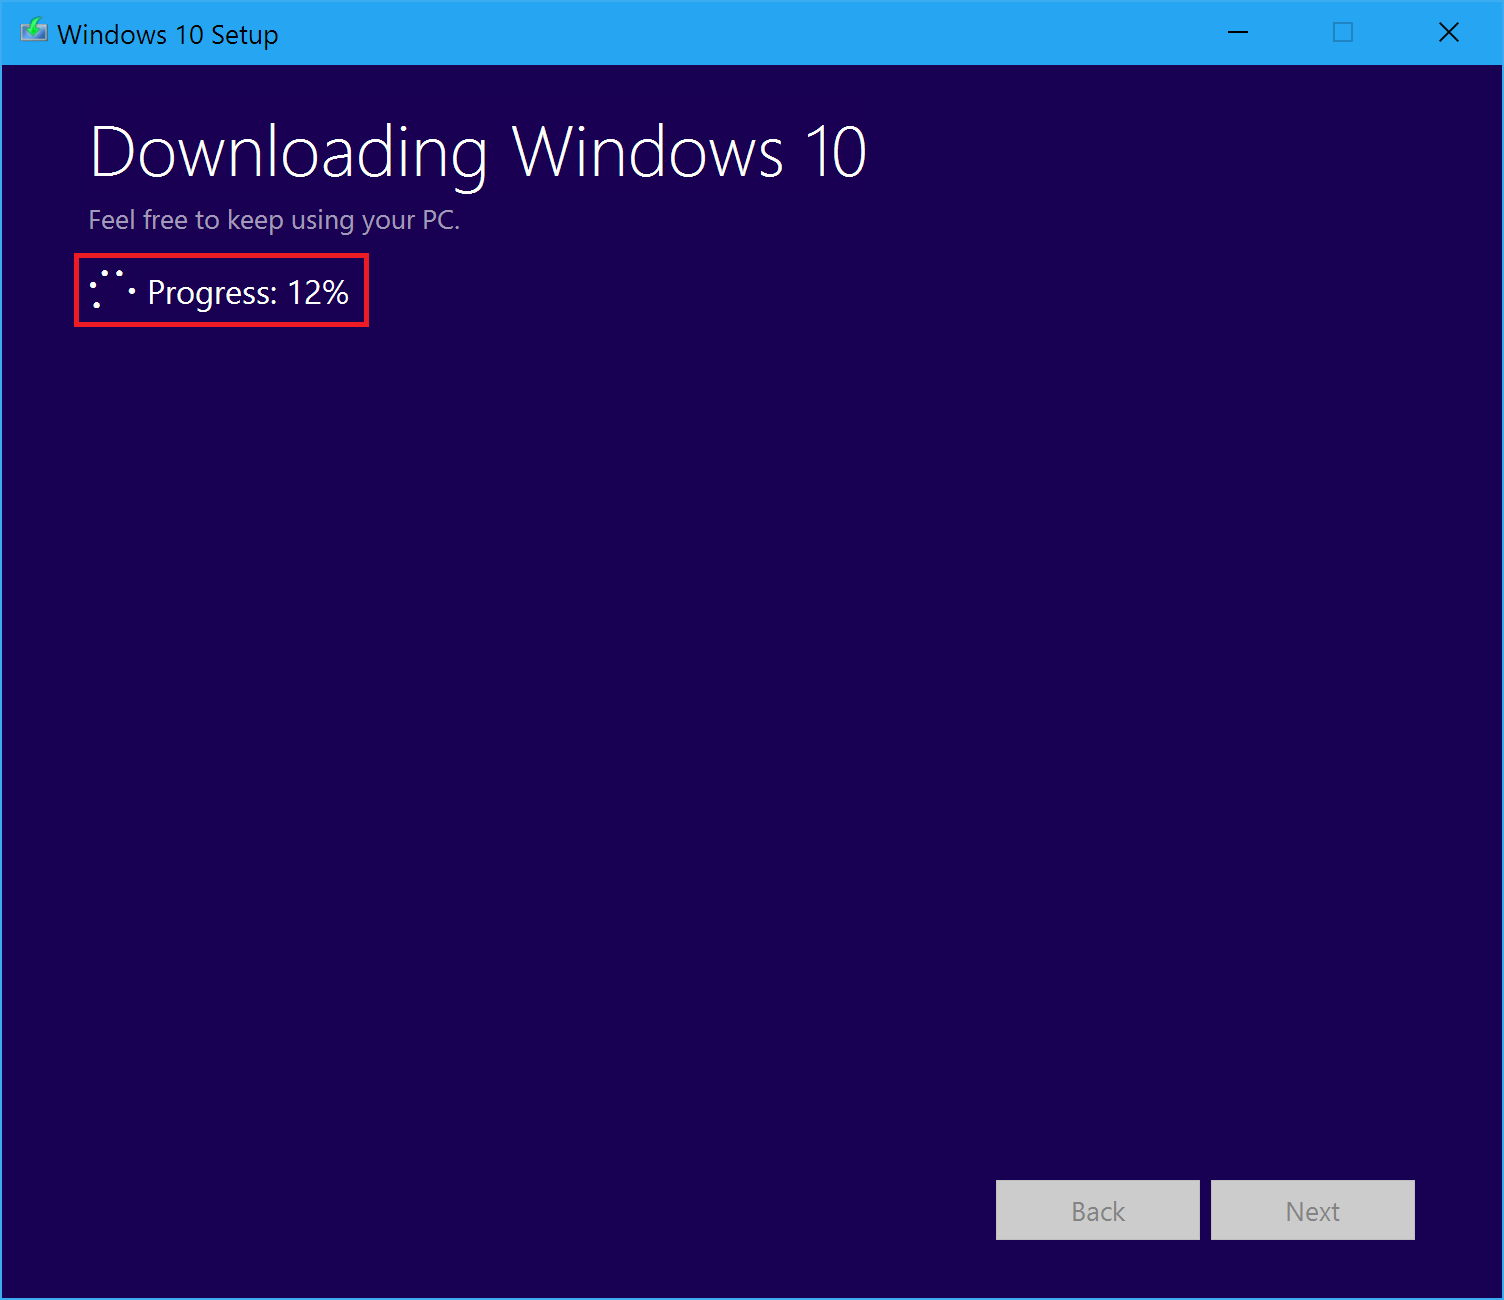
9. Click on “Finish” after the download has completed.
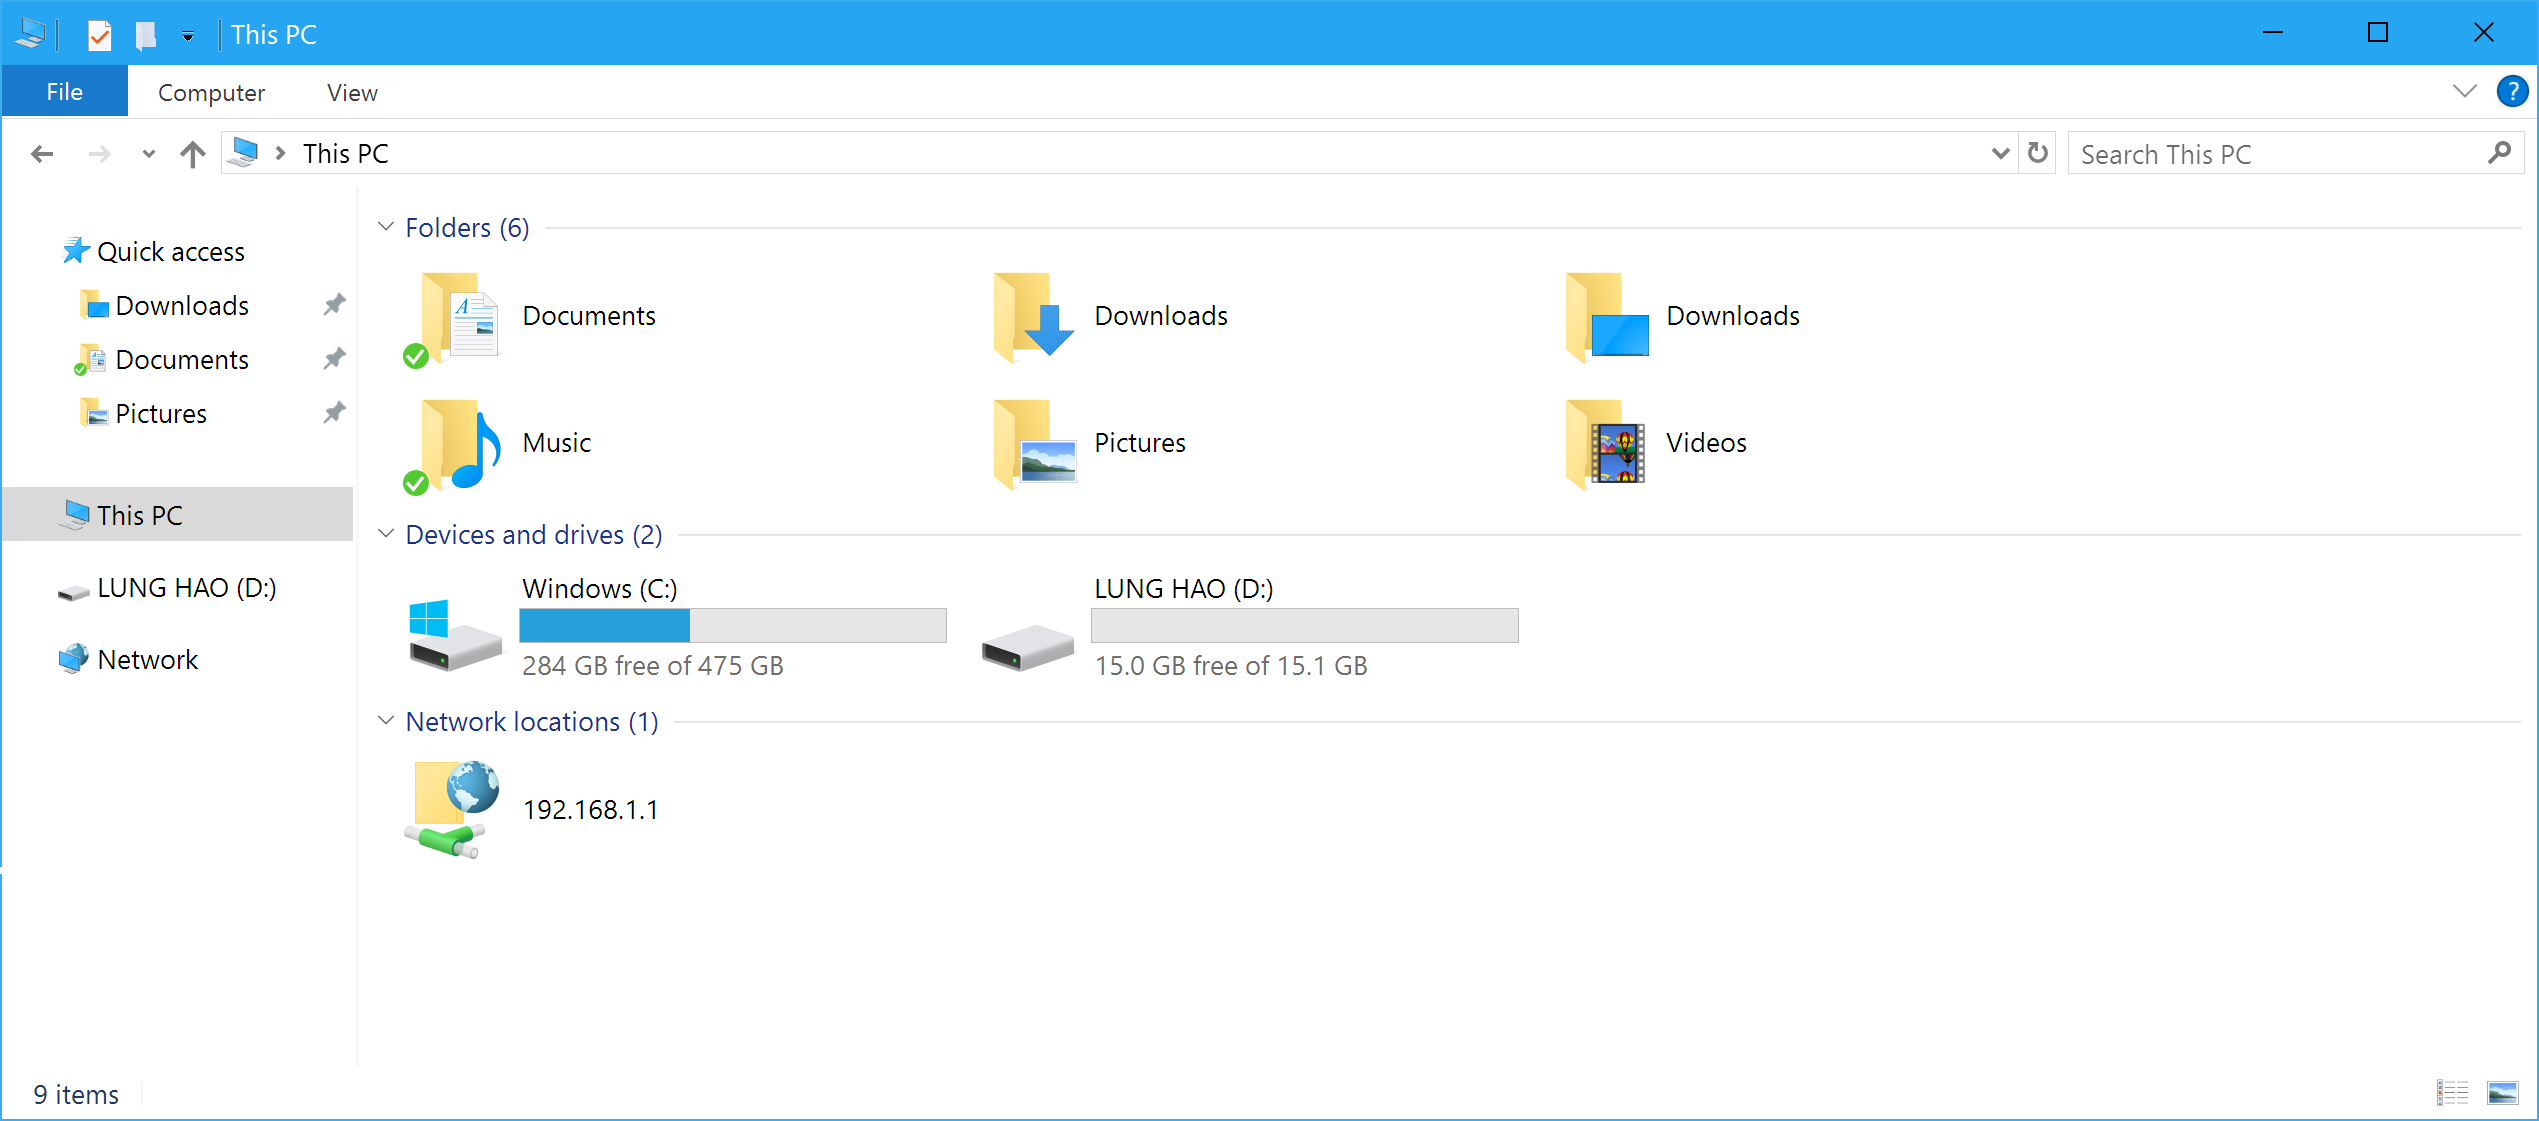
10. Plug in your thumb drive and go to “This PC”
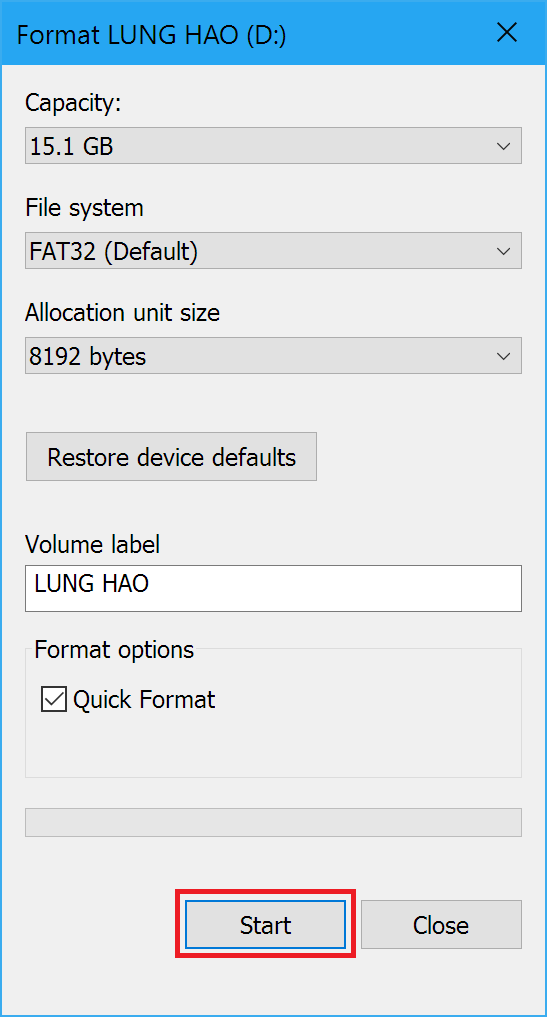
11. Right click on the drive icon of your thumb drive and select “Format…”
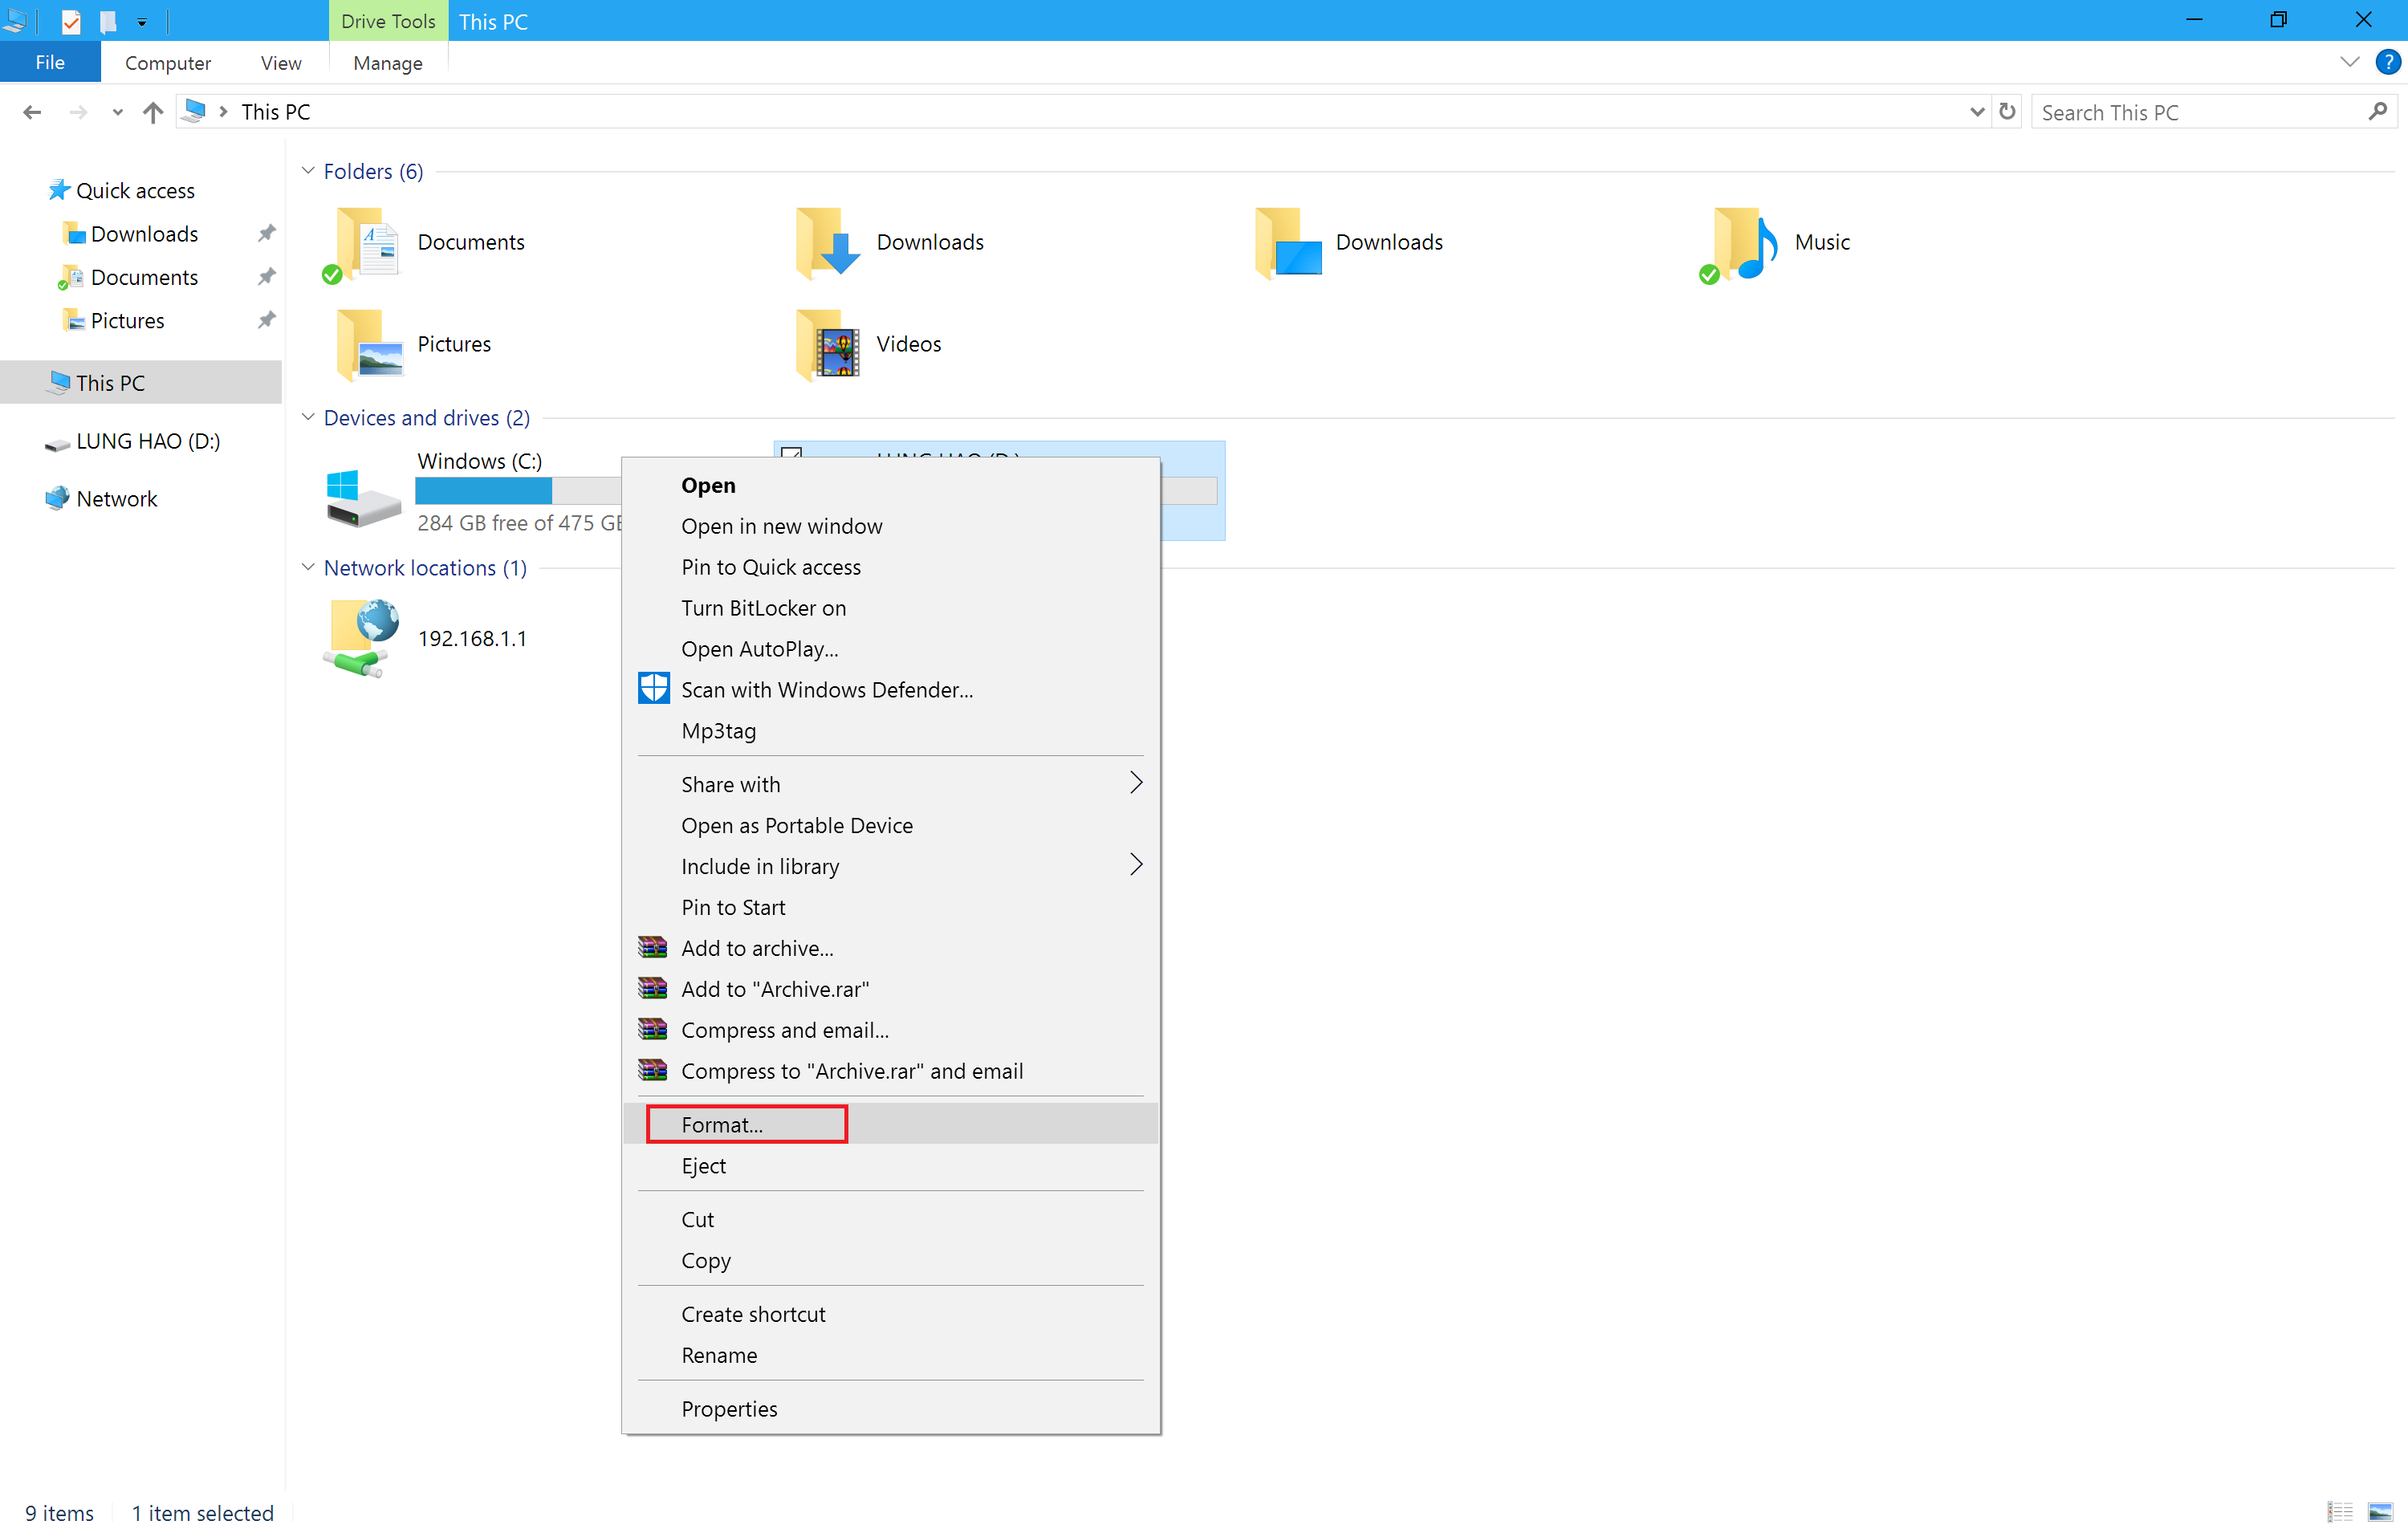
12. Click on “File system” and select “FAT32”
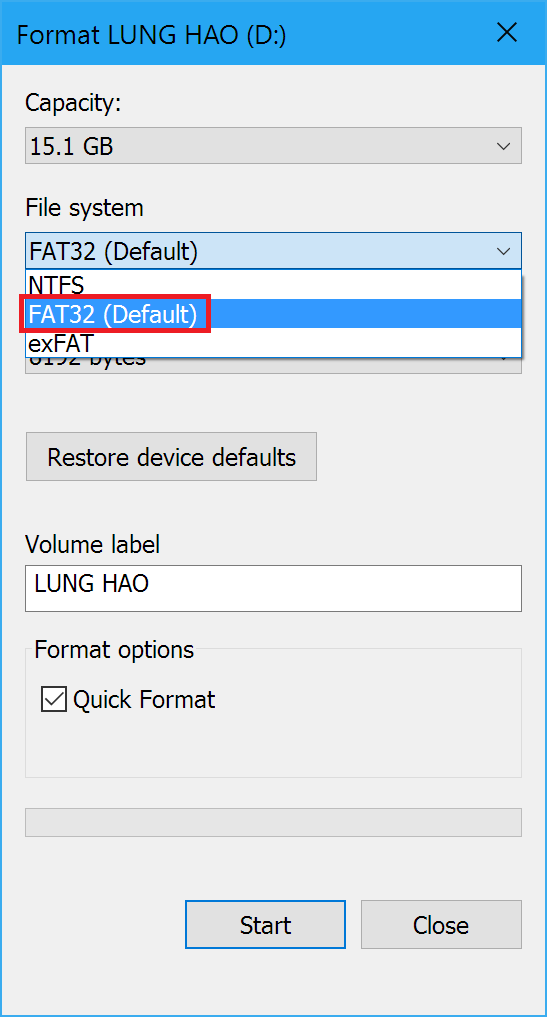
13. Click on “Start” to begin the format drive process. NOTE THAT THIS STEP WILL WIPE THE ENTIRE THUMB DRIVE.
14. Browse to the ISO file you have saved. Right click to get the drop down list. Select “Open with” then “Windows Explorer”.
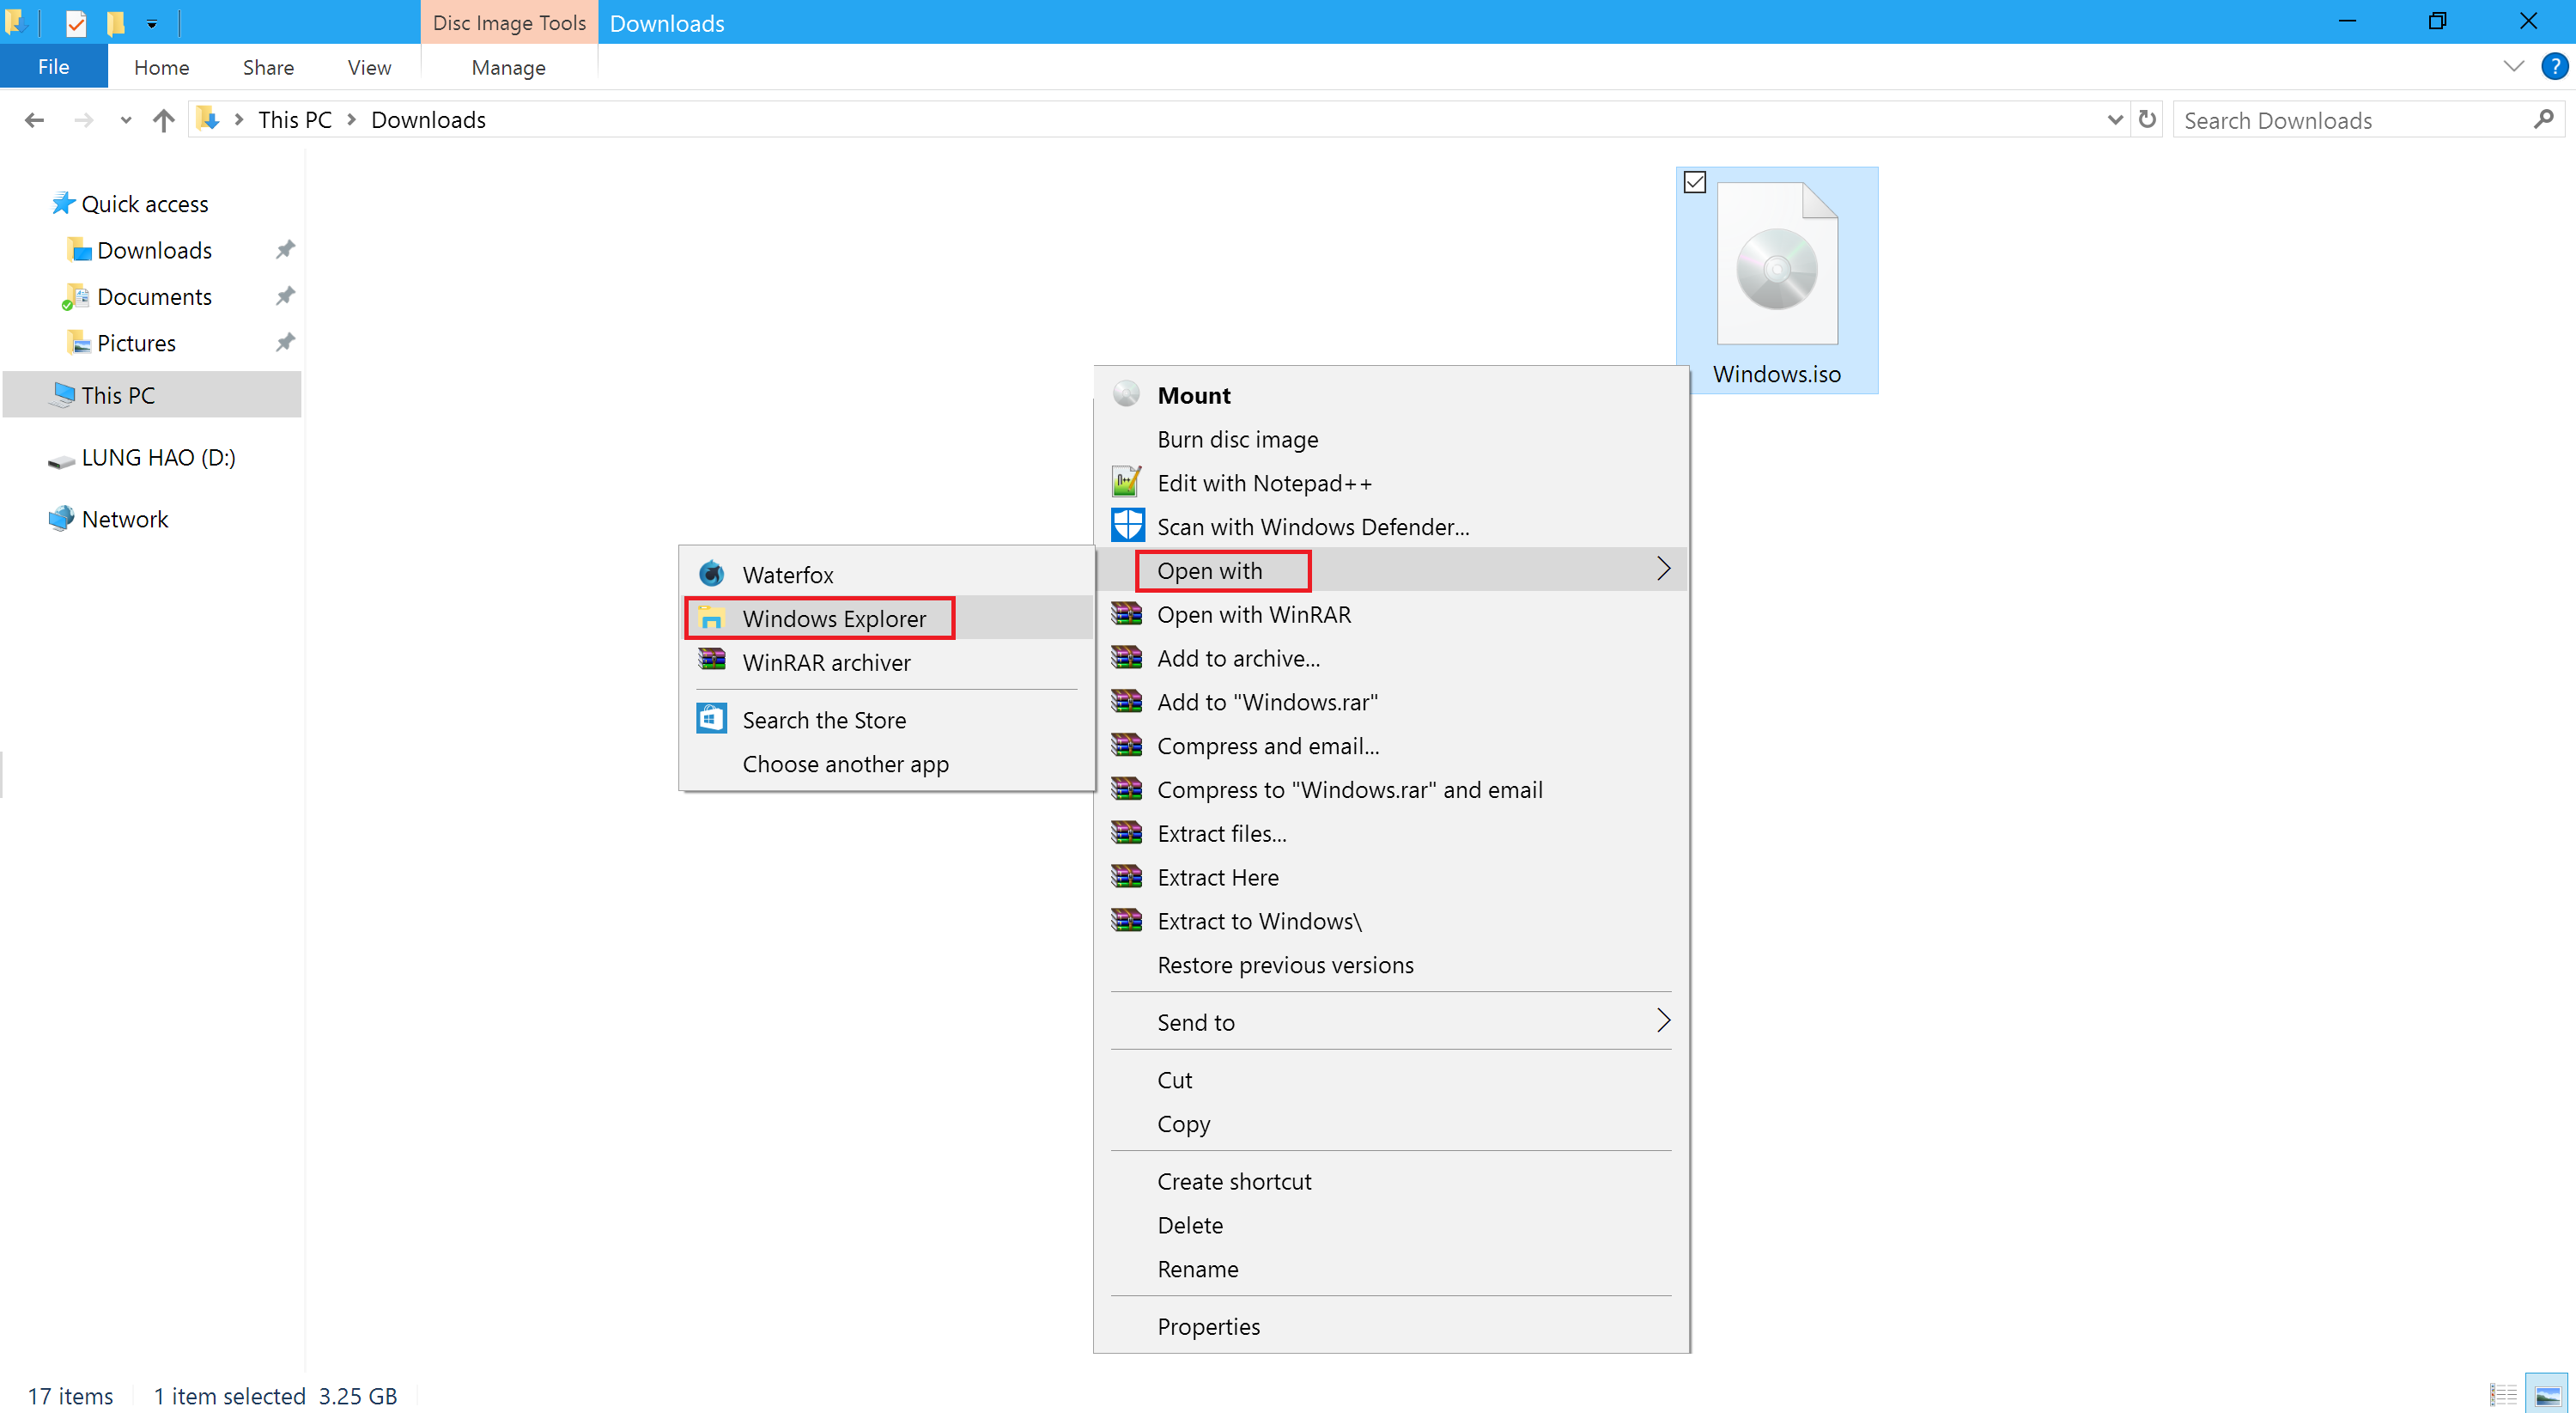
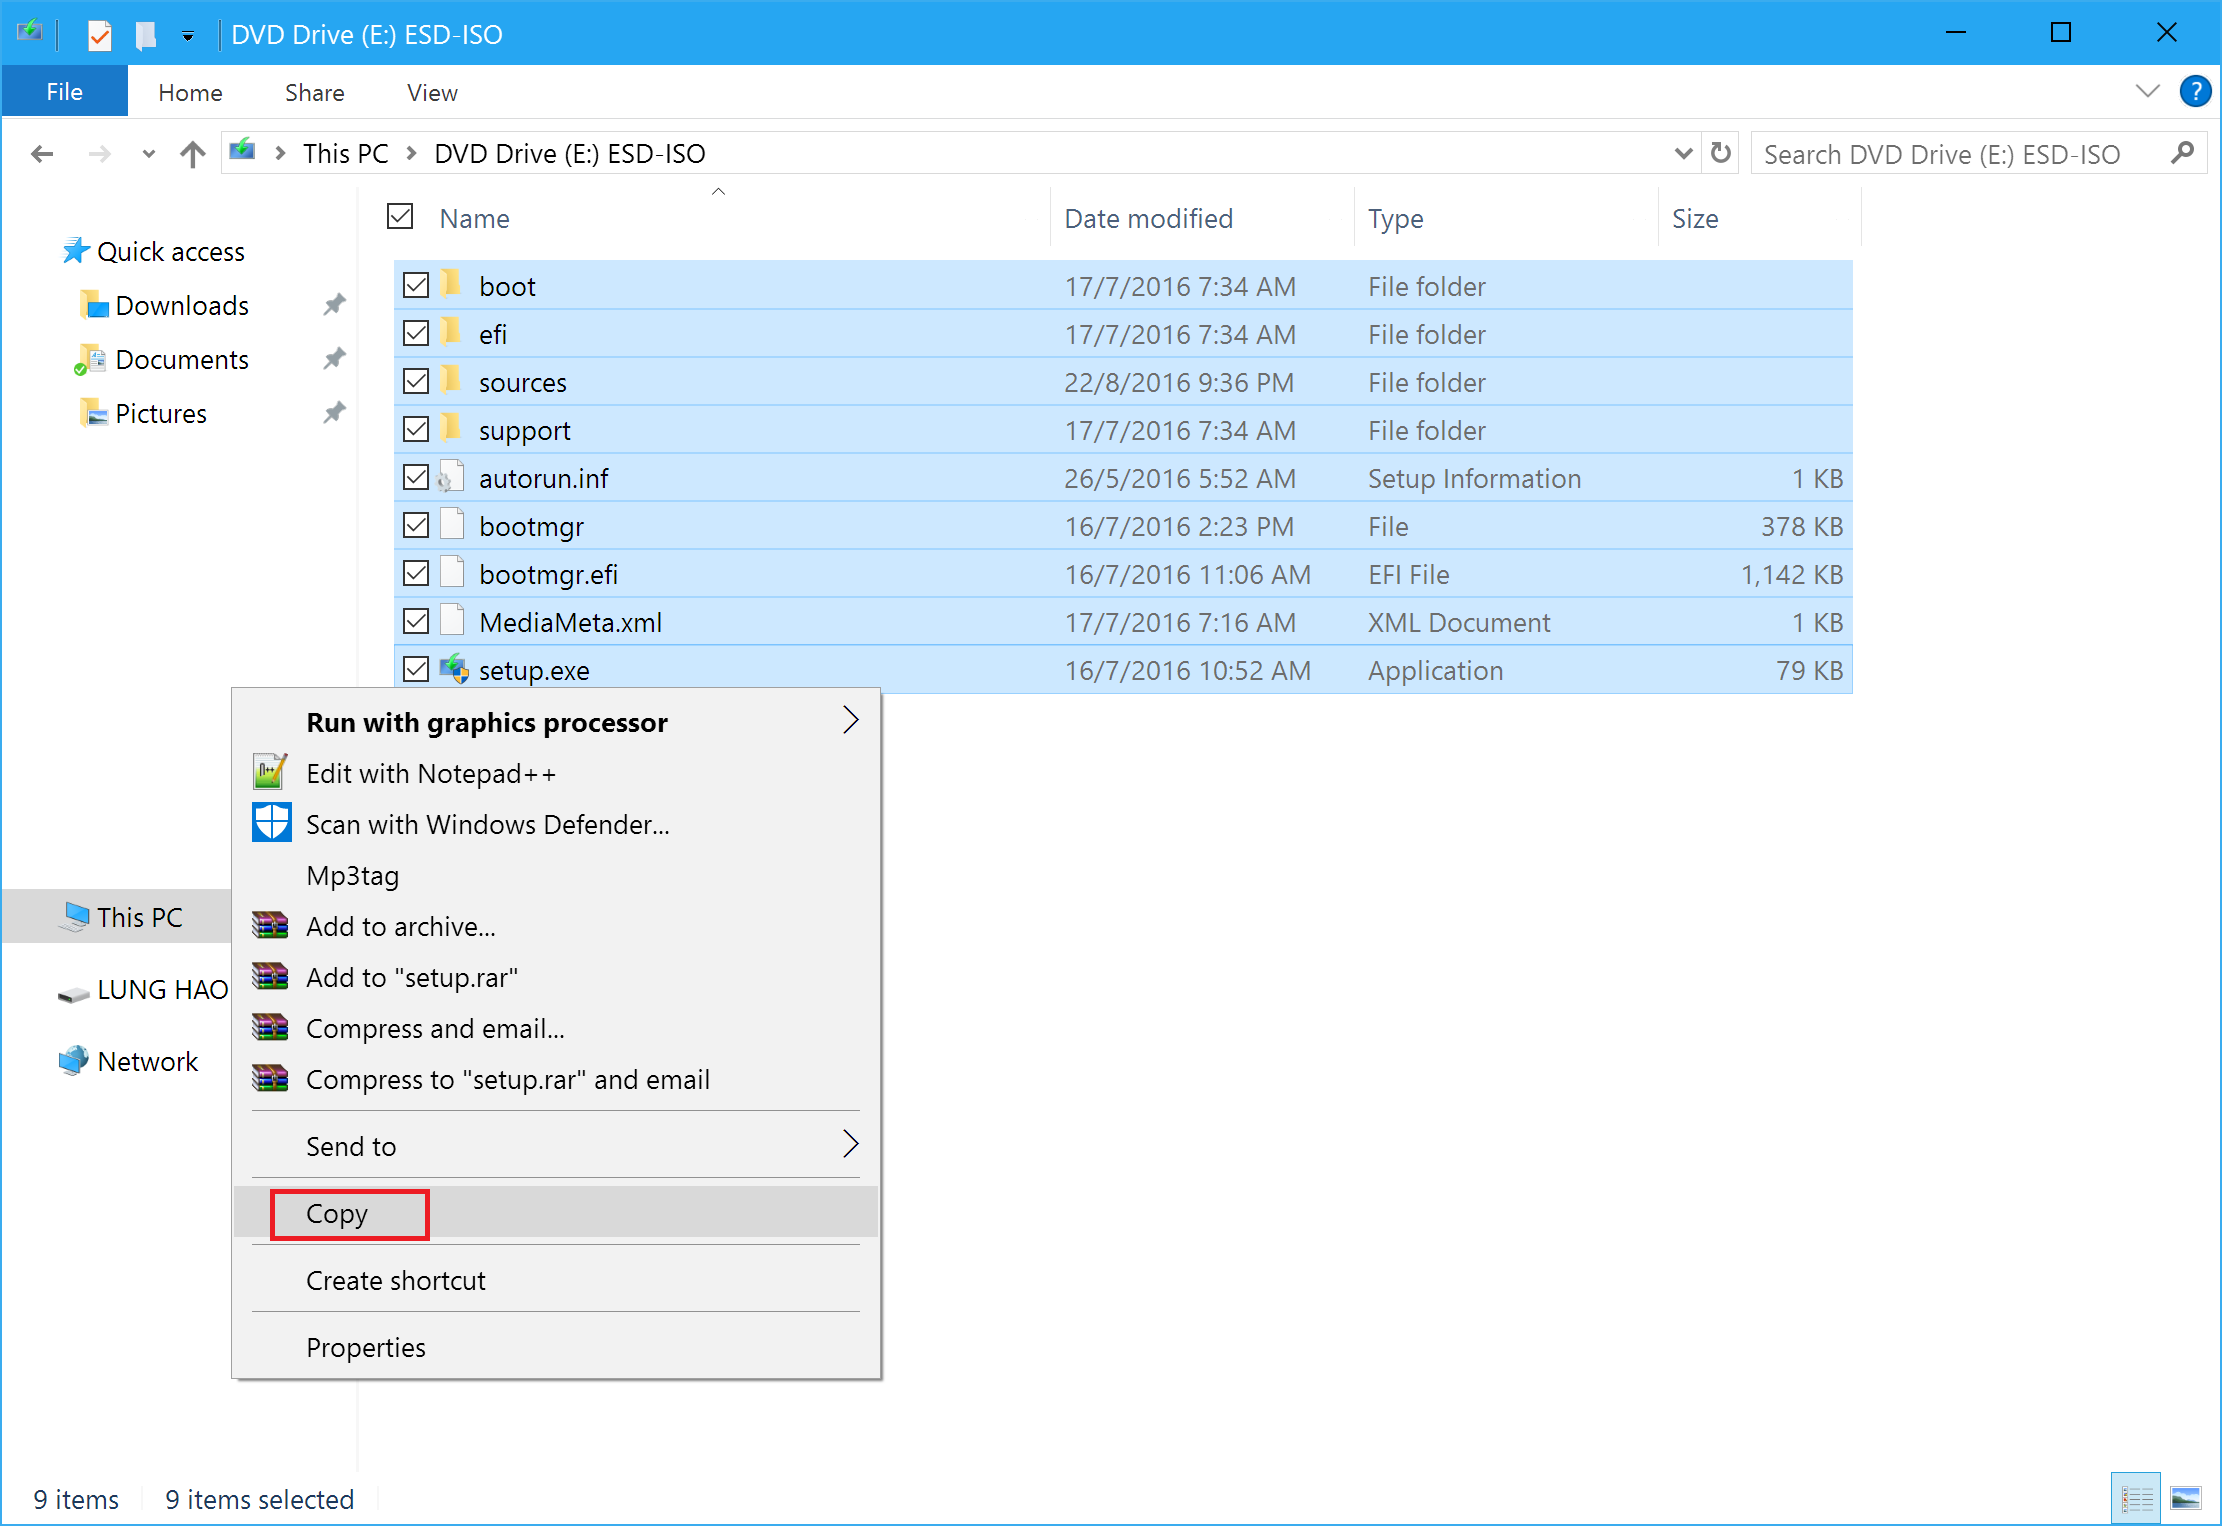
15. A Windows Explorer will open. Select all the files and copy it.
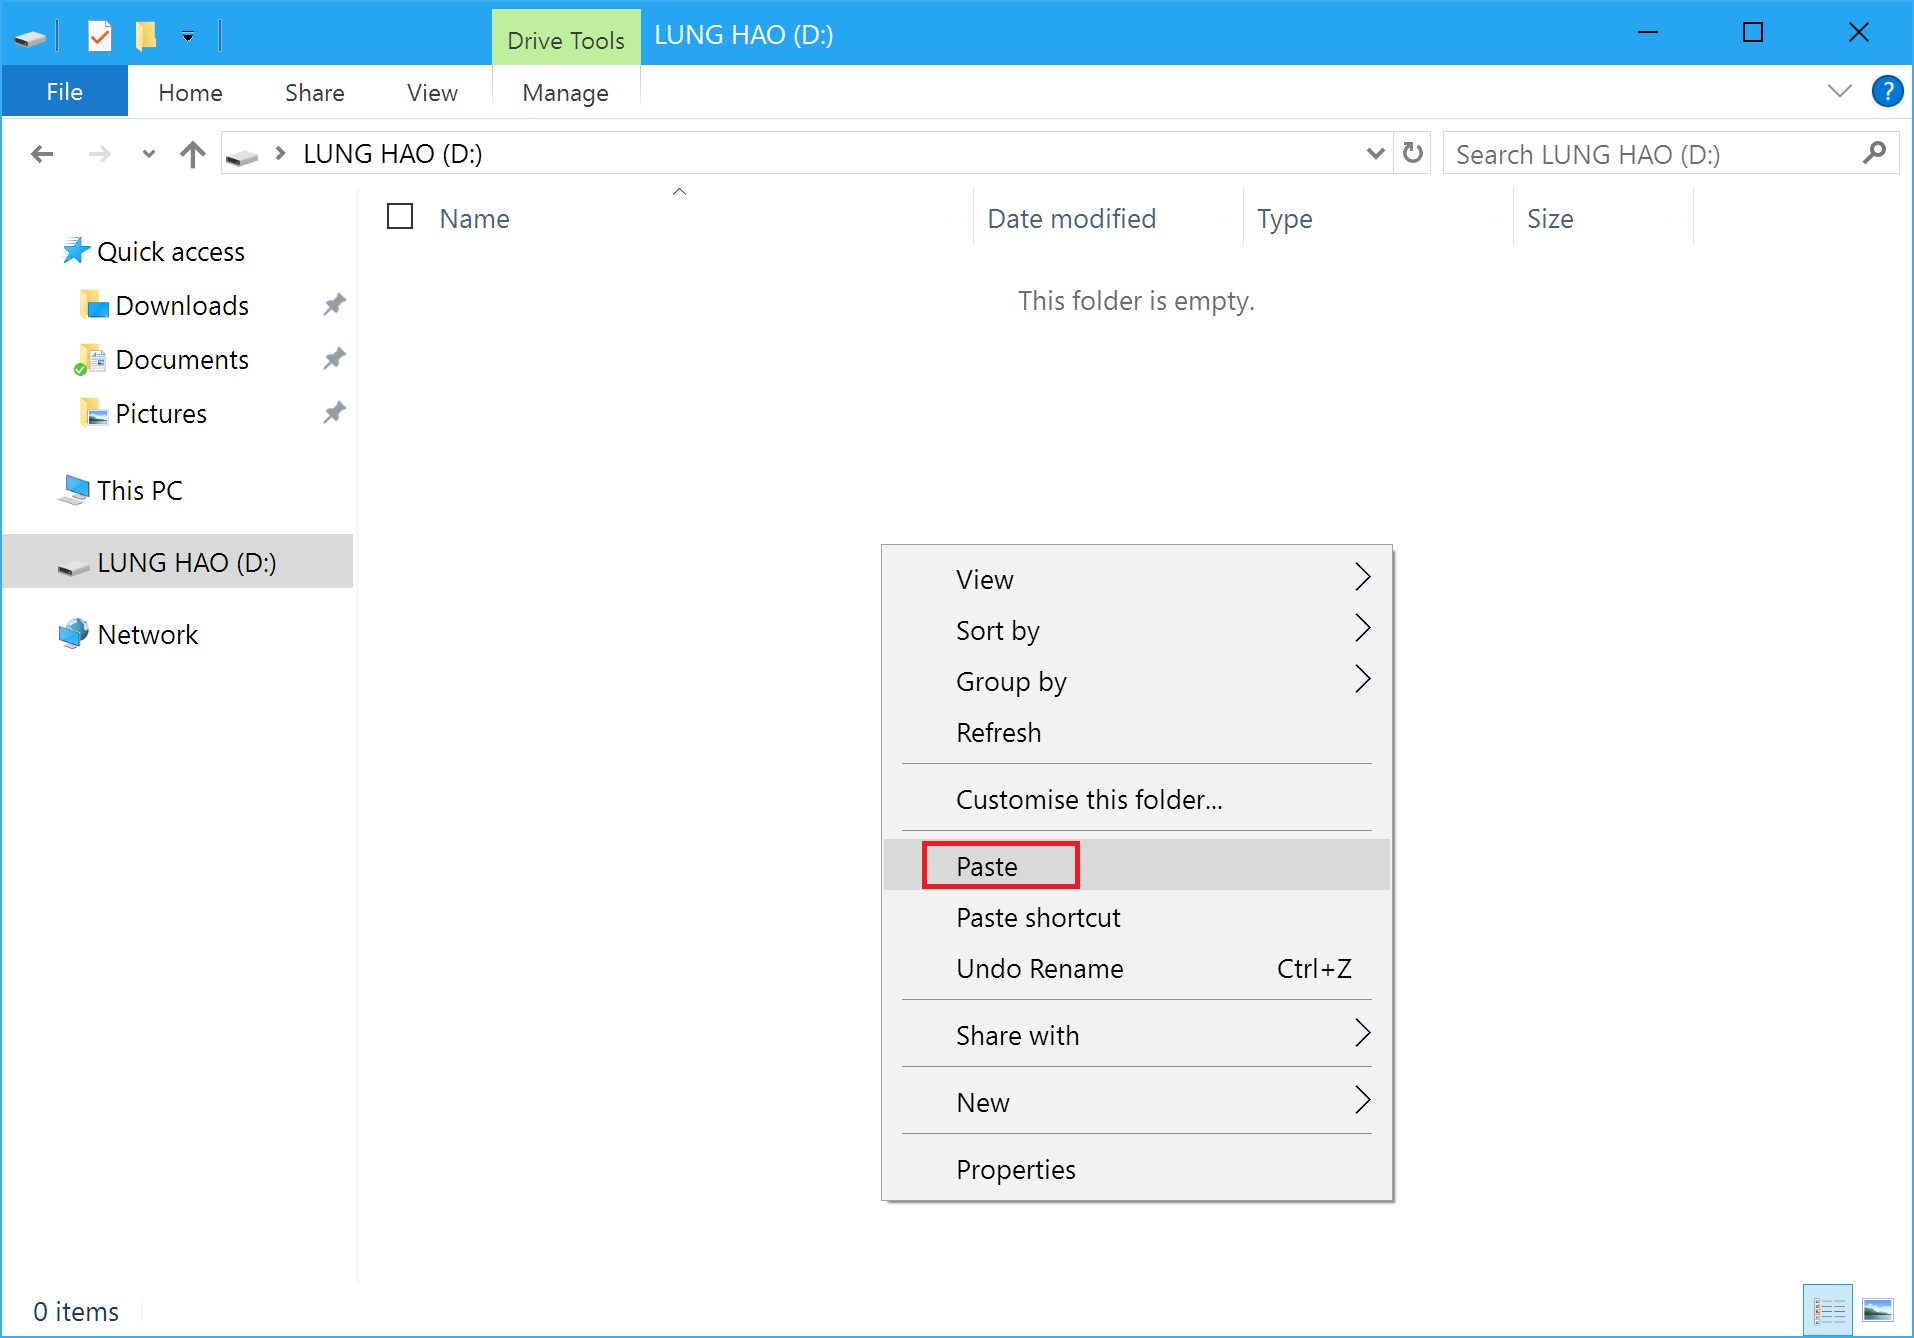
16. Go to the root folder of the thumb drive and paste the files into it.
17. That’s it! Your Surface bootable thumb drive is ready!
You may want to refer to https://www.microsoft.com/surface/en-ae/support/storage-files-and-folders/boot-surface-from-usb-recovery-device?os=windows-10 to see how to boot Surface from a USB device.
Cheers Lungic \(^o^)/
 Follow