 Looking for a guide to get the OpenVPN Community Version on Azure? Follow the guide below. So first up, What do we need? 1. 30-Day Trial Azure Subscription [link] 2. A little bit of knowledge of Linux shell commands 3. PuTTY [link] 4. OpenVPN GUI [link] Right. Now that we’ve gone through the pre-requisites, let’s move on to the fun part. First up, we gotta head into Azure and create a virtual machine. Let’s quick create a machine as seen below. A shared core and 768MB of RAM is more than enough for just an OpenVPN server as the overhead isn’t too large. If you want to change the region to another region, go ahead but leave the rest as defaults. Note down the password you use and the username. Once you press the create button, give it a little bit for Azure to set-up everything and then proceed to the next step once you see it’s Status in Azure has been updated to “Running” with a green tick at the left.
 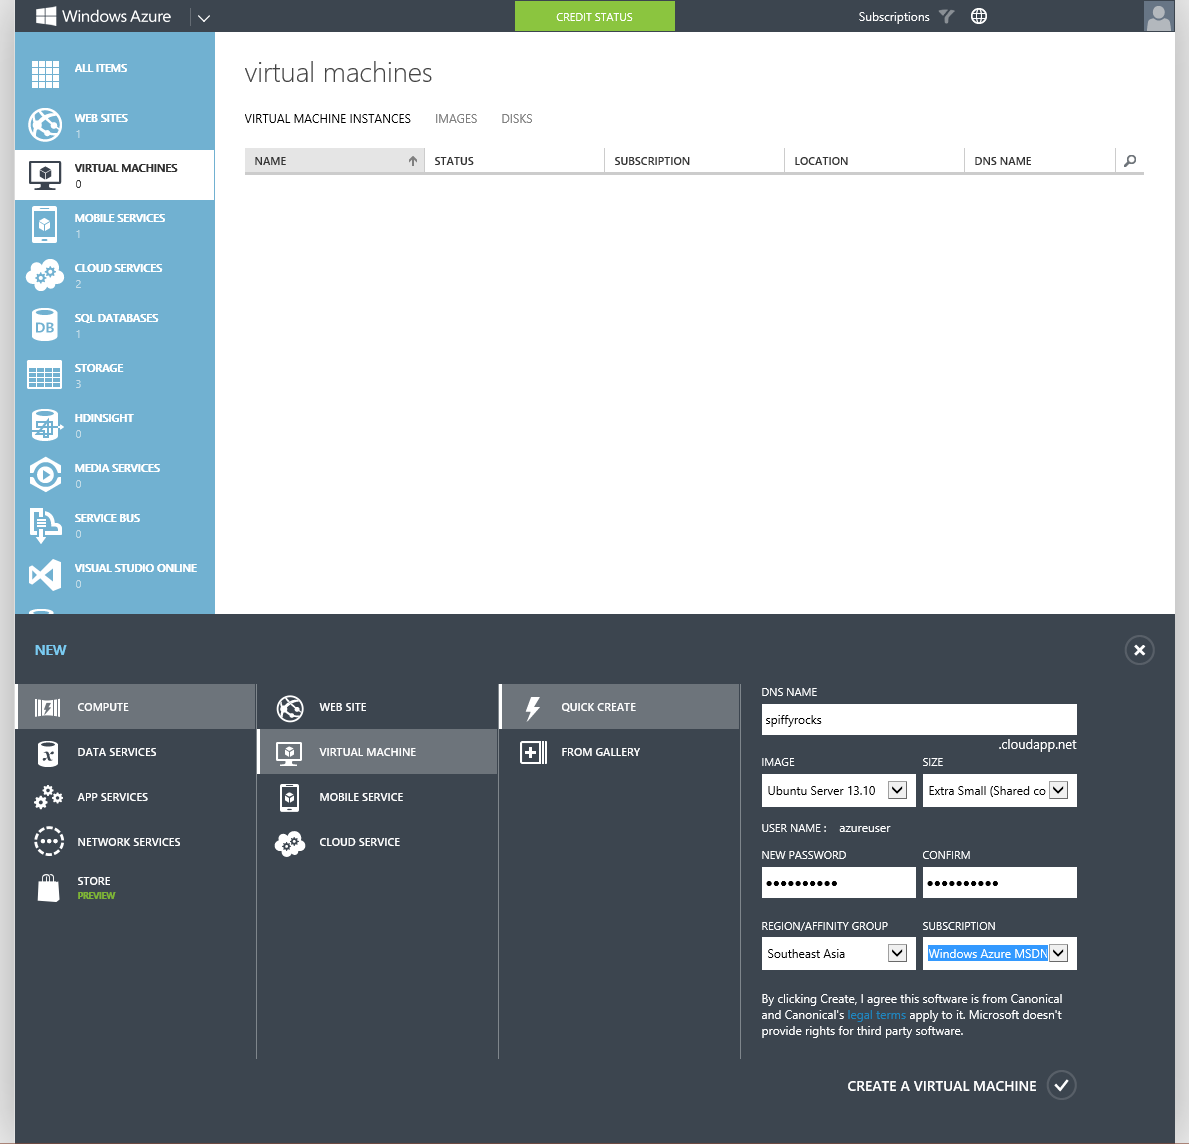 Now we have to configure some endpoints on the virtual machine itself as to make sure that your internet traffic is able to reach the virtual machine. Go to the Endpoints Tab in your Virtual Machine once it’s been created and hit the add button at the bottom. Both buttons have been highlighted in the image below.
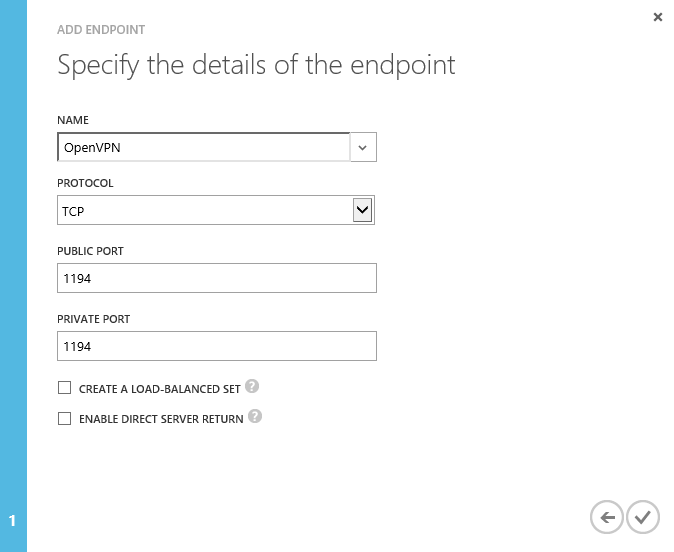
 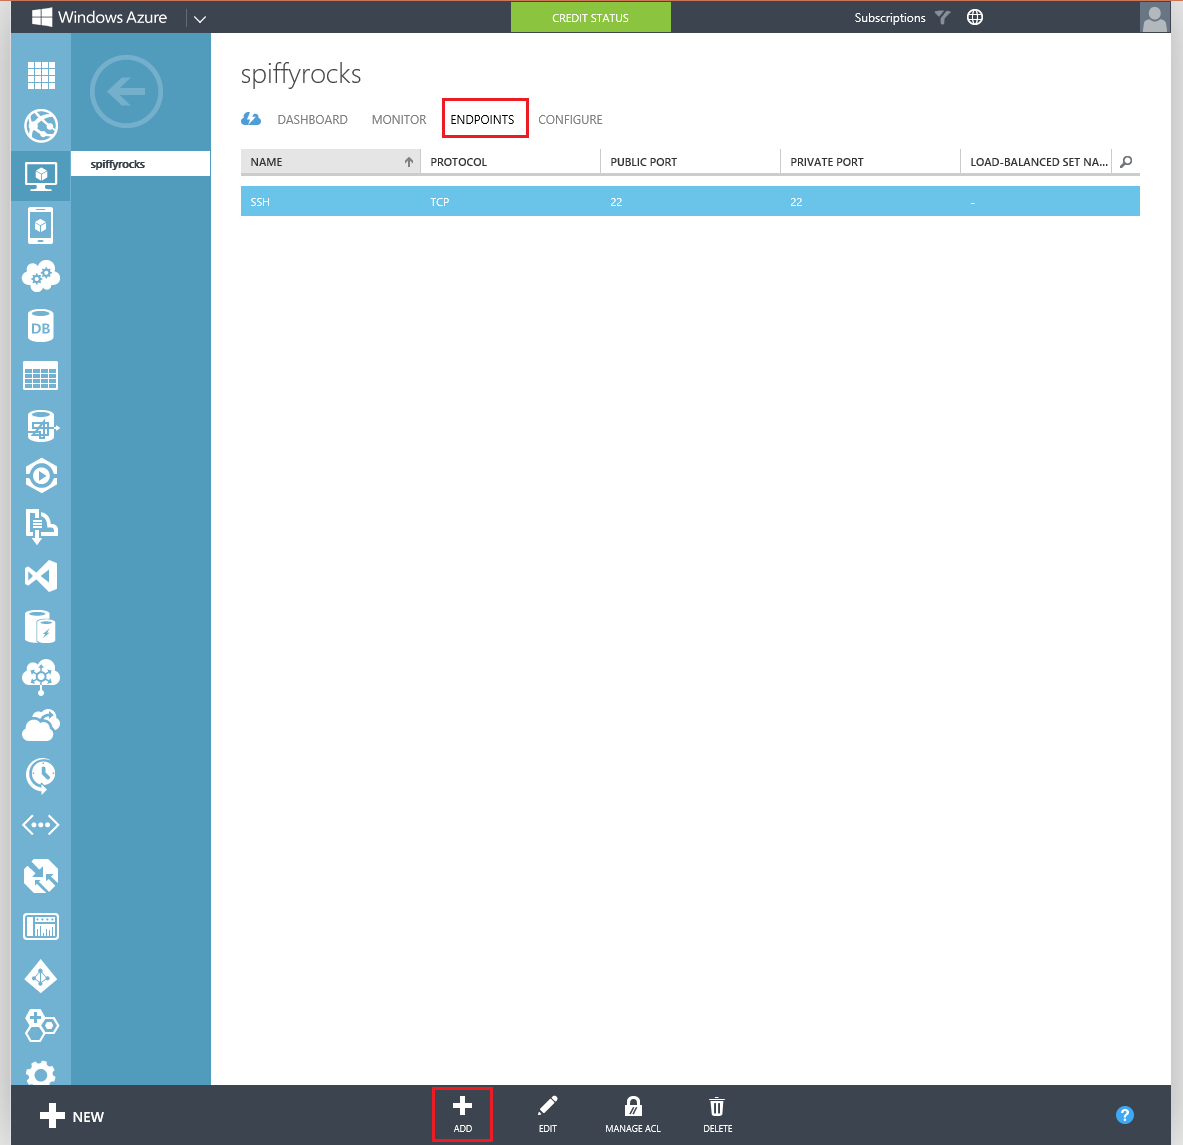 Once you select add, you will be presented with a small pop-up wizard. Configure it according to the two images below
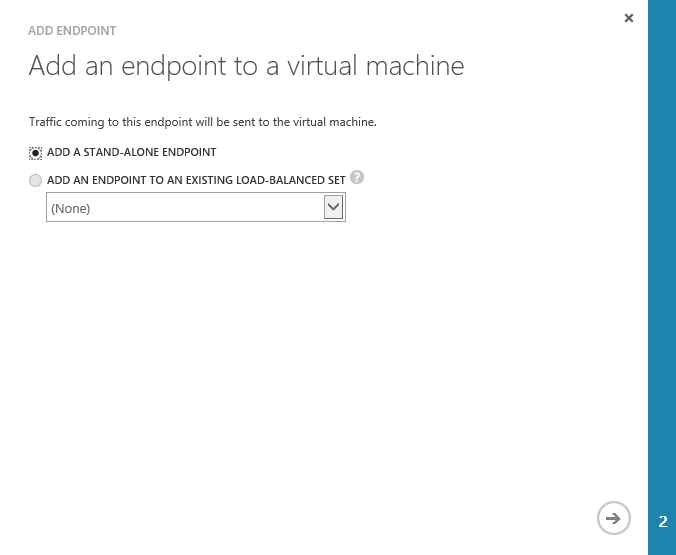
 If it is done correctly, you should have an Endpoints tab looking like the one below.
 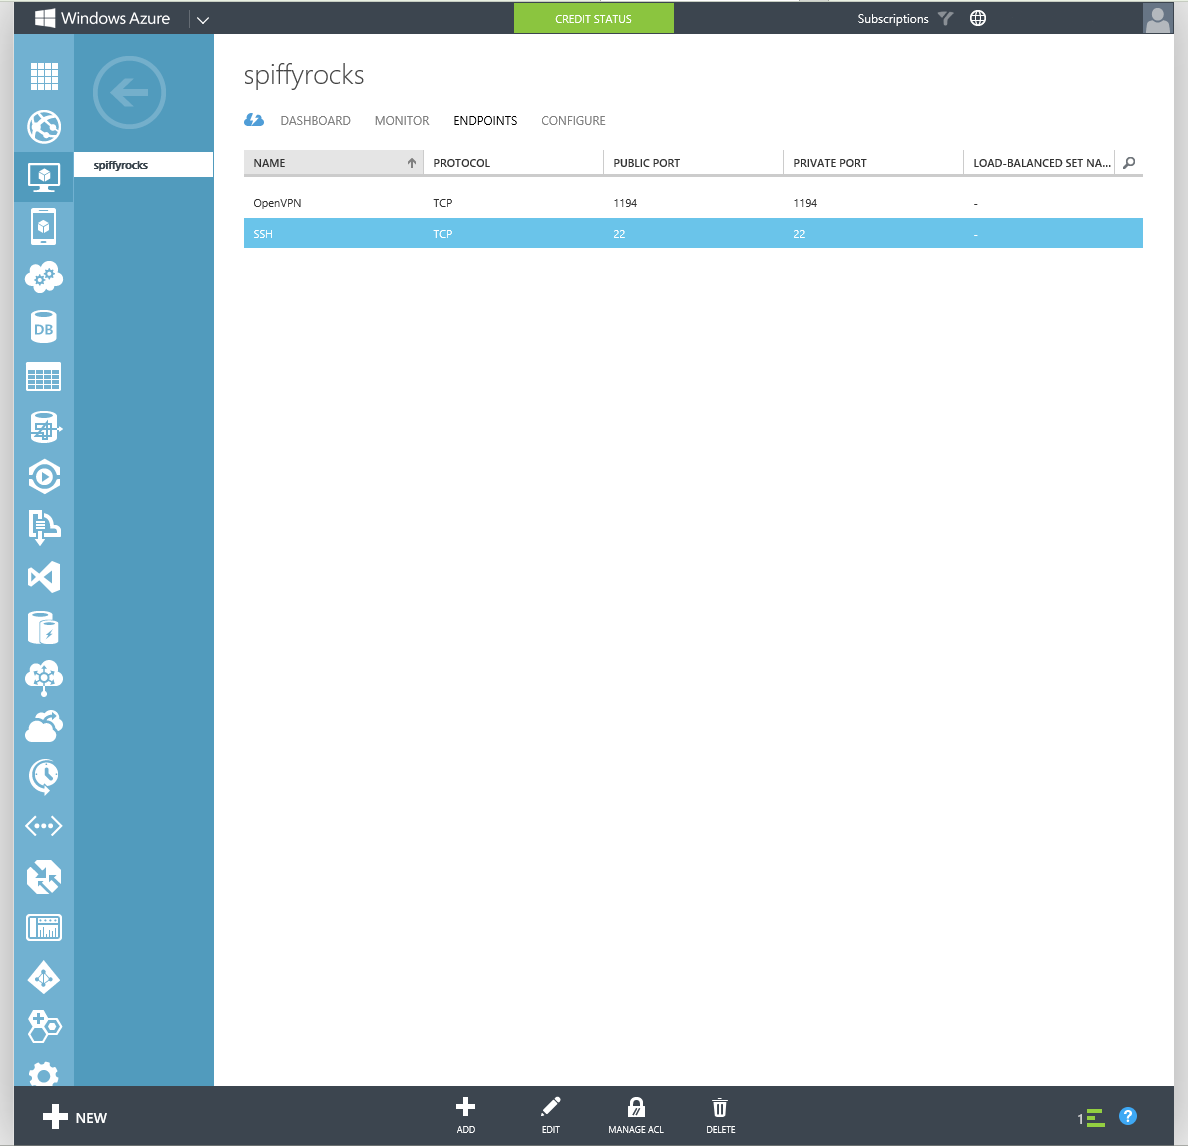 If all is good, it’s time to move on to configuring the virtual machine you just set-up! Now’s the time to fire up PuTTY that you downloaded just a moment ago.
 Fill up the relevant details in this format: username@dnsname Example: azureuser@spiffyrocks.cloudapp.net Hit Open to start connecting to the virtual machine.
 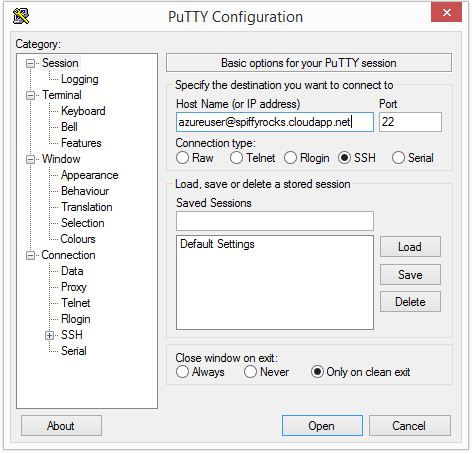 You will most likely get a warning like the one below but just hit yes.
 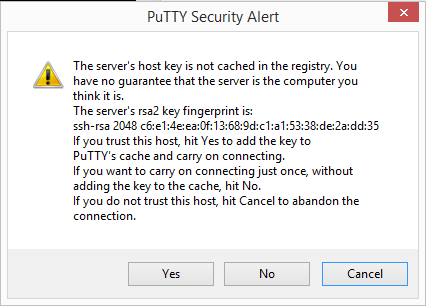 Next up you’ll have to key your password into the black box, don’t worry if you do not see your password being typed and just continue typing it and hit the Enter key when you’re done.
 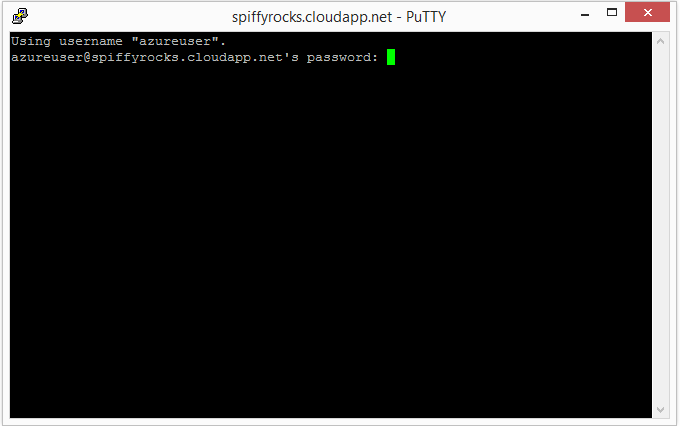 You should be logged into your Azure Virtual machine now and should see something similar to the image below.
 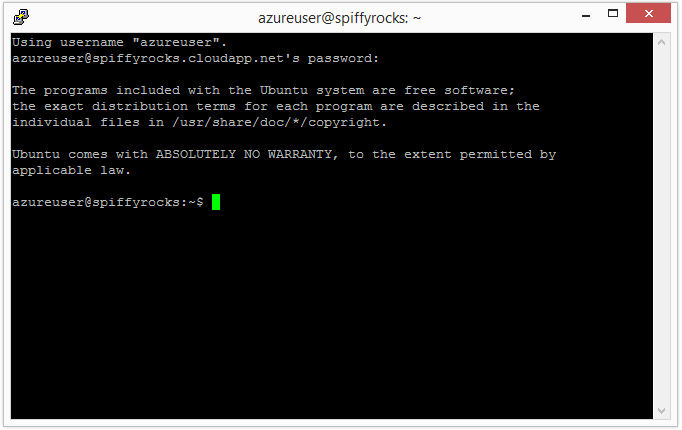 Now, let’s proceed onto this by just typing commands into the box above. Each line means a new command.
sudo -i apt-get install openvpn easy-rsa mkdir /etc/openvpn/easy-rsa/ cp -r /usr/share/easy-rsa/* /etc/openvpn/easy-rsa/ cd /etc/openvpn/easy-rsa/ source vars ./clean-all ./build-ca ./build-key-server spiffyrocks ./build-dh cd keys/ cp spiffyrocks.crt spiffyrocks.key ca.crt dh1024.pem /etc/openvpn/ nano /etc/sysctl.conf
*Note: You will have to enter the details accordingly to generate the certificates and answer ‘y’ during the installation of packages or the signing of certificates. When executing the command ./build-key-server, instead of using ‘spiffyrocks’ you can choose to use your own name, all you have to do is substitute accordingly. *Note 2: If you are using the newest Long Term Support of Ubuntu which is 14.04, the ./build-dh command automatically generates a 2048 bit diffie-hellman. You would have to replace dh1024.pem with dh2048.pem instead. And in the below openvpn configuration file you would have to find dh1024.pem and replace it with dh2048.pem Now you have to edit a line in this file. Look for this section in the file by using your arrow key to scroll down the file
# Uncomment the next line to enable packet forwarding for IPv4 #net.ipv4.ip_forward=1
Change this section to:
# Uncomment the next line to enable packet forwarding for IPv4 net.ipv4.ip_forward=1
Then press Ctrl + O and Enter then press Ctrl + X Now let’s set-up the OpenVPN Configuration files on the server.
cp /usr/share/doc/openvpn/examples/sample-config-files/server.conf.gz /etc/openvpn/ gzip -d /etc/openvpn/server.conf.gz nano /etc/openvpn/server.conf
Here we are back in nano (nano is a Text Editor) again and let’s edit this configuration file now. Make the relevant changes as listed below: From:
# TCP or UDP server? ;proto tcp proto udp
To:
# TCP or UDP server? proto tcp ;proto udp
From:
ca ca.crt cert server.crt key server.key # This file should be kept secret
To:
ca ca.crt cert spiffyrocks.crt key spiffyrocks.key # This file should be kept secret
From:
# (The OpenVPN server machine may need to NAT # or bridge the TUN/TAP interface to the internet # in order for this to work properly). ;push “redirect-gateway def1 bypass-dhcp”
To:
# (The OpenVPN server machine may need to NAT # or bridge the TUN/TAP interface to the internet # in order for this to work properly). push “redirect-gateway def1 bypass-dhcp”
From:
# The addresses below refer to the public # DNS servers provided by opendns.com. ;push “dhcp-option DNS 208.67.222.222” ;push “dhcp-option DNS 208.67.220.220”
To:
# The addresses below refer to the public # DNS servers provided by opendns.com. push “dhcp-option DNS 208.67.222.222” push “dhcp-option DNS 208.67.220.220”
Now once you have all of it done, Press Ctrl + O and Enter then press Ctrl + X We have to edit one more file on the virtual machine and then we should be pristine
nano /etc/rc.local
NOTE: PLEASE DO NOT COPY AND PASTE THE LINE CHANGE BELOW. TYPE IT OUT. Change the file according to below. From:
# By default this script does nothing. exit 0
To:
# By default this script does nothing. iptables -t nat -A POSTROUTING -s “10.8.0.0/24” -j MASQUERADE exit 0
We now need to generate keys so that you’re able to connect to your VPN Server. All we need to do is run the following commands in PuTTY.
cd /etc/openvpn/easy-rsa/ source vars ./build-key client1 cd keys/
Here comes the slightly tricky part. We need to get the generated certificates and keys out of the server. To do this, we will just use PuTTY and copy the certificates into a file. Run the following commands one by one to view the file and select the text with your mouse and it will be automatically copied.
nano ca.crt nano client1.crt nano client1.key
You don’t even have to right click to copy, It should look something like below when you have selected the text. Once that’s done, open up a blank text file in NotePad, paste it inside and save it with the proper extension respectively(.crt, .key) 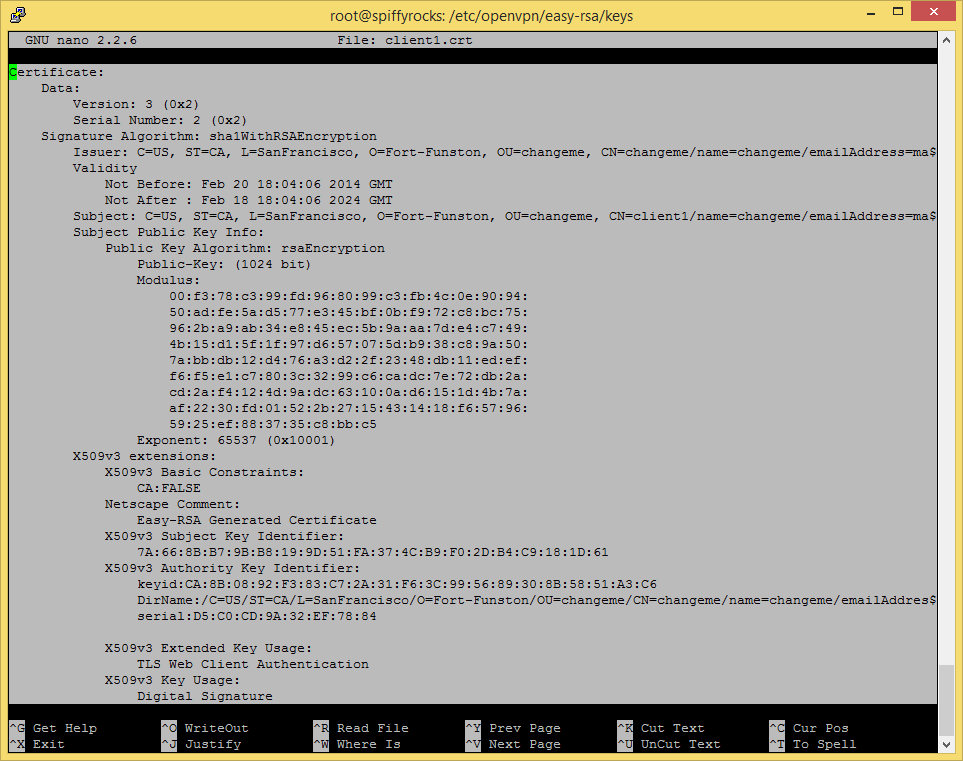 We will be needing to start the OpenVPN service and also reboot the virtual machine to make some of the changes take effect. Run the following commands:
service openvpn start reboot
I will be providing you with a simple client configuration file below which you will need to change the remote address which is currently ‘spiffyrocks.cloudapp.net’ and save it as client.ovpn on your computer. client.ovpn
client dev tun proto tcp remote spiffyrocks.cloudapp.net 1194 resolv-retry infinite nobind persist-key persist-tun ca ca.crt cert client1.crt key client1.key ns-cert-type server comp-lzo verb 3
After doing this, you should have 4 files which are ca.crt client1.crt client1.key client.ovpn *Note: I assume that you have installed the 64bit version of OpenVPN GUI. If you installed the 32bit version of OpenVPN GUI, you should copy the files into C:\Program Files (x86)\OpenVPN\config instead. Copy these files into C:\Program Files\OpenVPN\config and it should look like the folder below. 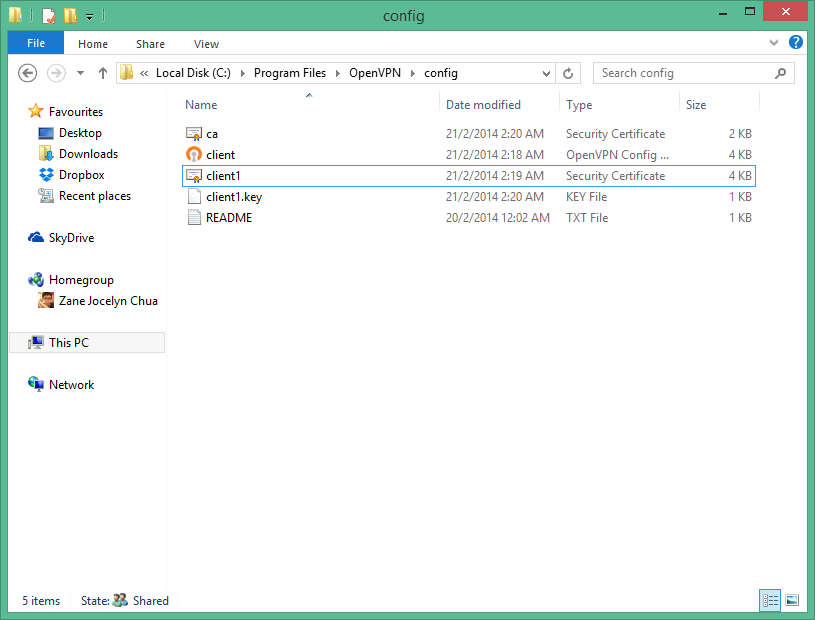 Time to fire up OpenVPN GUI and test it out against our new Azure hosted OpenVPN Server! Right Click and run the OpenVPN GUI as Administrator. OpenVPN should appear as a tray icon at the bottom right, right click it and press connect! You should get a similar window as below when it’s connecting
 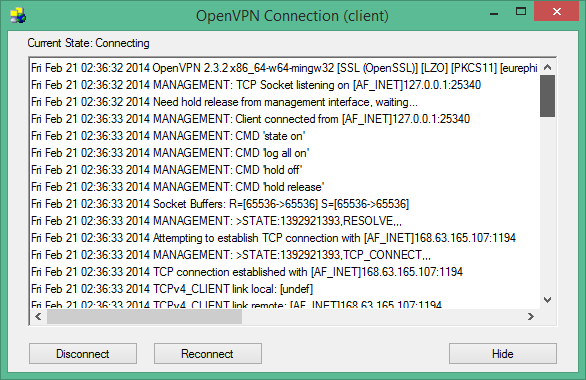 And if you followed all the steps correctly, you should see your vpn connected like below! Woohoo!
 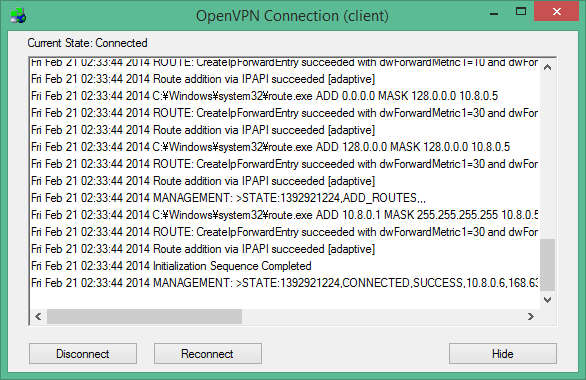 Now just a quick test to see if your IP Changed. It worked! My IP Changed and now it seems like my internet is from the US when I’m actually a few thousand miles away. Pat yourself on the back, you’ve just earned yourself a medal.
 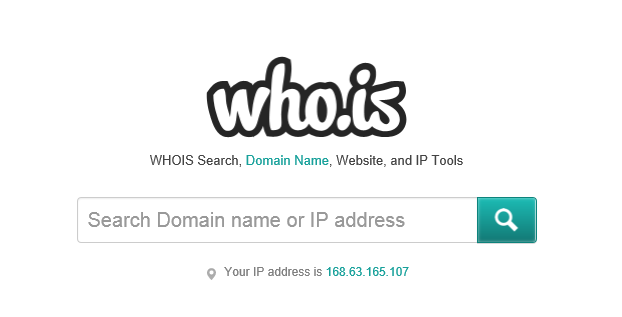 Extras: For students who just started Polytechnic and you realise that your school internet blocks certain sites you want to visit, you can also follow my guide. However, the only major change you need to make is that anywhere that i specify ‘1194’ you need to change it to ‘443’ and it should work.