 If you’re a student at a recognized educational institute (Primary, Secondary, Tertiary), you’re eligible for Microsoft DreamSpark where you can get free development tools and software. One of the benefits is Microsoft Azure - a cloud computing platform and infrastructure for building, deploying and managing applications and services through a global network of Microsoft-managed datacenters. In this article, I’ll be walking through the steps to create your very first blog in just a few minutes, using the free Microsoft Dreamspark offerings to students. You may then use your blog to write about your daily personal encounters, or share your awesome life’s stories with your friends and families. Before we begin, be sure to activate your free Microsoft Dreamspark and Azure account for students using these instructions.
1. Log in to your Azure account
Once you have created your Azure account, you may sign it to the Microsoft Azure portal via: http://manage.windowsazure.com, where you’ll be prompted to log in with your Microsoft Account. 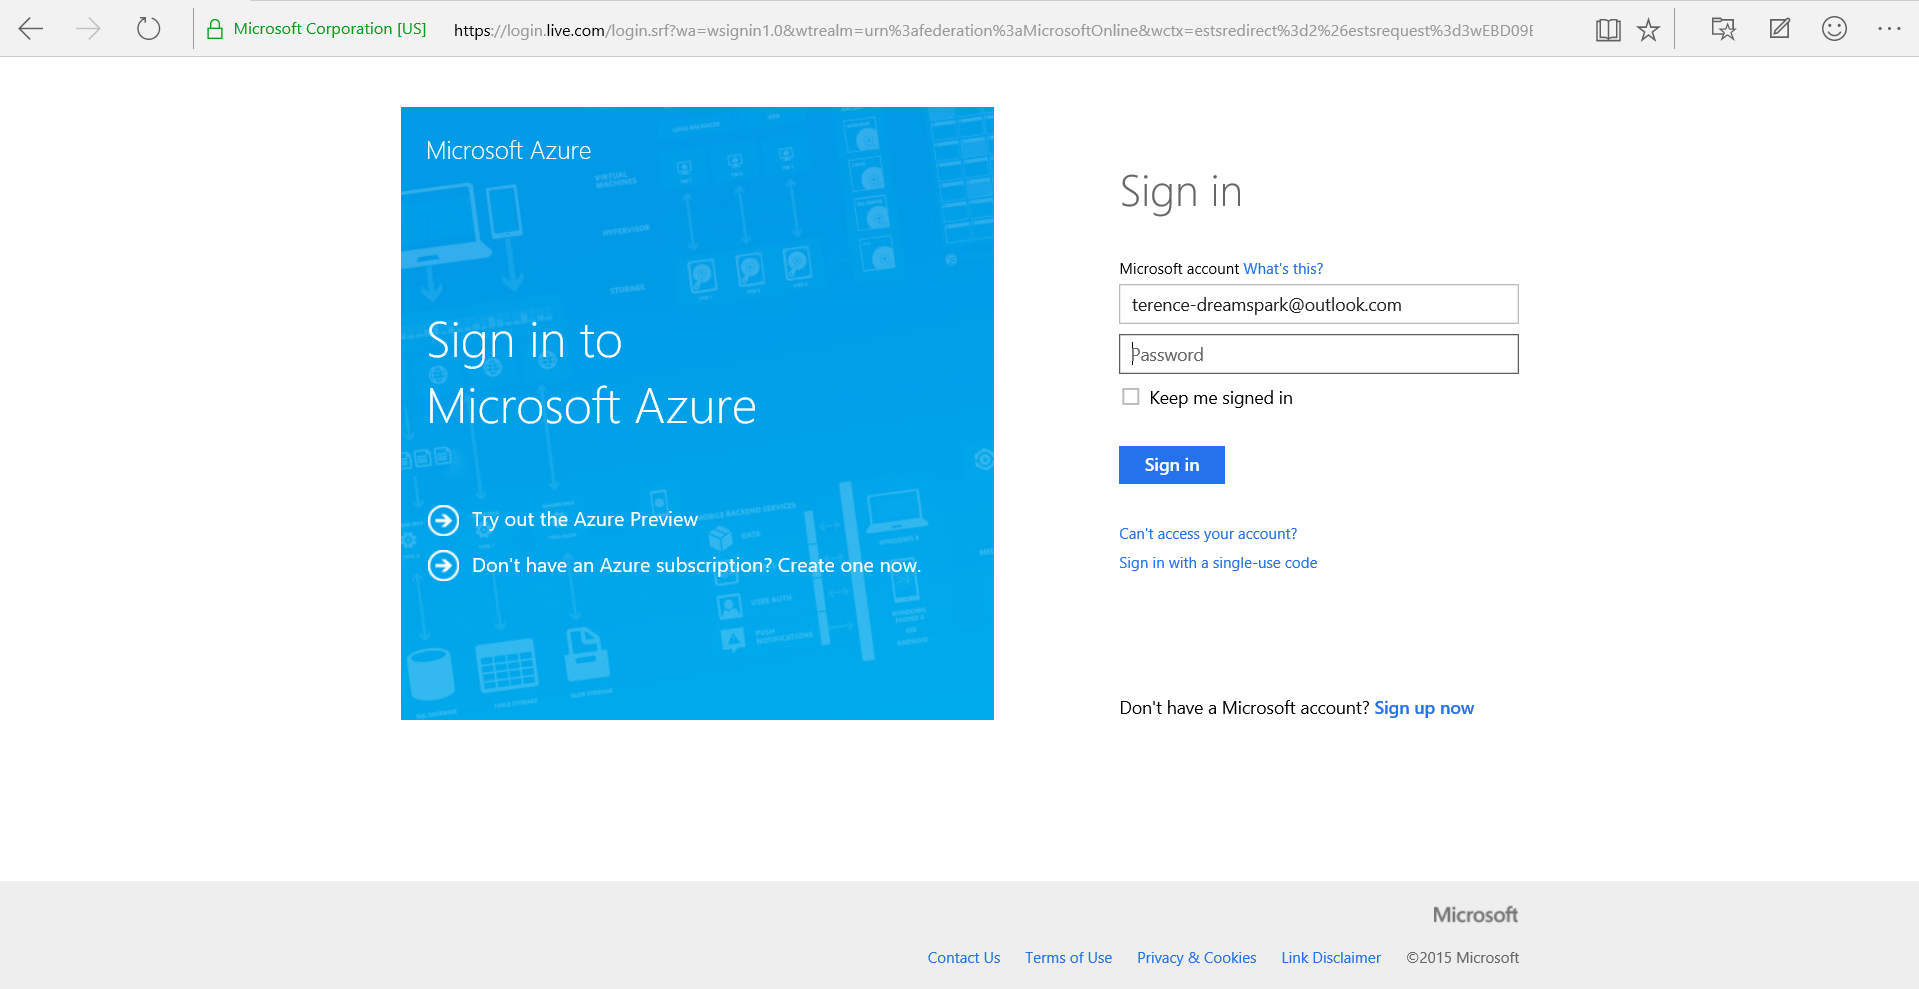
2. New Azure Preview Portal
Once you have successfully logged on, you will be redirected to the New Azure Preview Portal. Within this portal, you are able to manage all the services within Azure, which includes Azure App Service Web Apps, MySQL Database from ClearDB and Application Insights as part of the free Dreamspark Azure offerings. 
3. Creating a WordPress App in Azure
Within the Azure portal, here are the steps to create your WordPress app. a) Click on the New button at the top left hand corner. 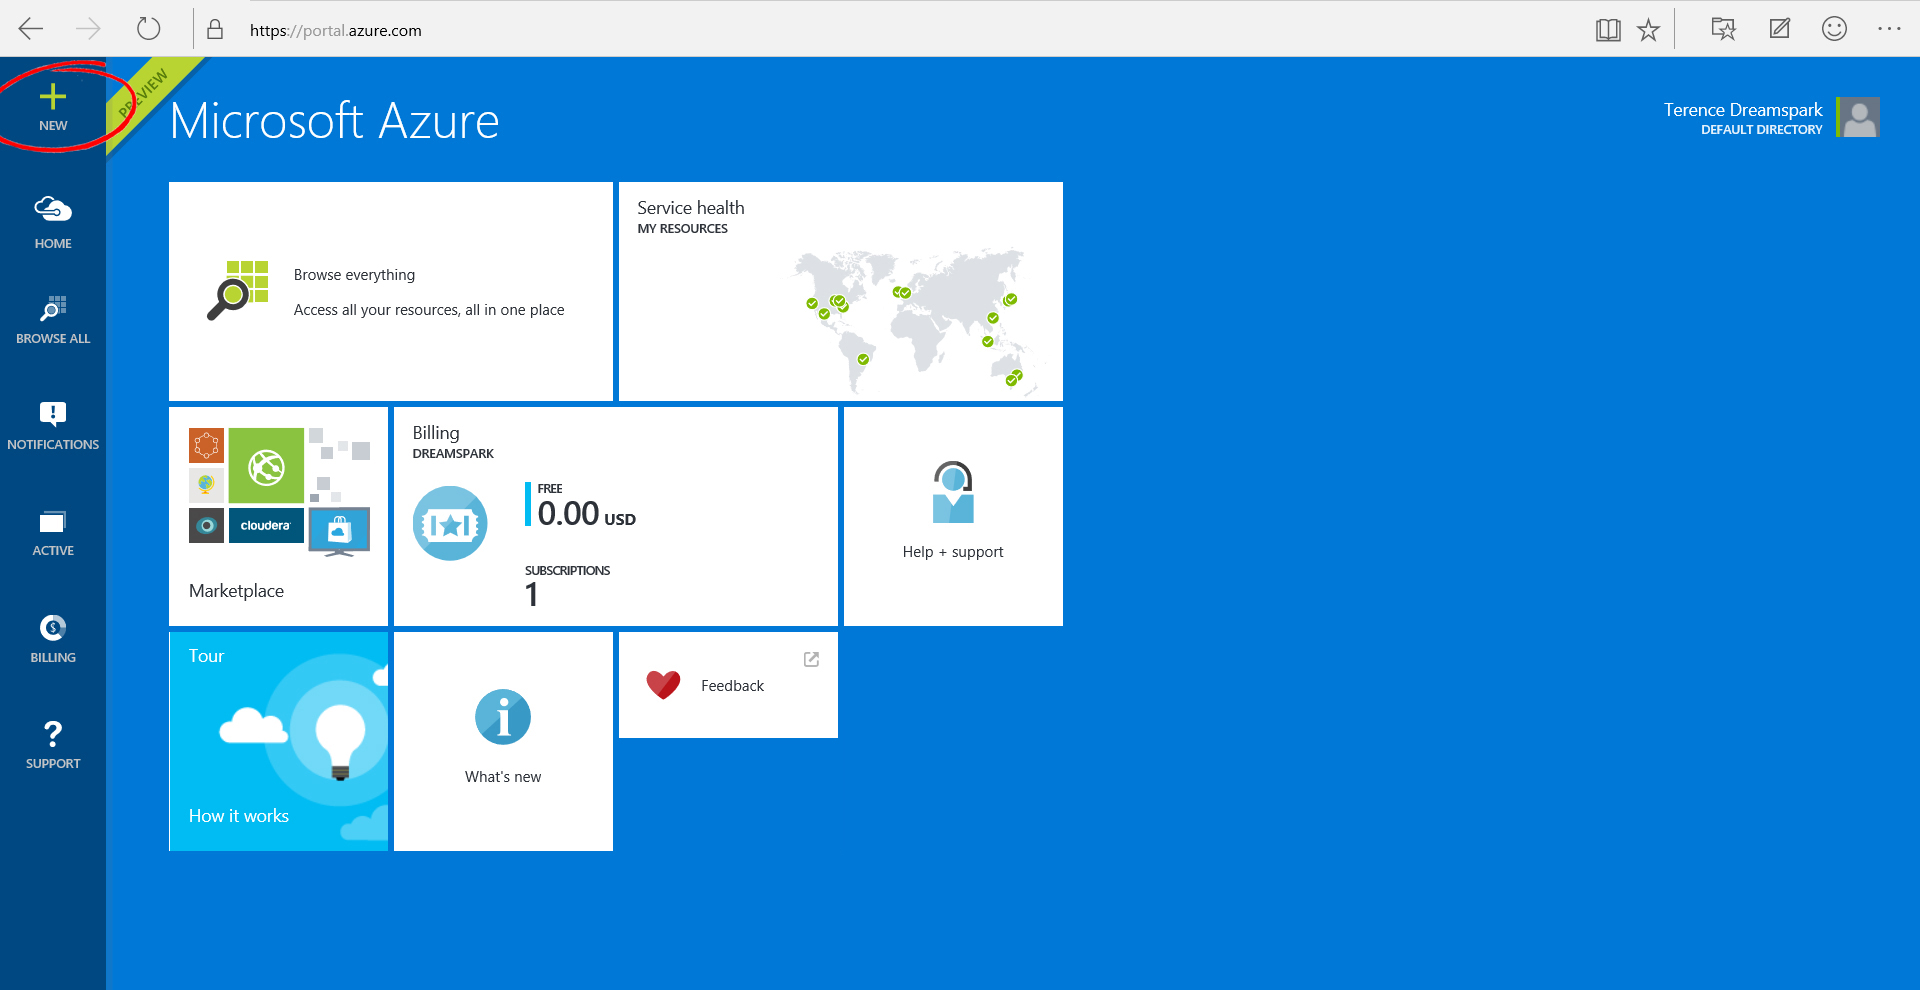 b) Open the Azure Marketplace by selecting Web + Mobile and then Marketplace.
 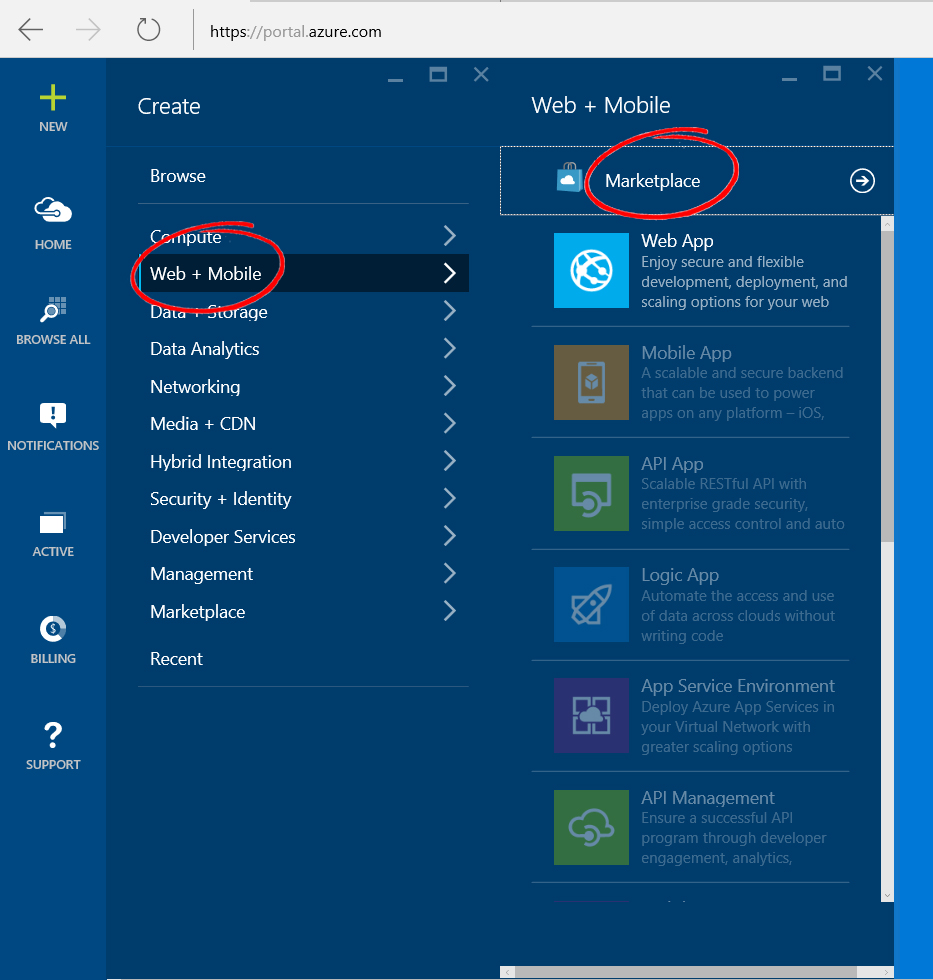 c) Select Web + Mobile. Search for WordPress and click the WordPress icon.
 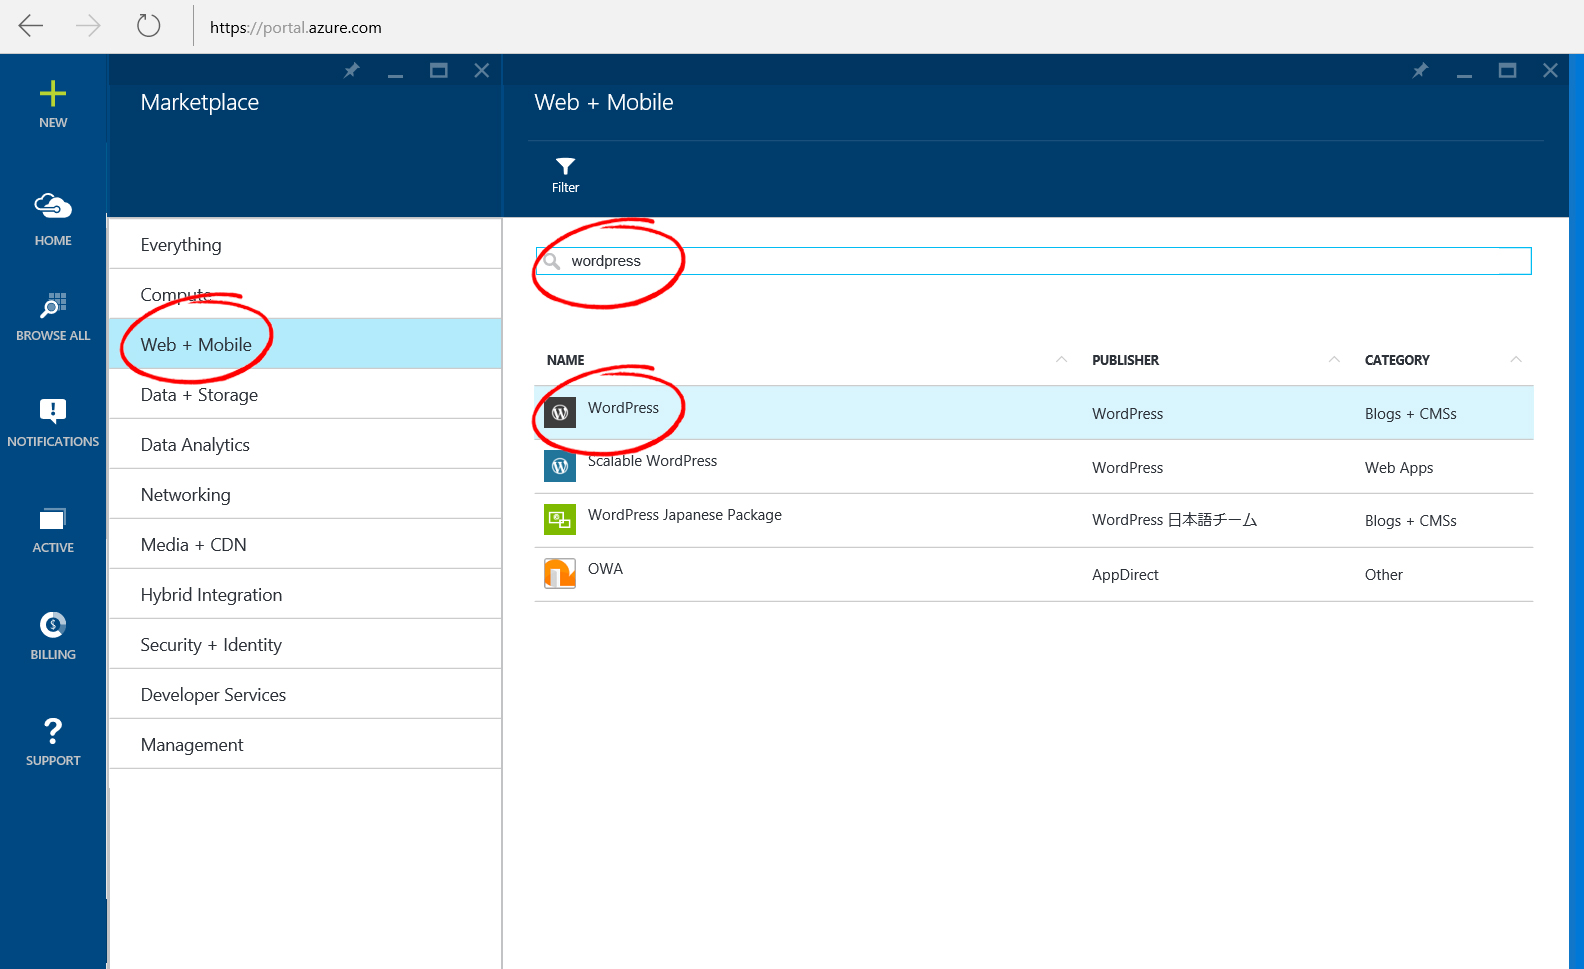 d) After reading the description of the WordPress app, select Create.
 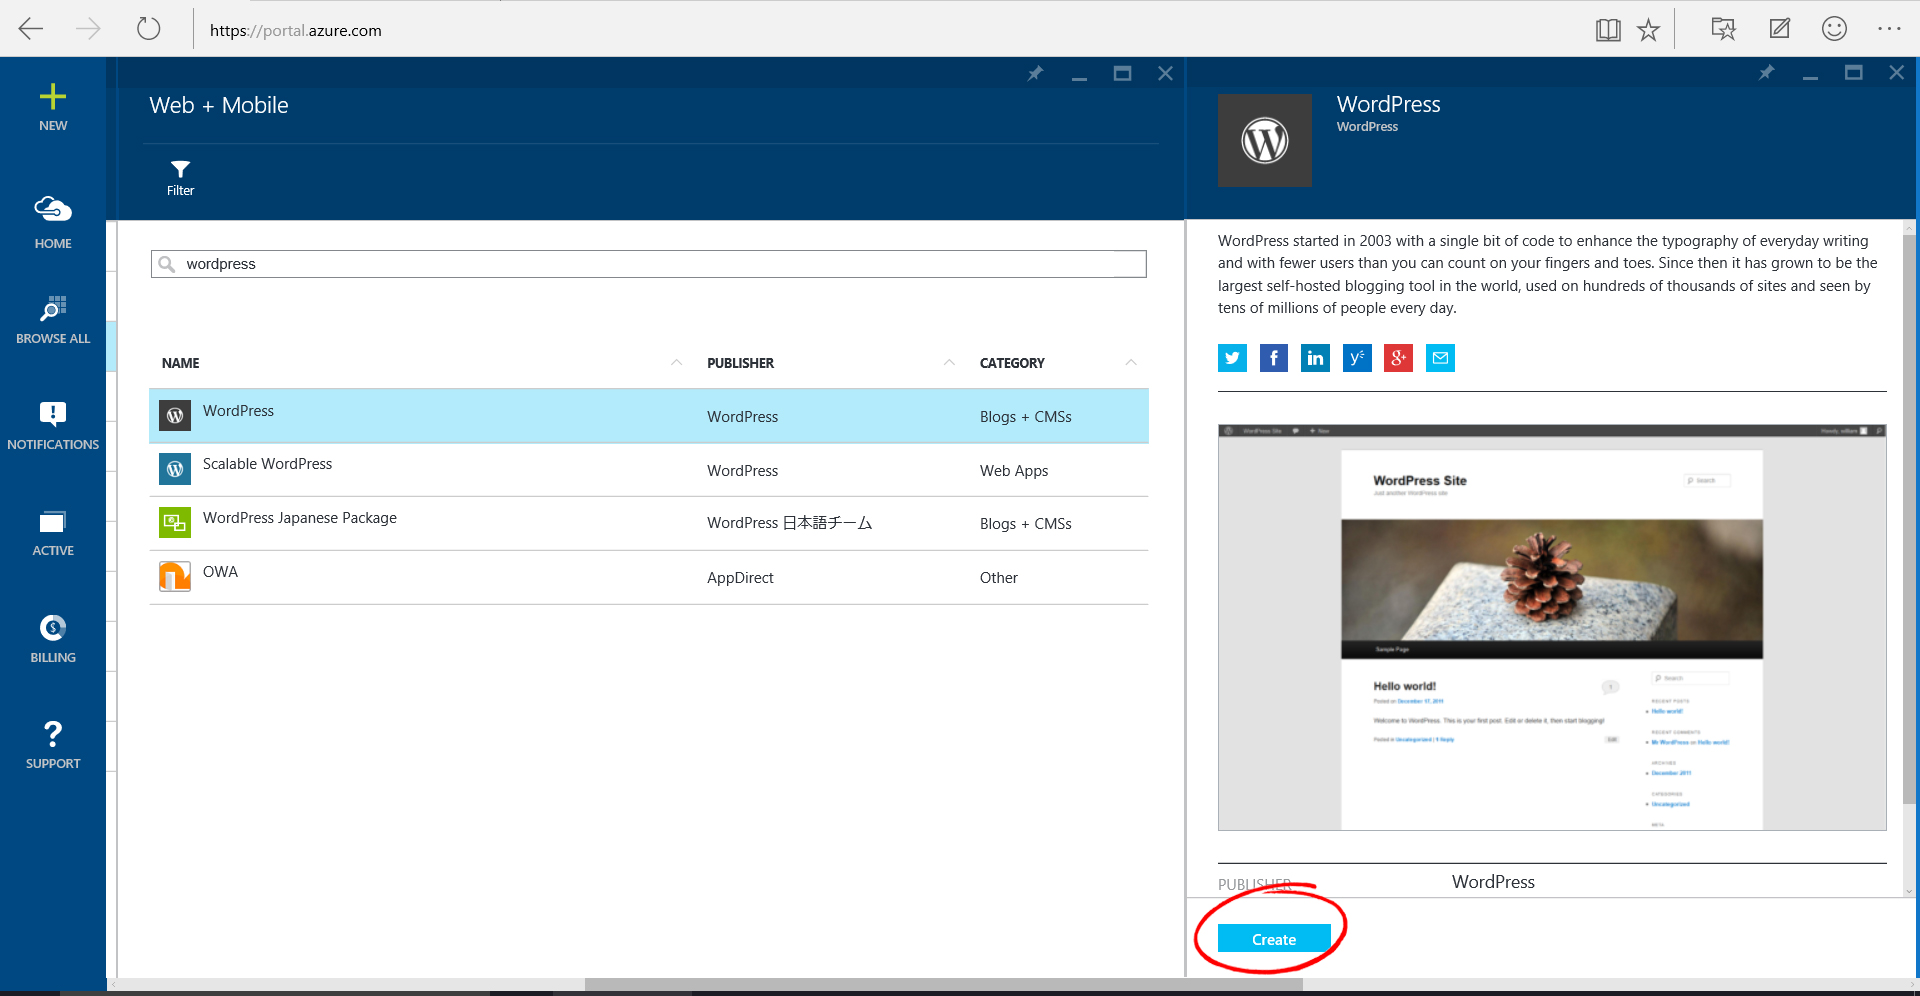 e) Click on Web App, and you will be asked to provide the required values for configuring your web app. The first field is the URL, which is a URL you would like to set up for others to access your WordPress blog. You have to choose a unique URL that is not used by others. Next, create a name for your App Service Plan. An App Service plan represents a set of features and capacity that you can share across multiple apps in Azure App Service. You may read more about App Service Plan here. Finally, for Location, select Southeast Asia, to host your WordPress application on a Singapore-based datacenter. Once this is done, click on OK.
 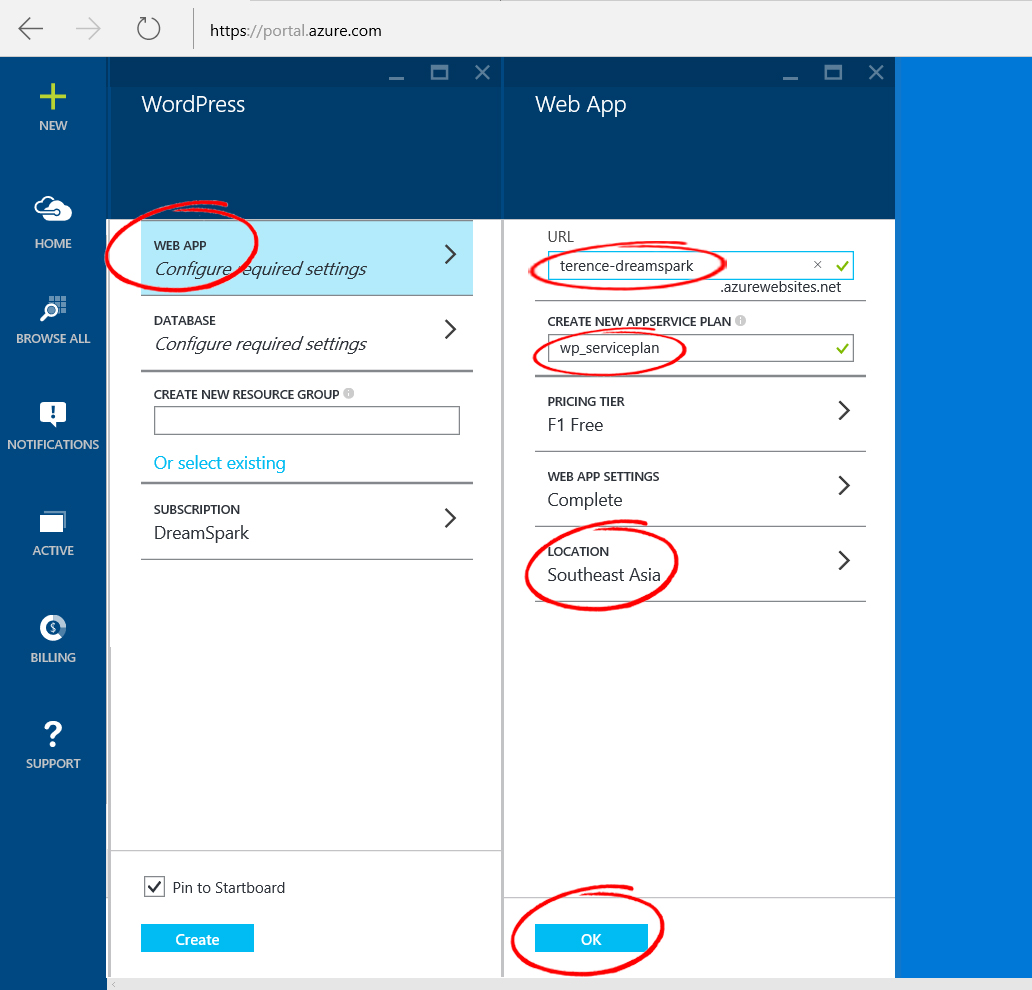 f) Click on Database, and you will be asked to provide the required values for configuring your MySQL Database, which is provided by ClearDB. You may leave the database name as the default value. Next, click on Legal Terms and then click OK to accept the MySQL Database ClearDB legal terms. You will not be charged for using the Mercury MySQL Pricing Tier, which comes with free 20MB every month. Once done, click on OK to confirm your database settings.
 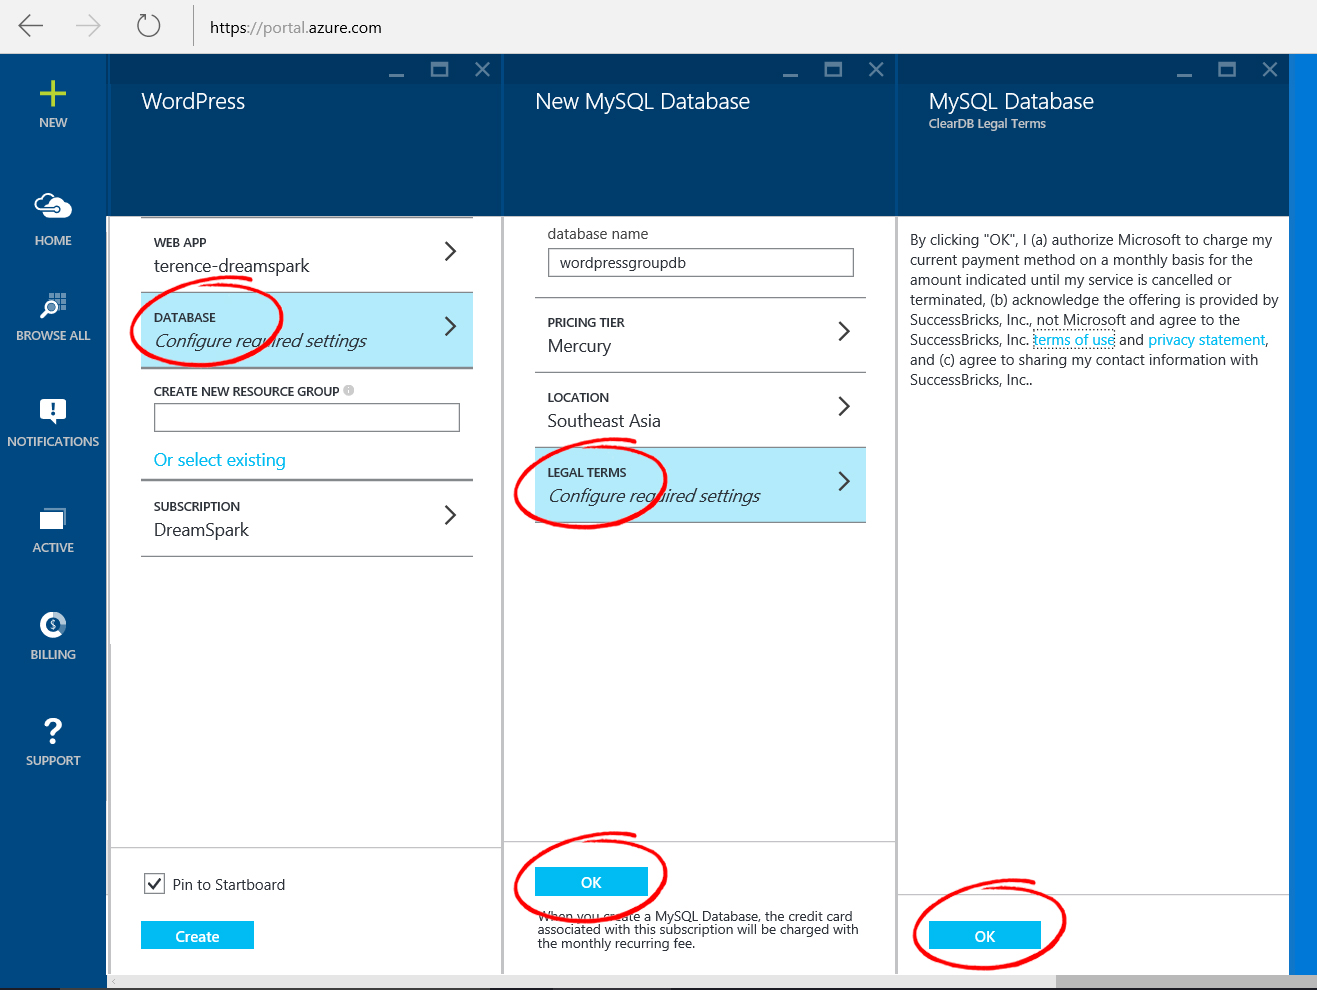 g) Next, you can create a resource group, which enables you to manage all your resources in an application together. In this case, the Web App + ClearDB database are created in this resource group. You may read more about resource groups here. Finally, once all these are done, click on Create to start creating your Web App.
  h) You will be presented back to the Azure portal dashboard. In the meantime, your WordPress Web App is being created (as you can see on the tile which says Creating WordPress), and you can check out the status using the Notifications button at the left hand side.
4. Setting up your WordPress
a) Once the creation is successful, you can go to the settings of your WordPress app by clicking on Browse All, followed by All resources. 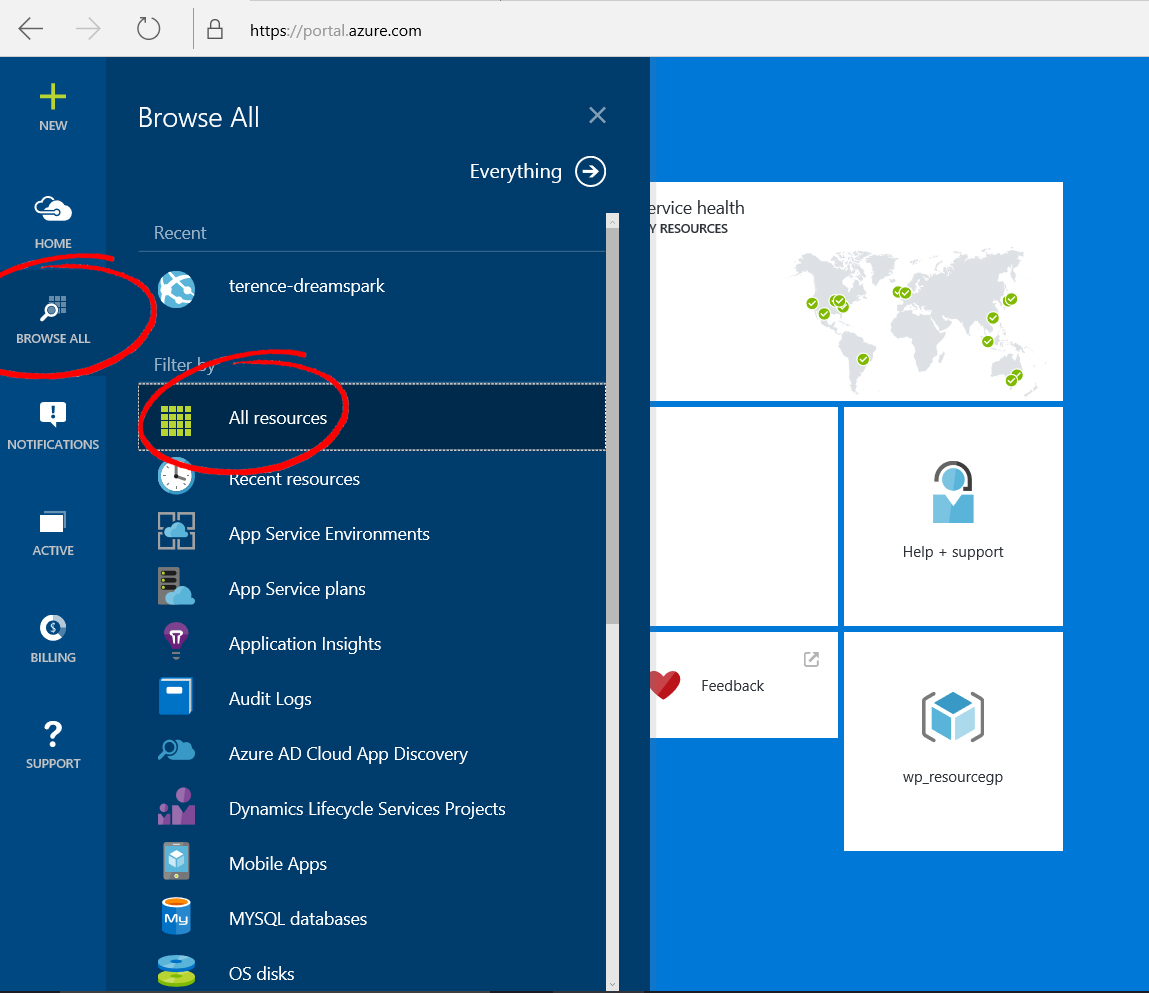 b) Click on your Web App, and you will be able to see all the details and settings for your WordPress Web App. Finally, click on Browse (or the link under URL) to open the WordPress web app’s welcome page.
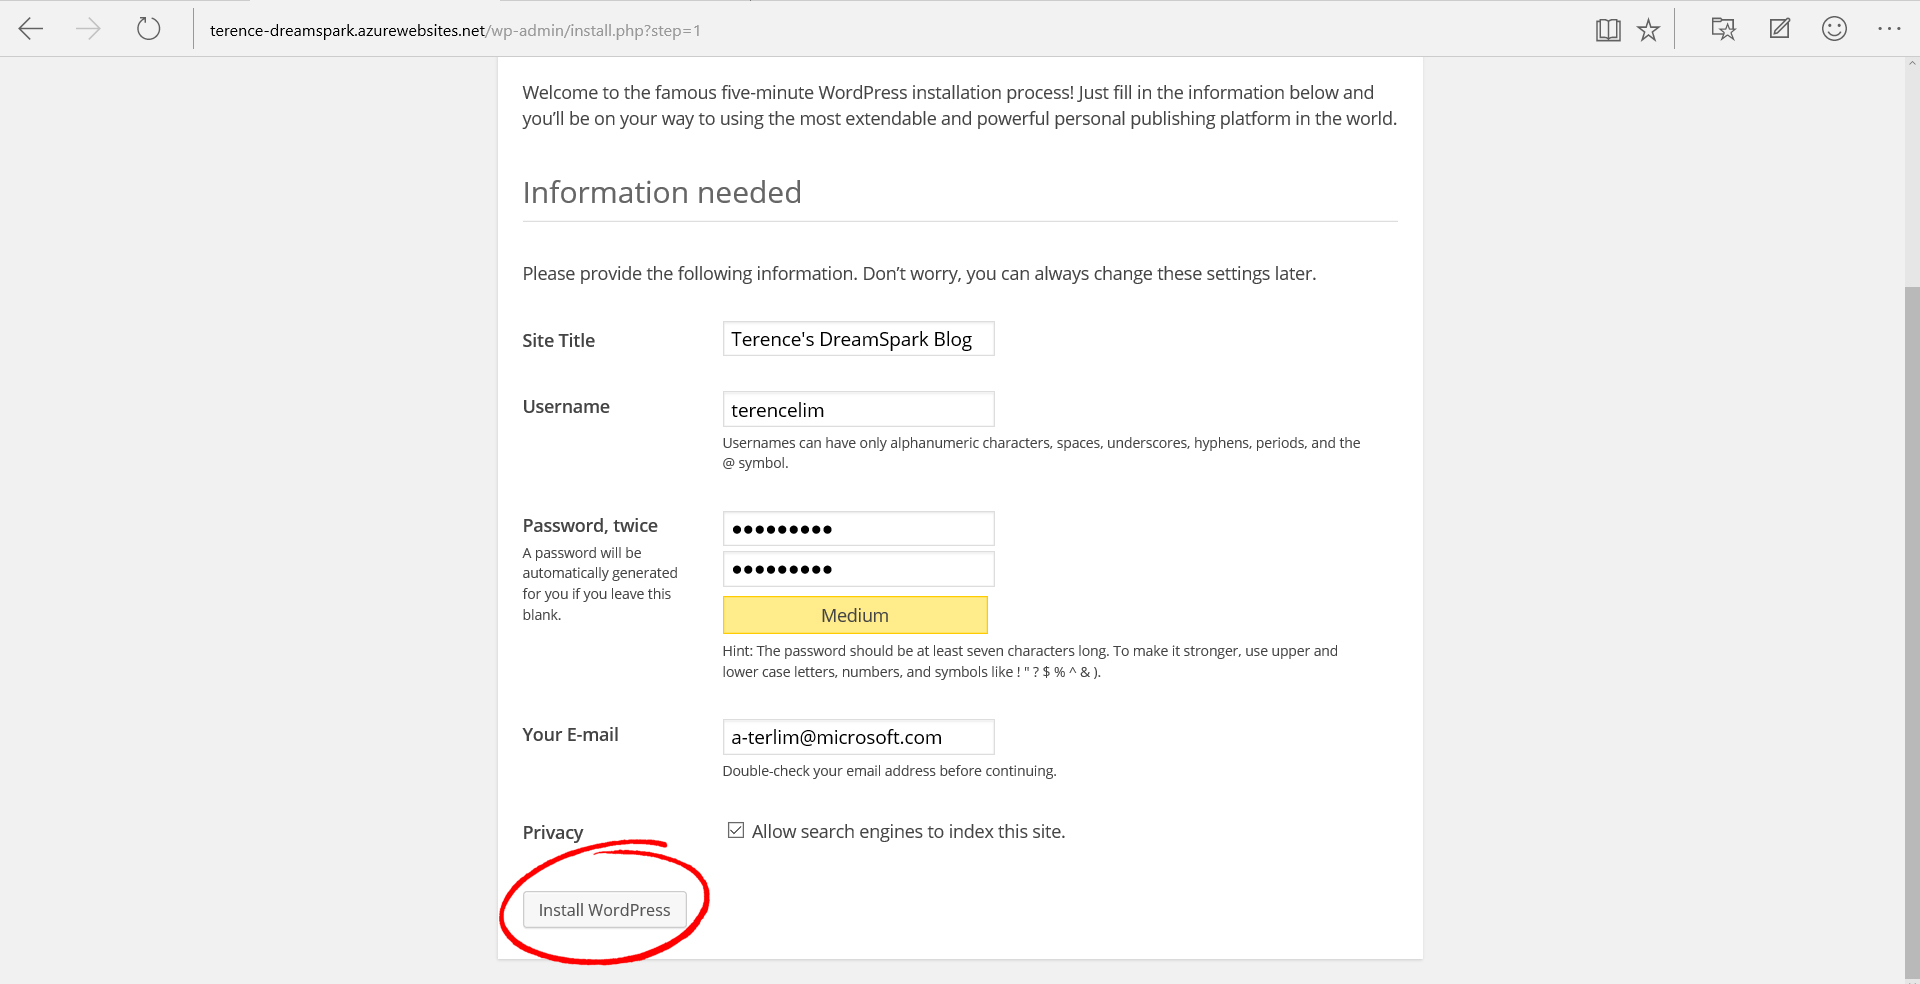
 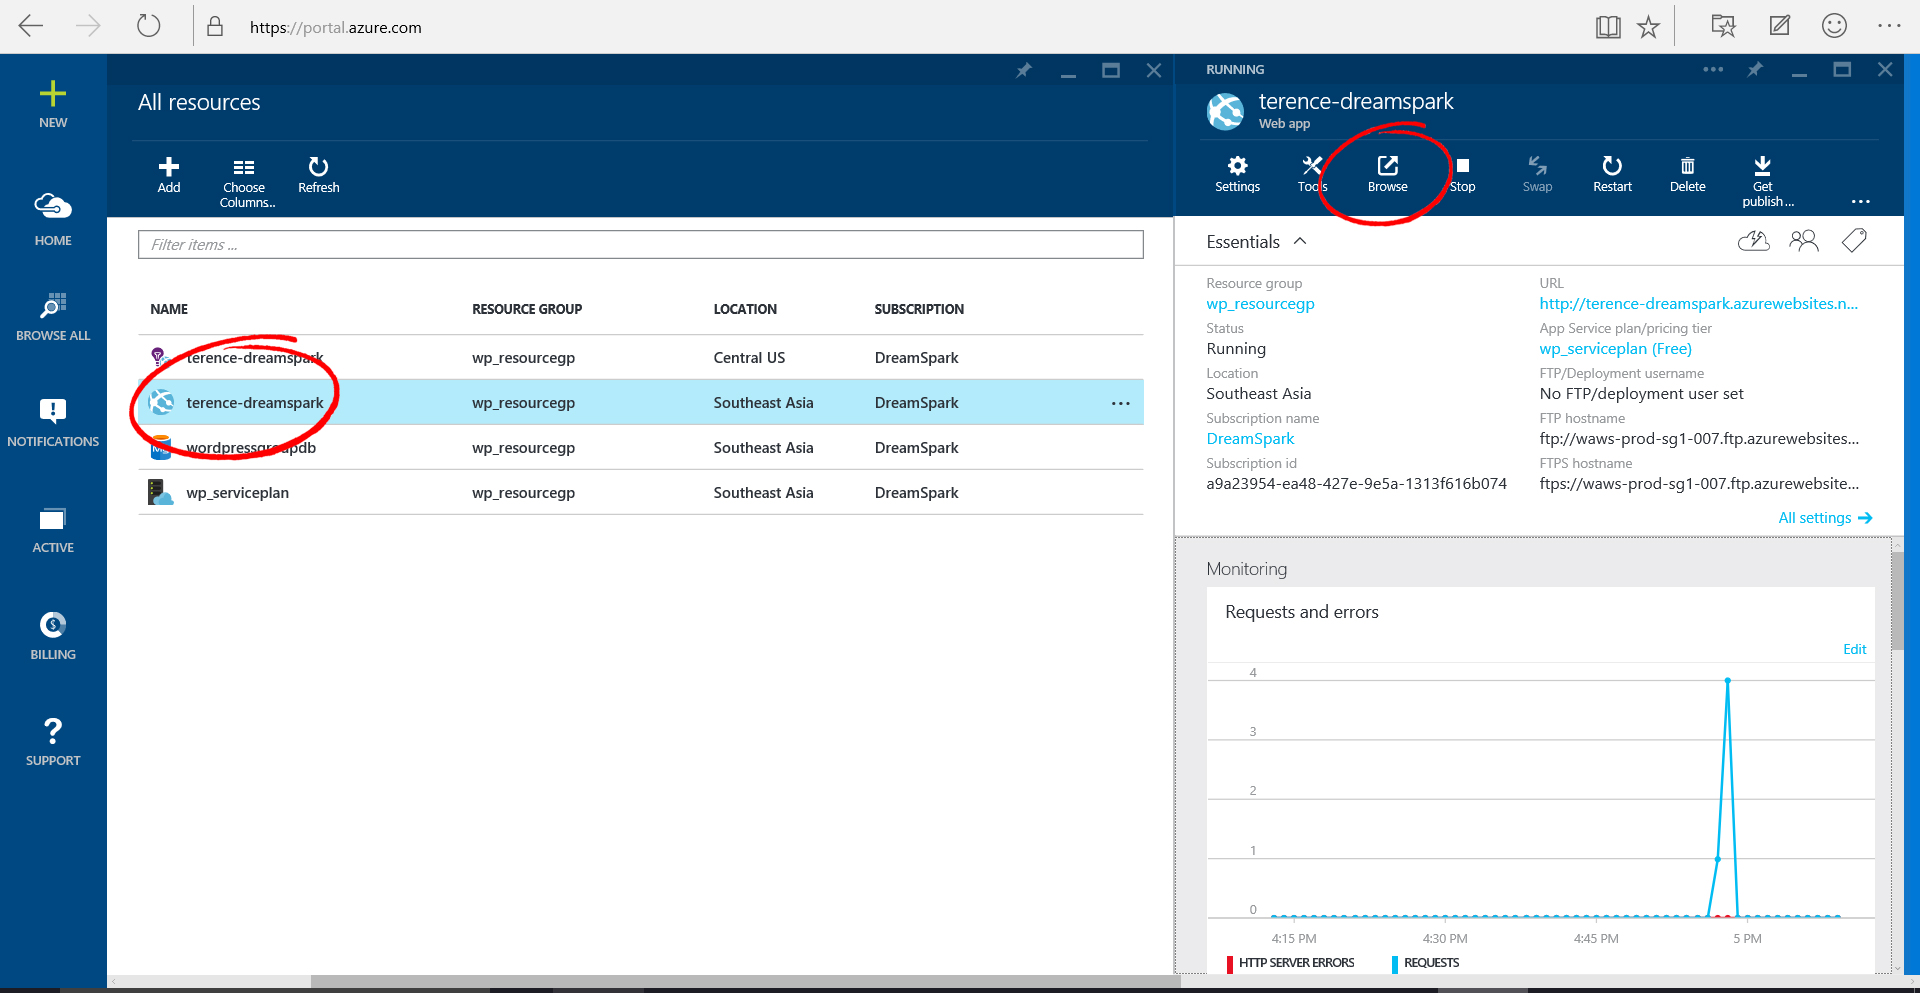 c) Within the WordPress settings page, select your desired language, followed by your Site Title, Username/Password to log on to the WordPress Admin panel, your email, and then click Install WordPress.
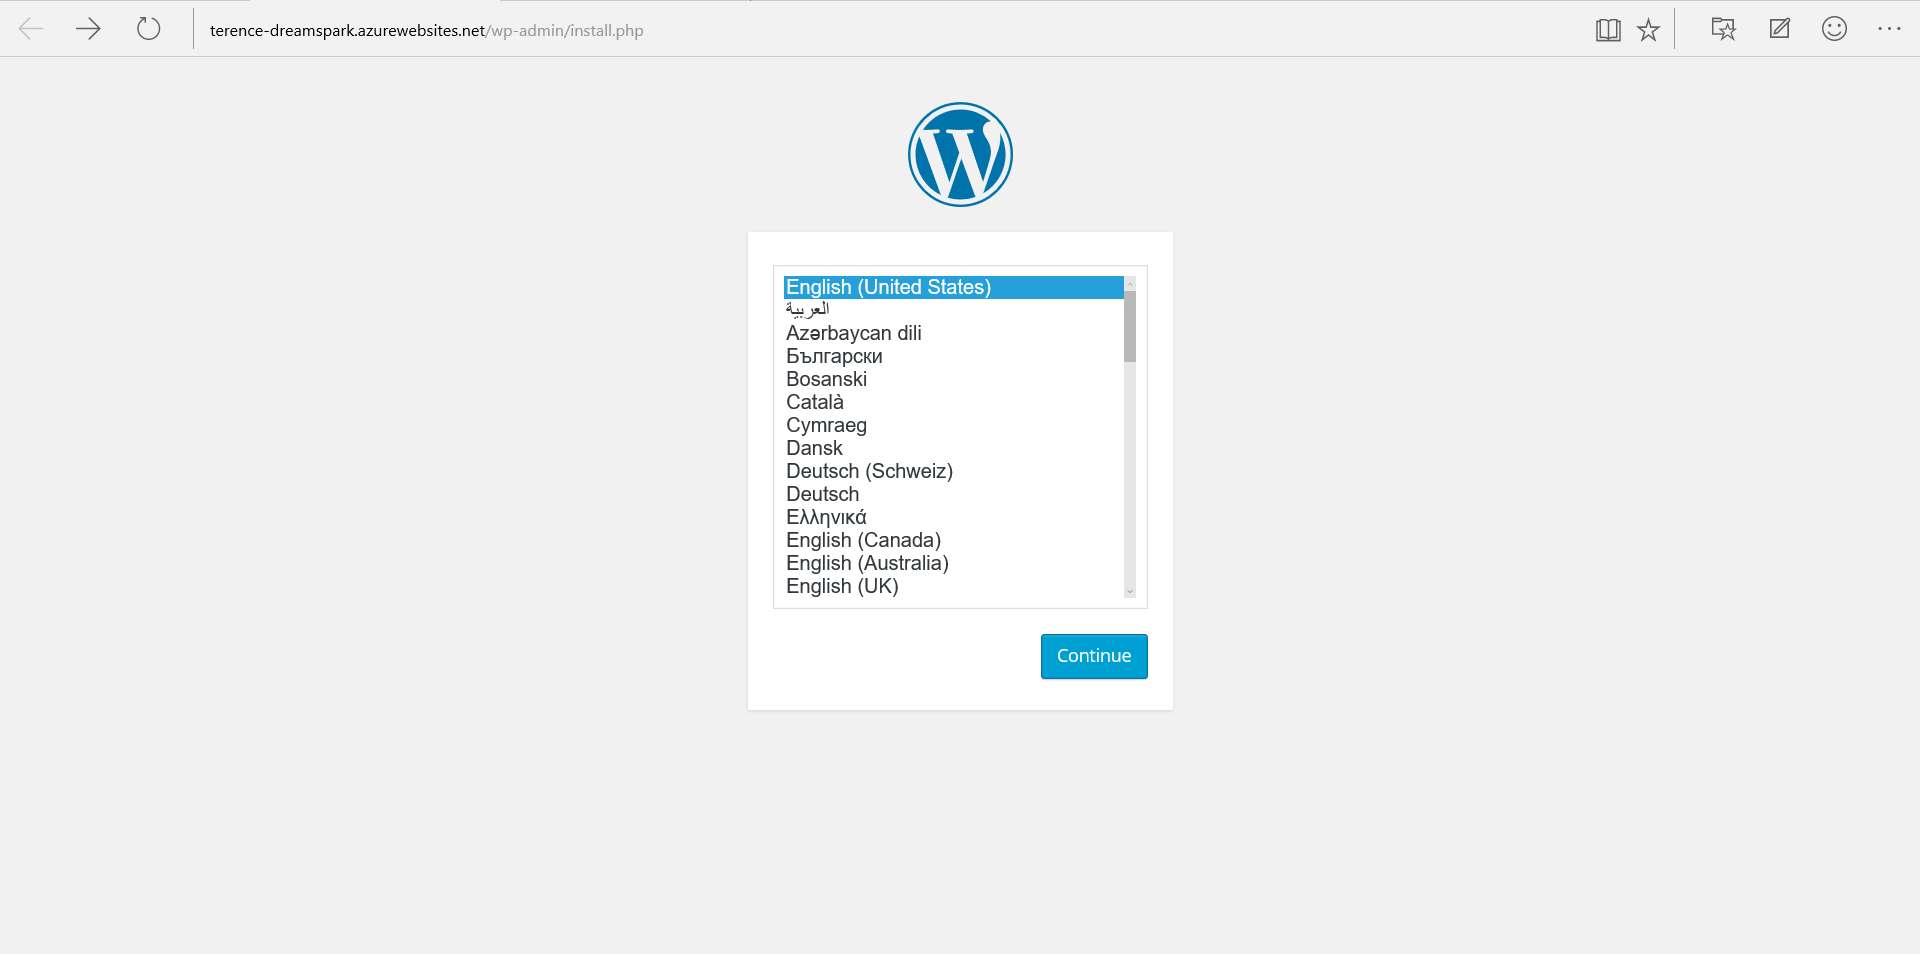
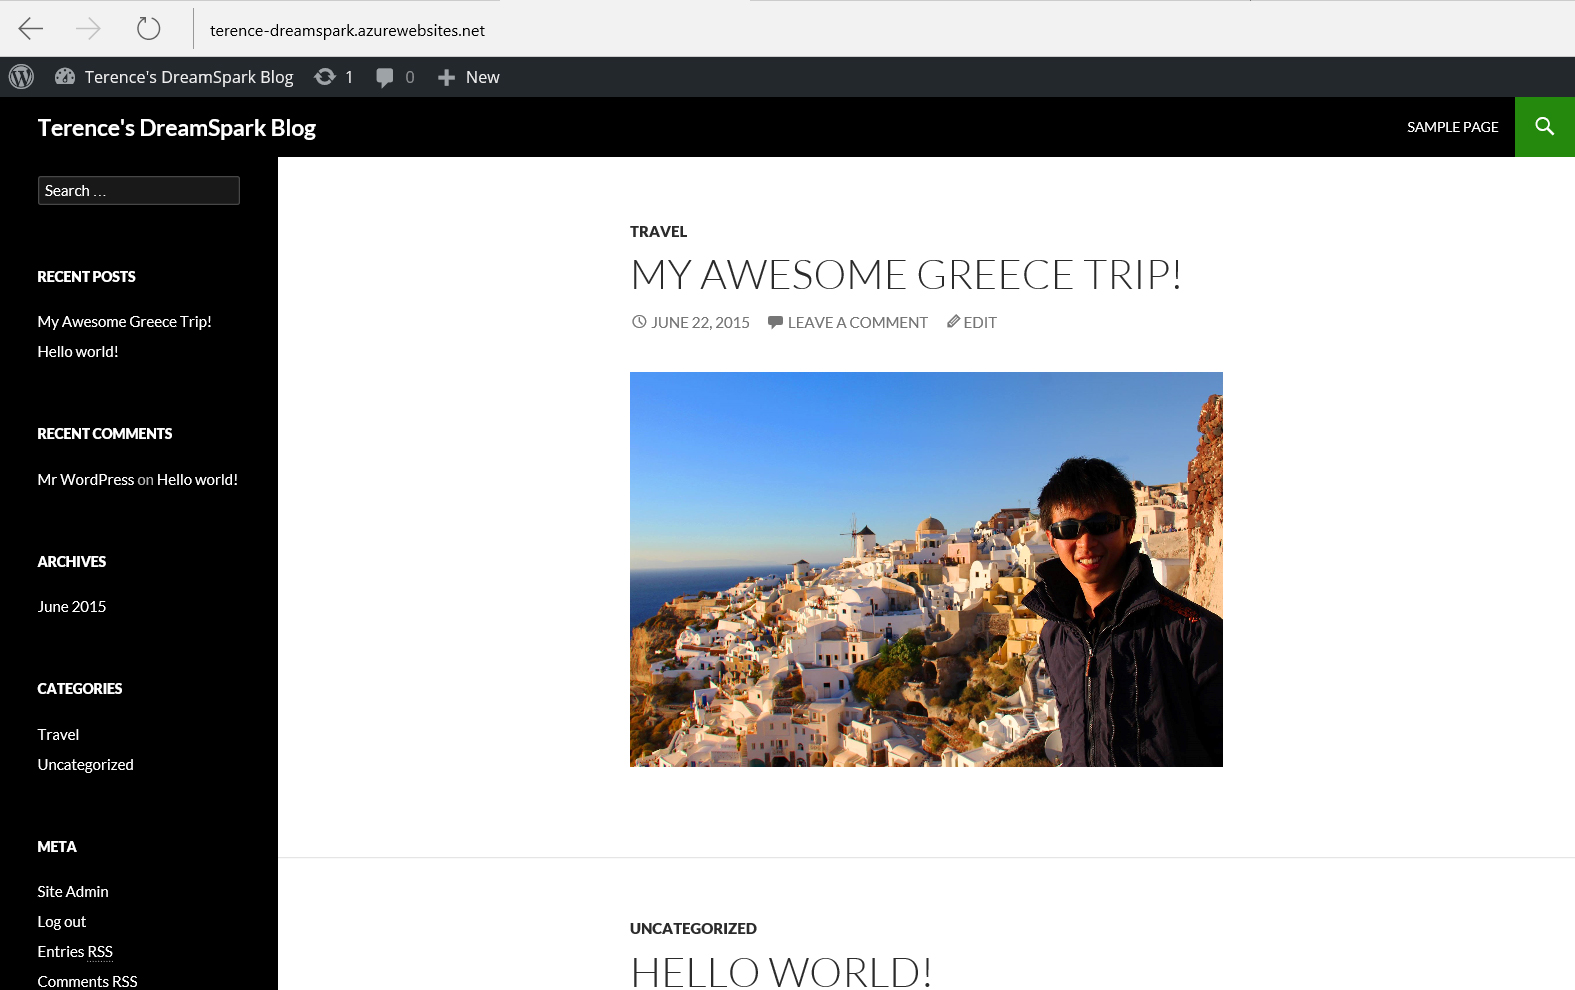
 d) Once that is done, you may either log into change your WordPress blog settings via (http://«your url>>.azurewebsites.net/wp-login.php) or visit your blog (http://«your url>>.azurewebsites.net) which is already live and ready for public viewing. your url is what you have set earlier in Section 3, step (e).